Modify Automation Flows #
1. Navigate to the Automation Flow Section #
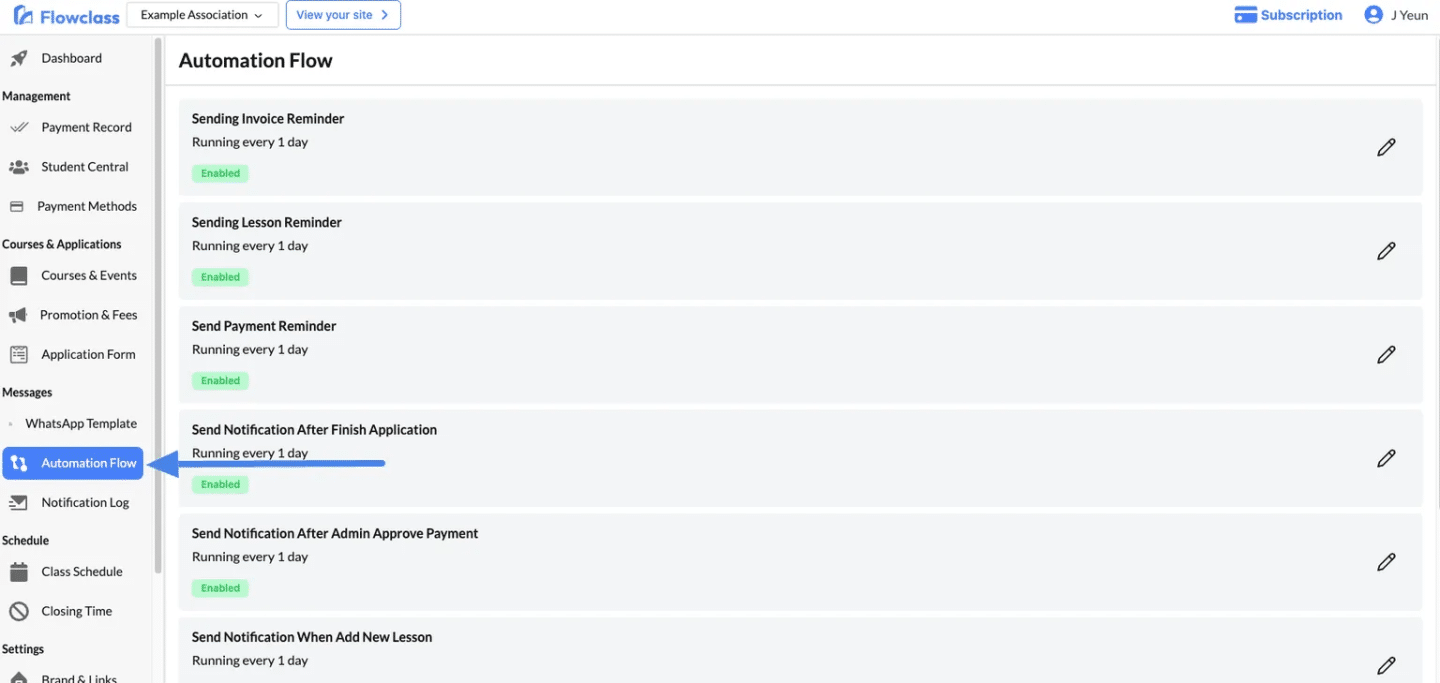
- From the left-hand menu, click on Automation Flow under the Messages section.
- You’ll see a list of pre-configured automation flows, including:
- Sending Invoice Reminders
- Lesson Reminders
- Payment Notifications
2. Edit an Automation Flow #
- Locate the flow you wish to modify.
- Click the pencil icon next to the corresponding flow to open the editor.
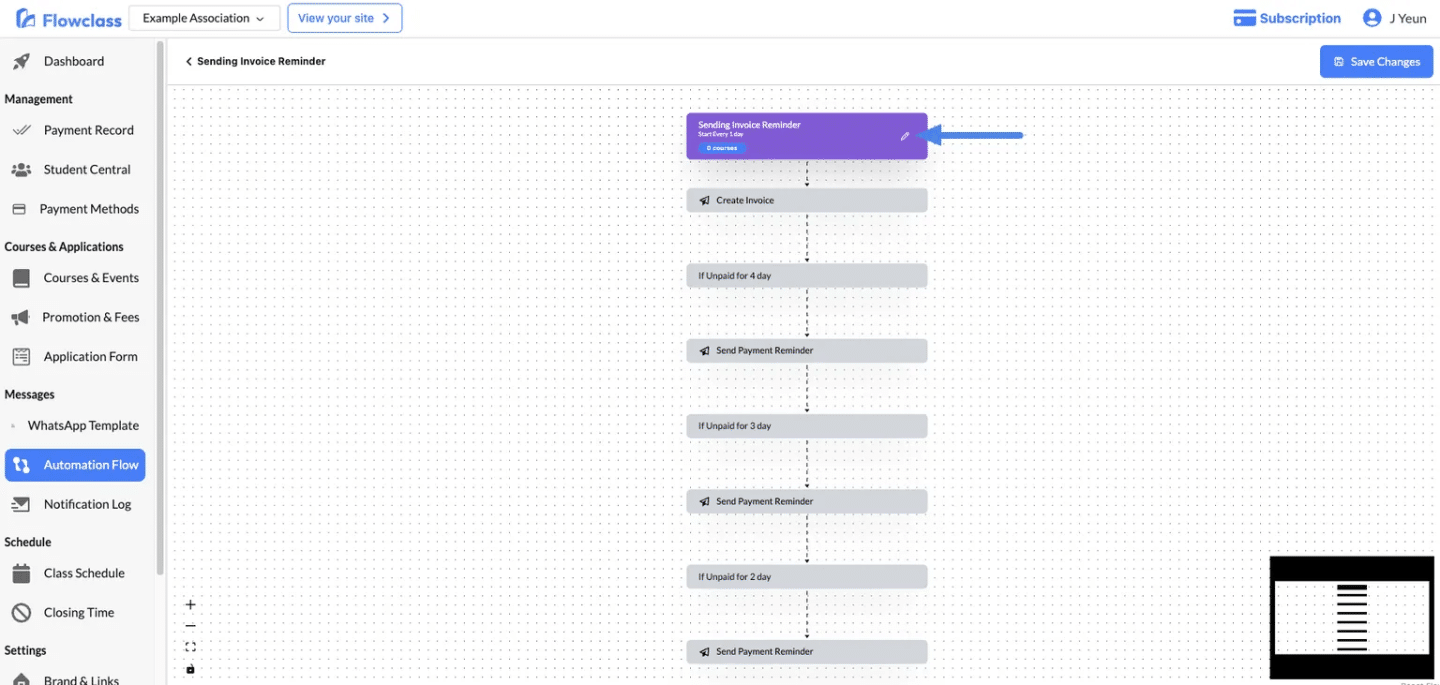
3. Edit the Flow Settings #
- At the top of the flow, click the pencil icon (🖉) on the purple block.
- Adjust Frequency: Change how often the flow should run (e.g., every 1 day).
- Assign Courses: Specify the courses this automation flow applies to.
- Example: Assign this flow to Course A and Course B for targeted reminders.
- Click Save to apply changes.
Modify Trigger Behaviour #
1. Activate or Deactivate the Flow #
- Use the toggle switch to enable or disable the flow:
- Active: The flow will run according to its schedule.
- Inactive: The flow will be paused and will not trigger any actions.
2. Set the Reminder Frequency #
- Period: Define the interval (e.g., “1”).
- Frequency Unit: Select the unit of time (e.g., “day(s)”, “week(s)”, or “month(s)”).
- Example: Setting “1 day(s)” ensures the flow runs every day.
- Adjust the period to fit your specific needs (e.g., weekly reminders for invoices).
3. Assign Courses to the Flow #
- Use the Select Courses dropdown to specify the courses this flow applies to.
- Assigning specific courses ensures only relevant students or users receive the reminders.
- Leave this field empty to apply the flow to all courses.
Tip: If you’re running the flow for a limited set of users, assign the appropriate course to avoid unnecessary notifications.
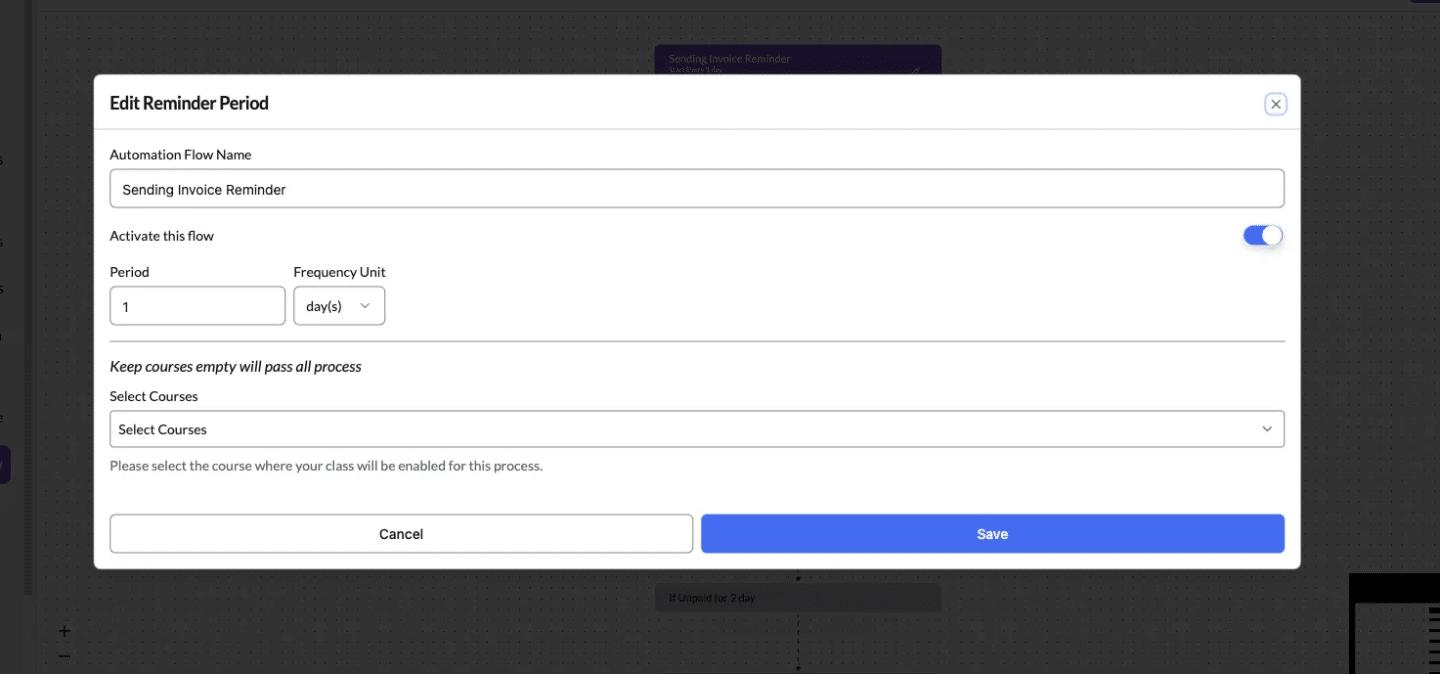
4. Save Changes #
- After making the necessary adjustments, click Save to apply the changes to the automation flow.
- The system will immediately update the flow to reflect your new settings.
Modify Message Steps #
1. Open the Automation Flow #
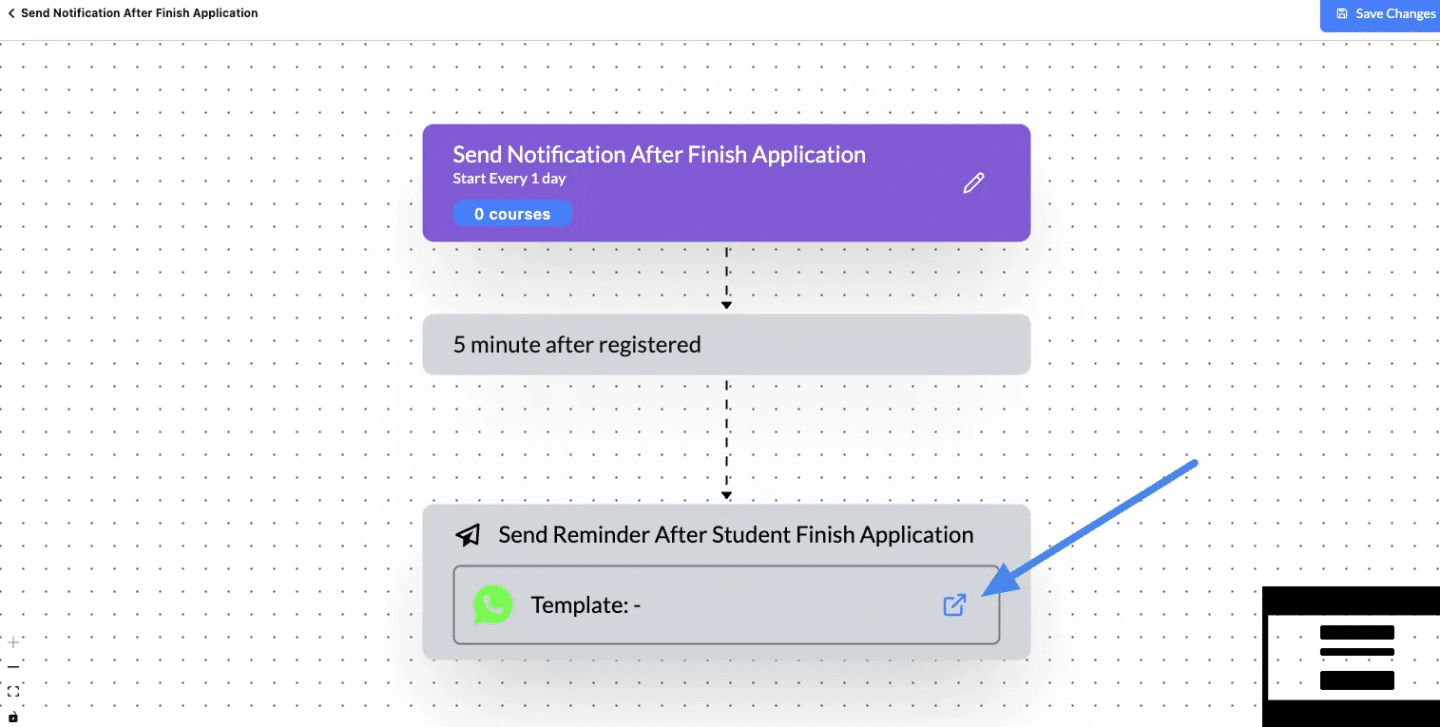
- From the Automation Flow section, select the flow you want to customize (e.g., Send Notification After Finish Application).
- The workflow editor will display the steps for this flow (e.g., a notification sent 5 minutes after a user completes an application).
2. Locate the Notification Step #
- Scroll through the flow to find the notification step where the template needs to be assigned (e.g., Send Reminder After Student Finish Application).
- Click the edit icon (🔗) next to the Template field.
3. Assign a WhatsApp Template #
- In the Edit Message pop-up, you will see a dropdown menu labeled Assign WhatsApp Template.
- Select the appropriate WhatsApp template for this notification.
- Note: Only templates categorized under the specific type (e.g., “Send Notification After Finish Application”) will appear in the dropdown.
Example: If you’re reminding students about their application, select a template like:
“Hello {{name}}, thank you for submitting your application! We’ll review it and get back to you soon.”

4. Test the Flow #
- To ensure everything works as expected:
- Trigger the flow manually (if possible) or wait for it to run on its schedule.
- Check the Notification Log to confirm the message is sent using the assigned WhatsApp template.
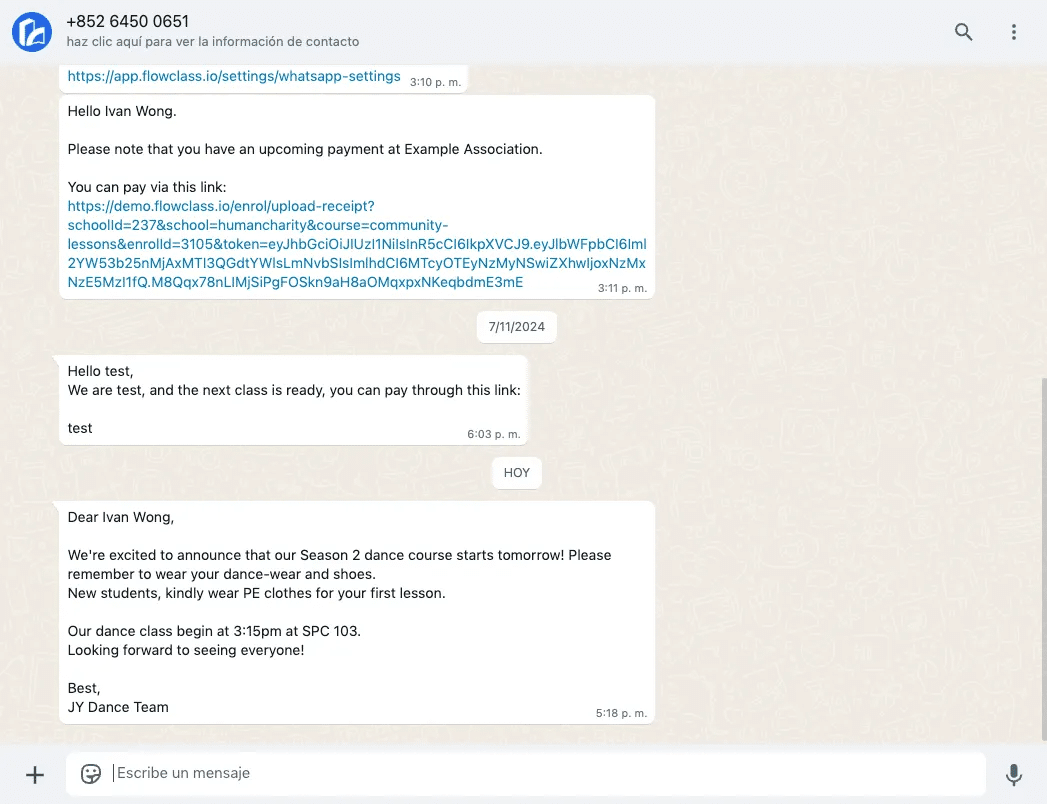
This is the final result – Customized messages sent to every student.