⚠️ Note:
- Only Parent Accounts can have points or a balance.
- Student accounts cannot directly top up or view their points balance.
- The system will automatically link points to all students under that parent, based on family group settings.
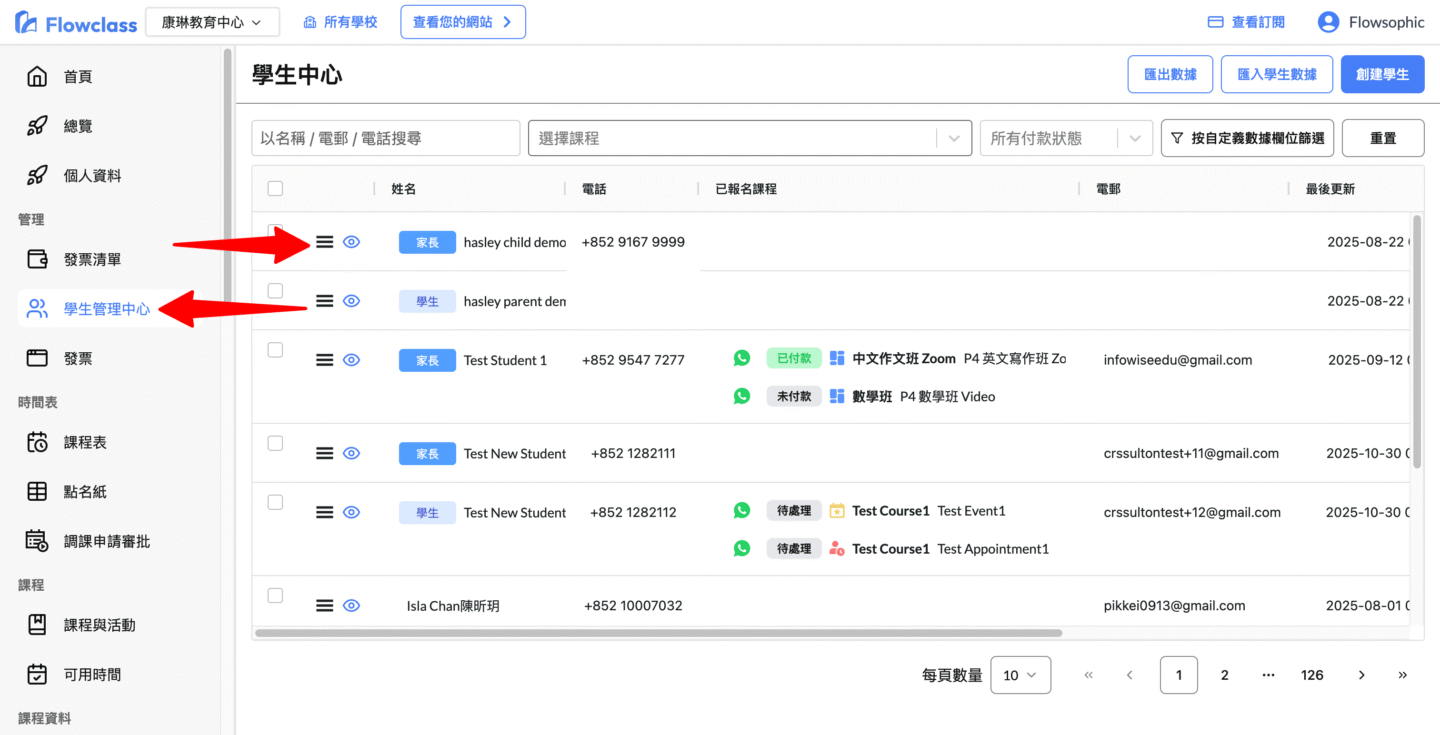
📍 I. Access the Student Management Center #
- Log in to the Flowclass backend.
- In the left-hand menu, click “Student Management Center”.
(As shown by the red arrow in the image below) - Use the search bar to enter a parent’s or student’s name or phone number to find the corresponding family group.
- Confirm that the parent account is labeled “Parent” on the right (e.g.,
hasley parent demo).
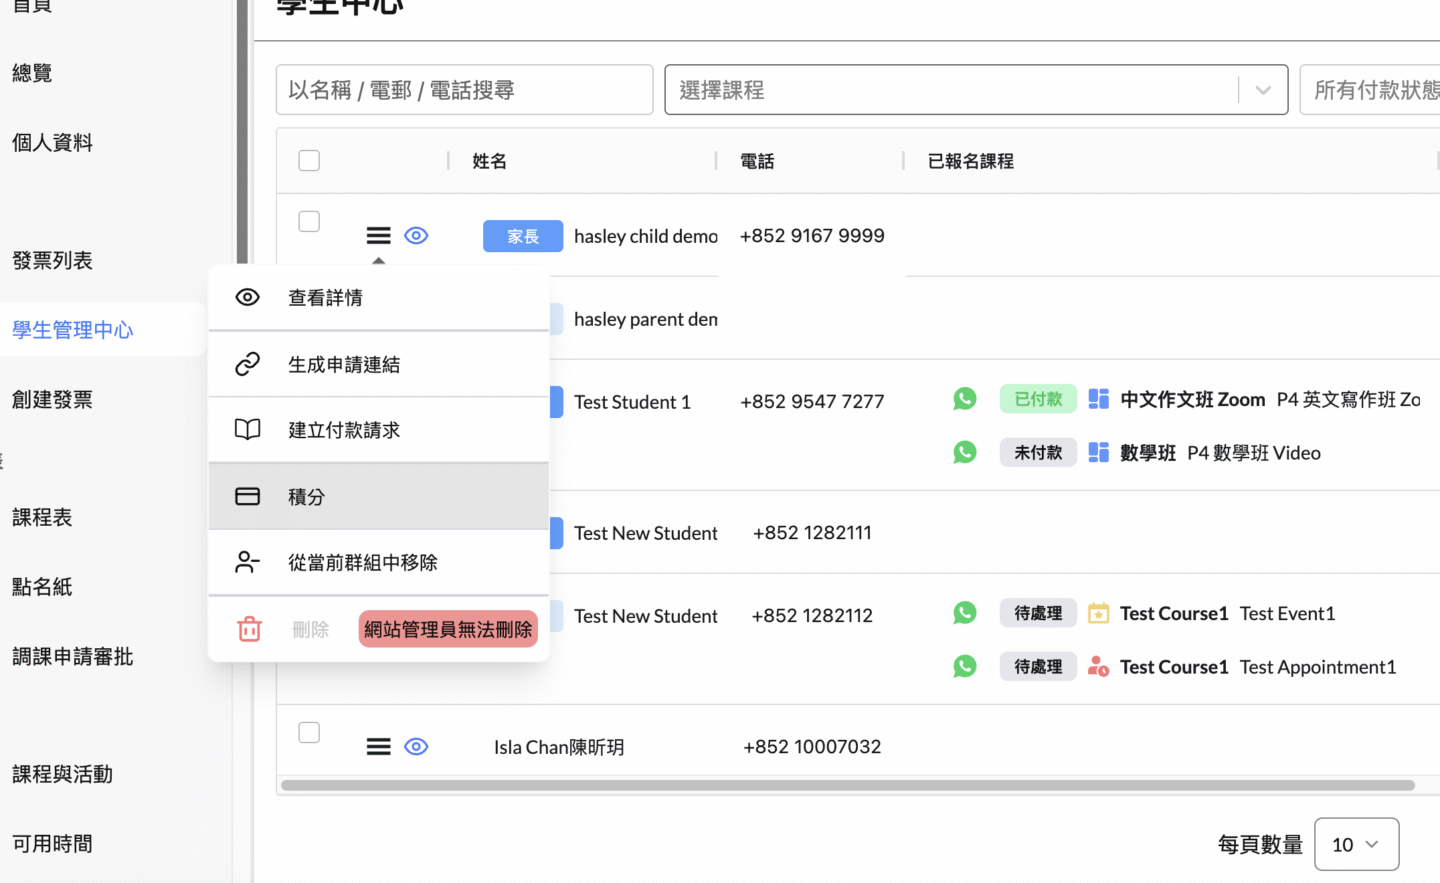
📍 II. Open the Points Management Window #
- On the right side of the parent account row, click the “⋮” button.
- From the dropdown menu, select “Points”.
(As shown in the image below)
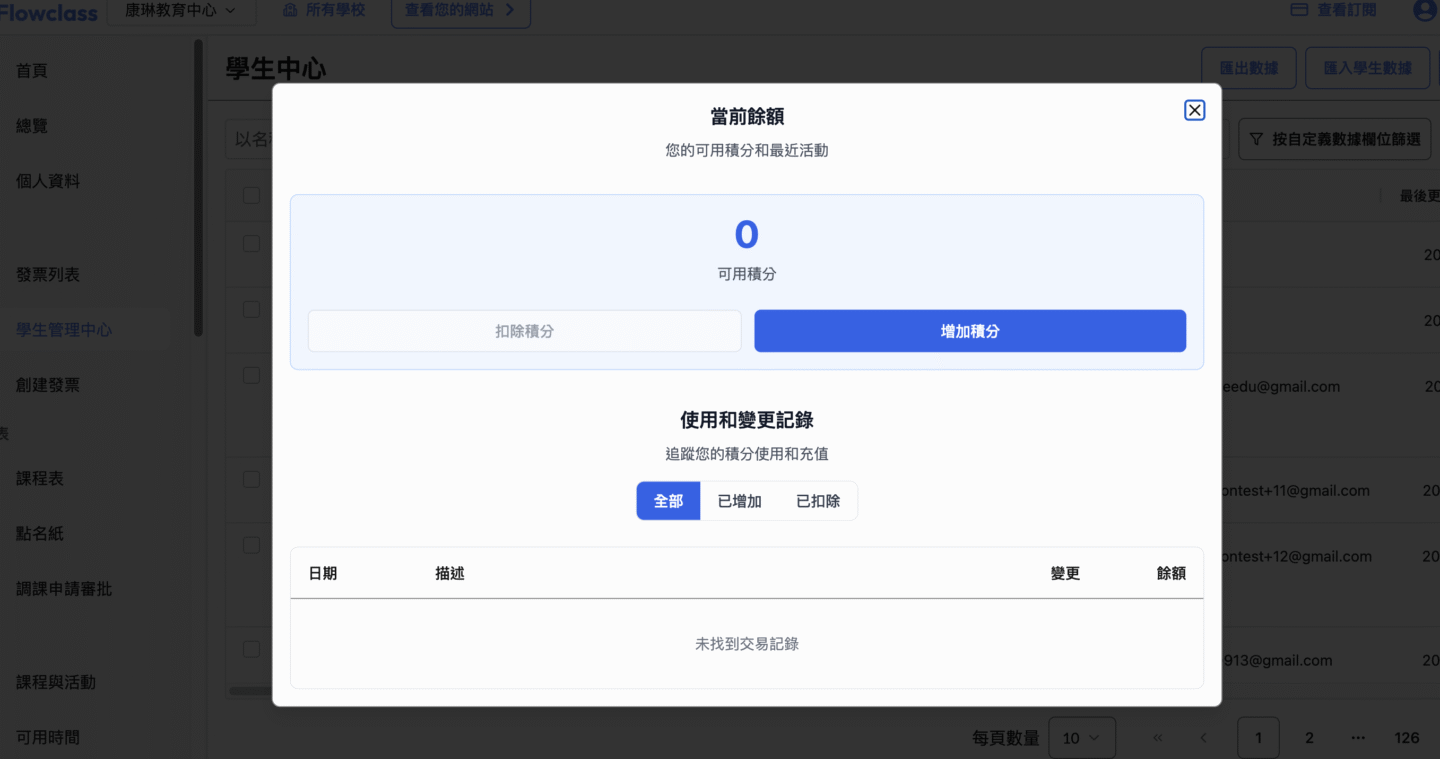
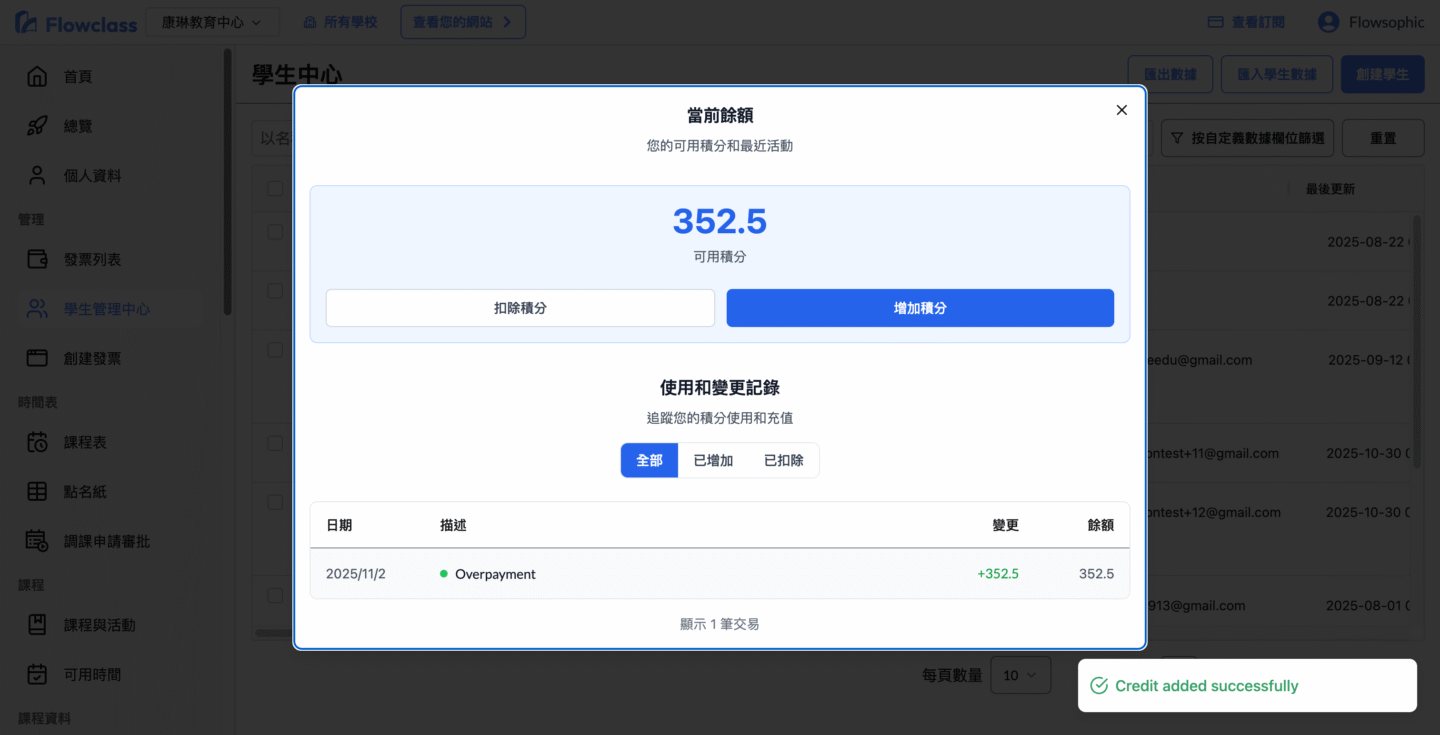
- The system will open the “Current Balance” window, displaying:
- Current available points
- Recent usage history
- Click the “Add Points” button on the right to go to the add screen.
📍 III. Methods for Adding Points #
After entering the “Add Points” window, you can choose from the following two methods:
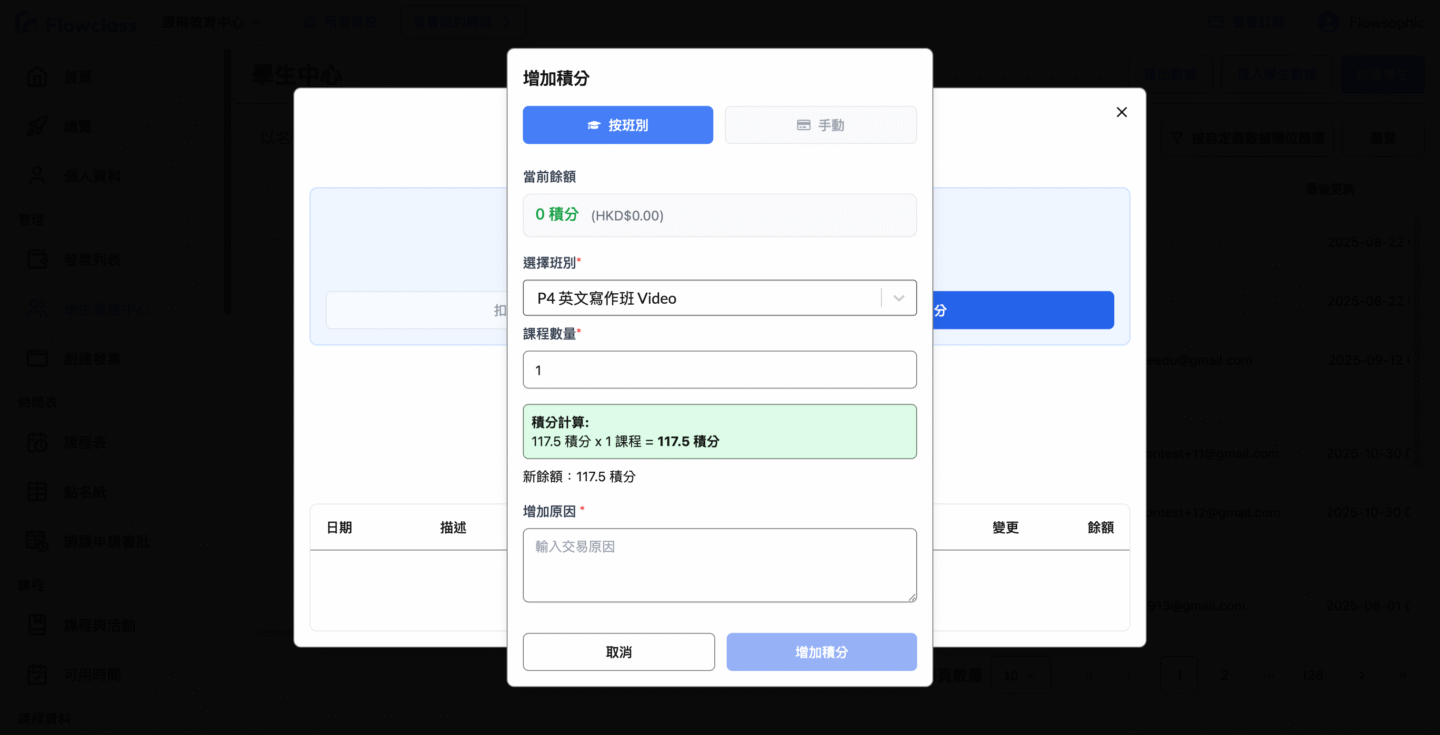
Method 1: 🗂 Add Points “by Class” #
Applicable when parents enroll in specific courses, automatically calculating and adding corresponding points.
- Select the tab “By Class”.
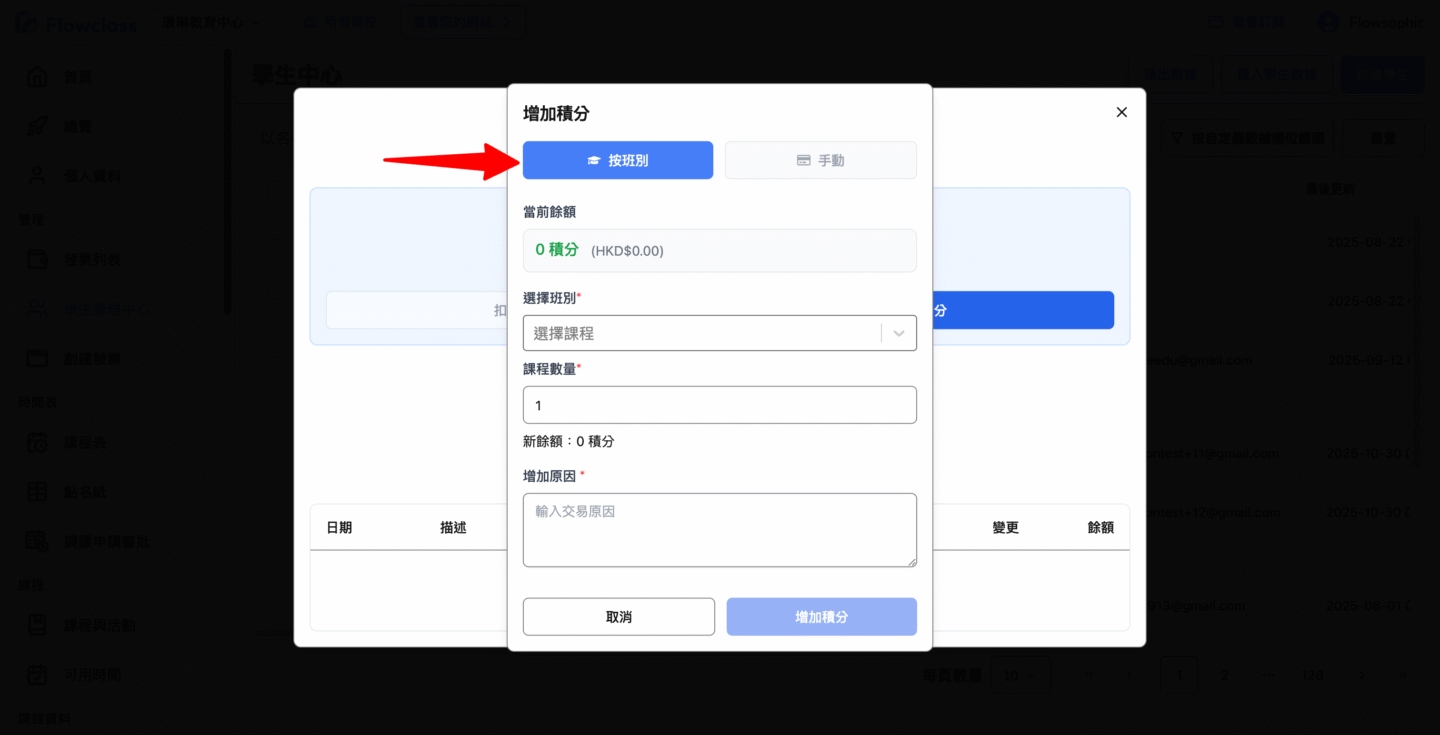
- Select a course from the “Select Class” dropdown (e.g., “P4 English Writing Class Video”).
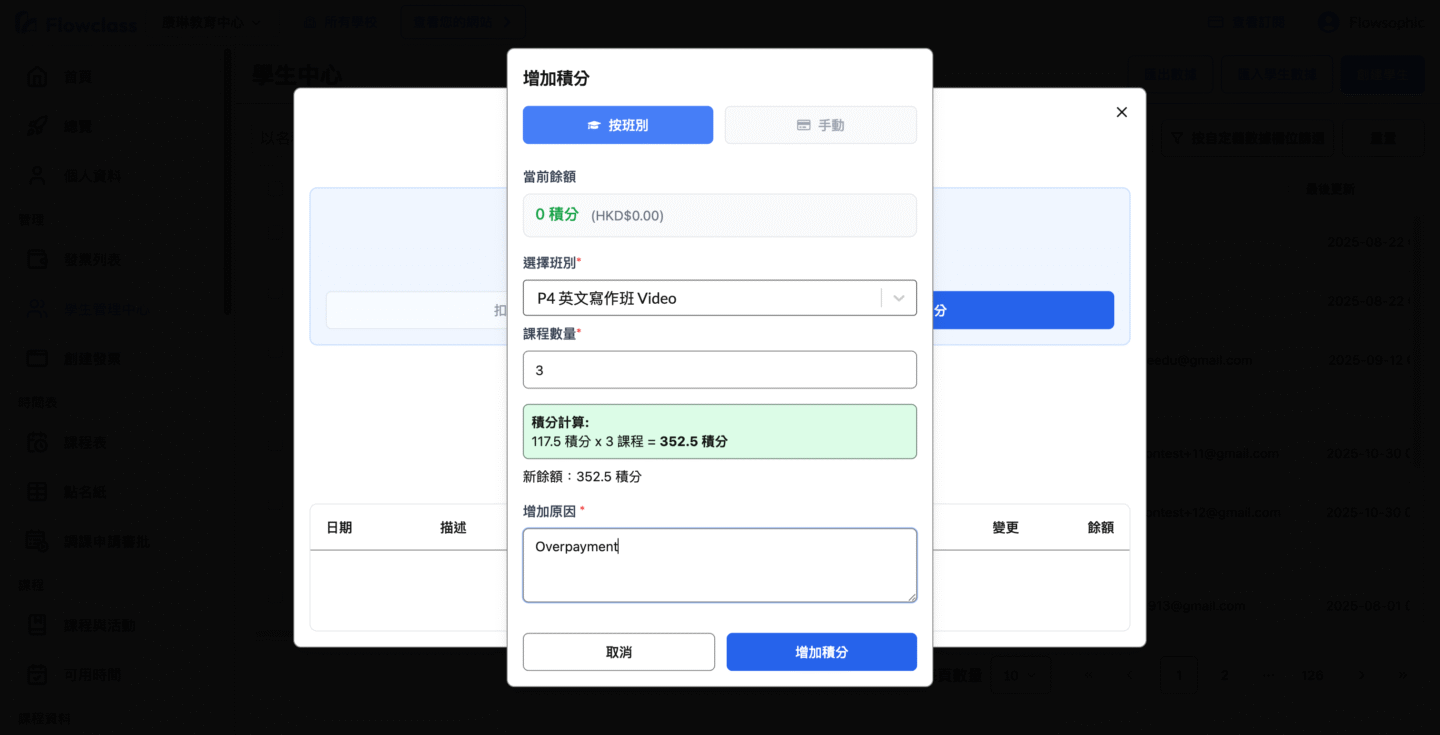
- Enter the “Course Quantity” to add (e.g., 3).
- The system will automatically display the points conversion based on class settings.
積分計算:117.5 積分 × 3 課程 = 352.5 積分
- Enter remarks in the “Reason for Addition” field (e.g.,
Overpayment). - Click “Add Points” to confirm.
Once completed, the system screen will update to show the new points balance.
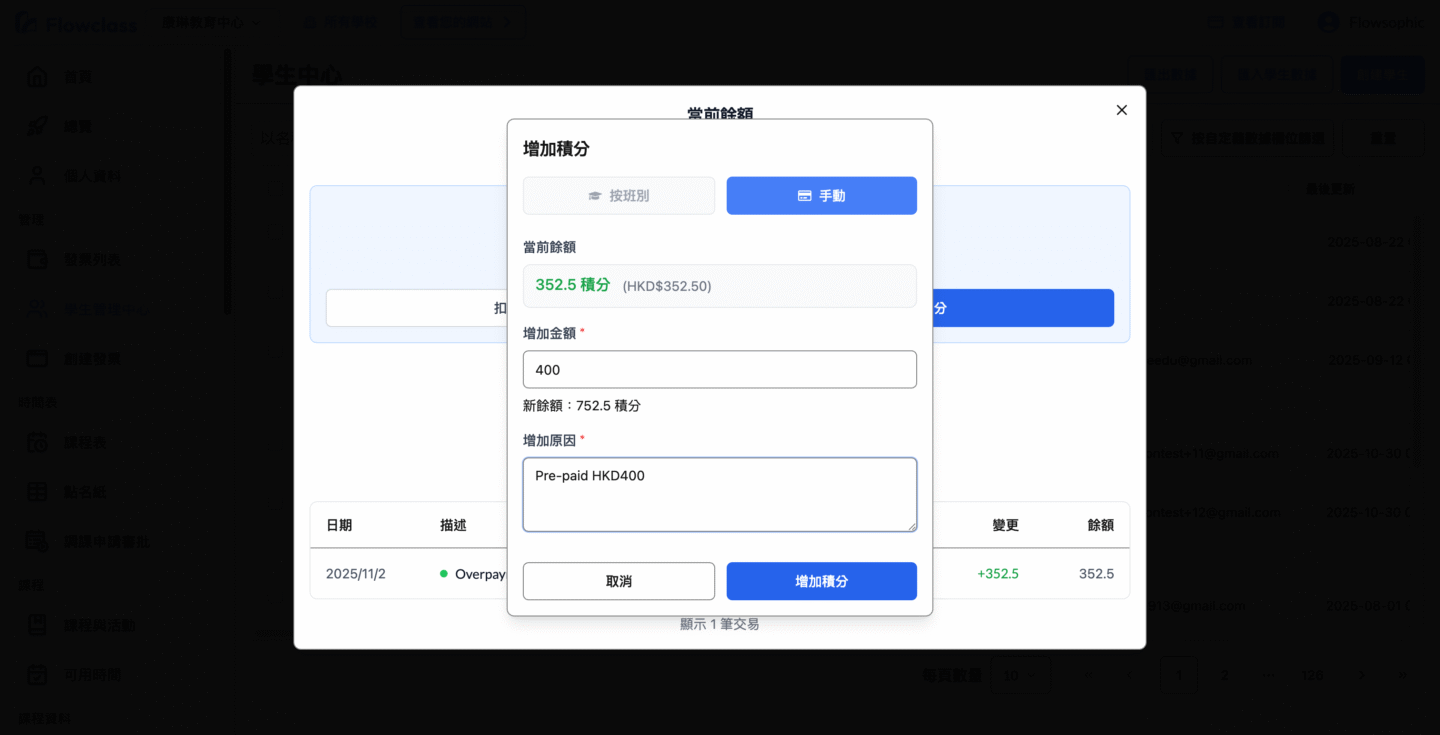
Method 2: 💳 Add Points “Manually” #
Applicable for top-ups, overpayments, or other point changes not related to courses.
- In the “Add Points” window, select “Manual” from the toggle options.
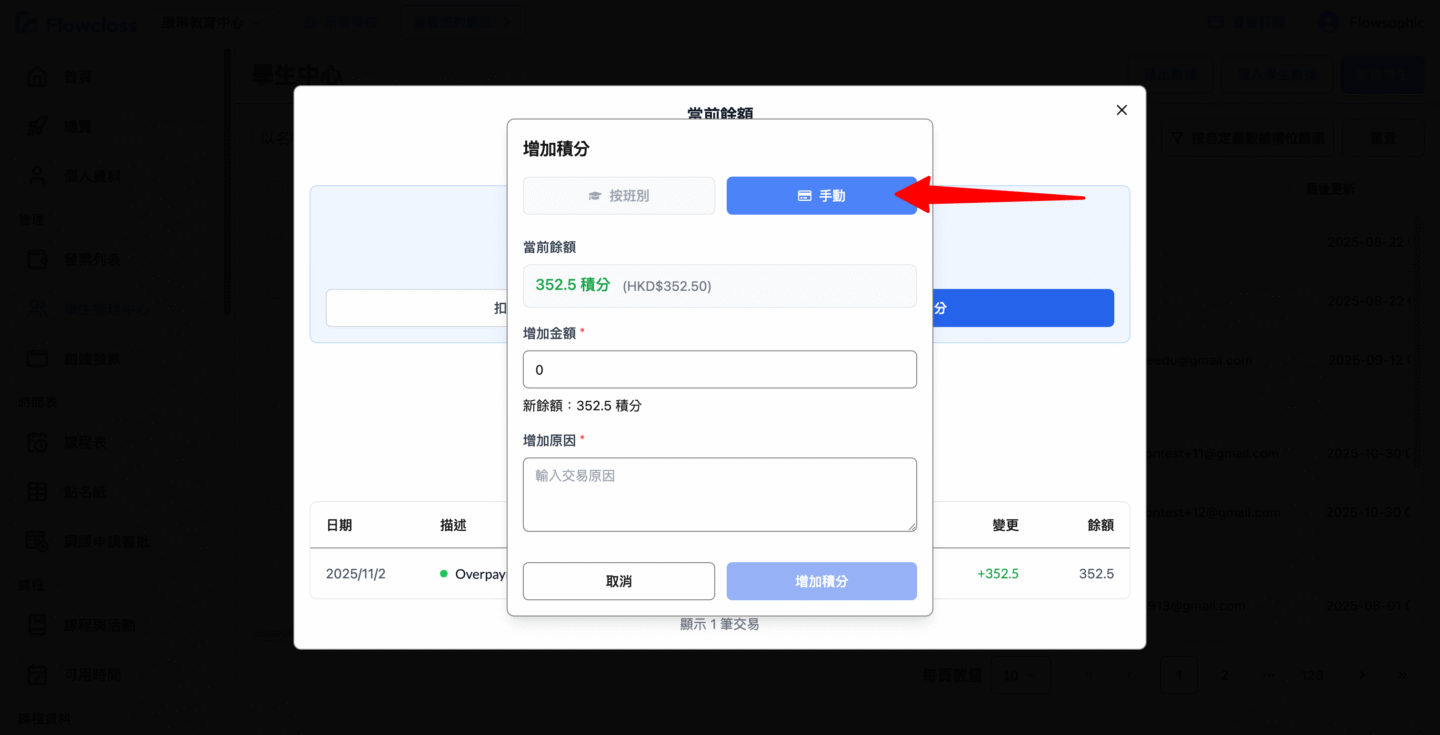
- The system will display the current balance and input fields.
- Enter the amount to add in the “Amount to Add” field (e.g.,
400). - The system automatically displays the new balance:
目前 352.5 積分 + 400 積分 = 752.5 積分 - Enter remarks in the “Reason for Addition” field (e.g.,
Pre-paid HKD400). - Click “Add Points” to confirm the operation.
After adding, the screen will display a success notification and transaction records:

📍 IV. Check Points Transaction History #
After completing the operation, the system will display the parent’s latest total points and all transaction details:
| Date | Description | Change | Balance |
|---|---|---|---|
| 2025/11/2 | Overpayment | +352.5 | 352.5 |
| 2025/11/2 | Pre-paid HKD400 | +400 | 752.5 |
After confirming the information is correct, you can close the window, and the operation is complete.
🧾 V. How Points Are Applied After Being Credited #
- Newly added points will immediately appear in the parent account and simultaneously affect payments and course registrations for all students within that family group.
- The system automatically records all point changes, including:
- Manual top-ups
- Administrator adjustments
- You can view the history at any time in the “Usage and Change Records” section.


