How to Use the Course Calendar #
The Course Calendar feature not only allows you to view scheduled classes but also provides detailed insights into individual lessons. With just a few clicks, you can access essential class details, manage student lists, and ensure smooth operations. Let’s walk through the process step-by-step.
Step 1: Access the Class Schedule #
- Log in to Your Dashboard: Navigate to the “Class Schedule” option under the Schedule section in the sidebar.
- Filter for Specific Classes (Optional):
- Use the Select Course or Select Class dropdown to narrow the schedule view.
- This helps you quickly locate the class you’re interested in.
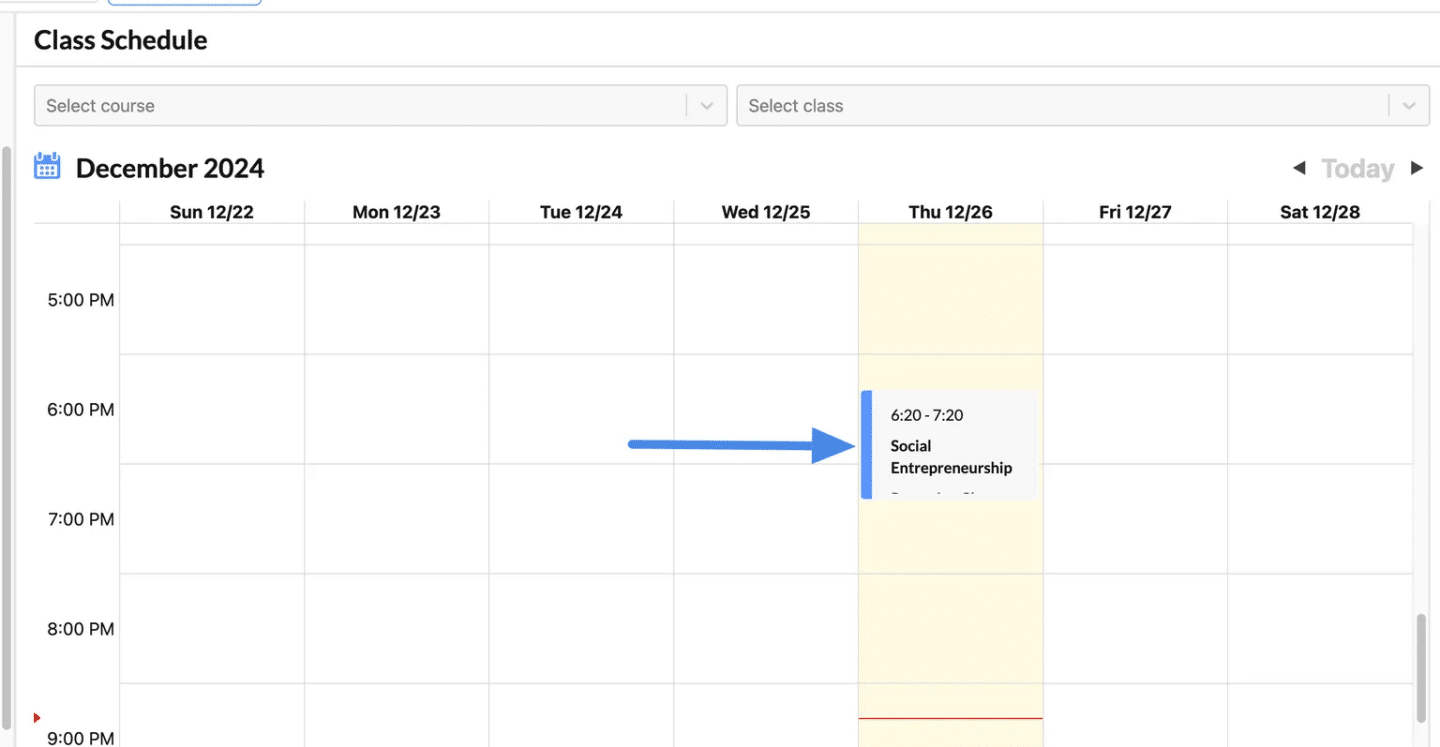
Step 2: View Your Class #
- Locate the Class:
- On the calendar, find the class you want to manage.
- Example: “Social Entrepreneurship” on Thursday, December 26, 2024, from 6:20 PM to 7:20 PM.
- Click on the Class Block:
- Clicking the class will open a Lesson Details window on the right-hand side.
Managing the lesson #
- Find the Menu Icon:
- In the Lesson Details panel, look for the hamburger menu (three horizontal lines) next to the class title.
- Click the Hamburger Menu:
- Click on the icon to reveal a dropdown menu of available actions.

View Detail Function #
The “View Detail” option allows you to access a detailed overview of a specific lesson and provides a shortcut to the Class Page. This is helpful for reviewing lesson information or making advanced changes.
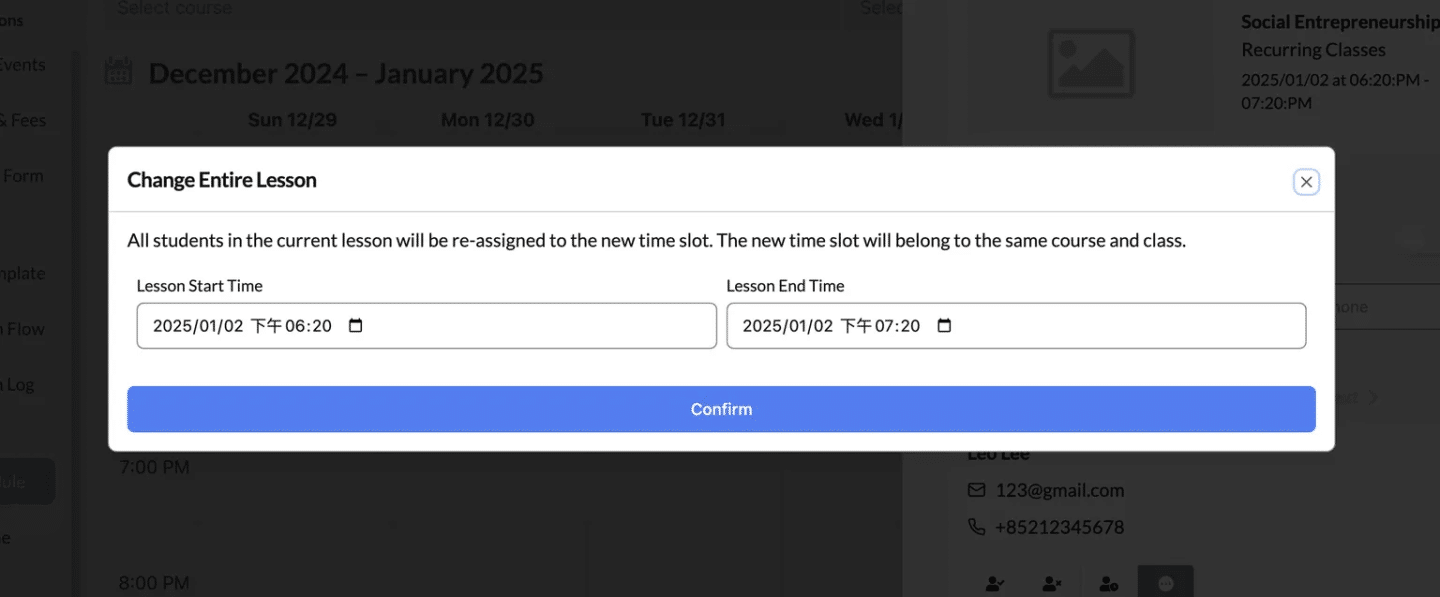
Change Entire Lesson Function #
The “Change Entire Lesson” option allows you to modify the time slot of one lesson for all enrolled students. This function is particularly useful for rescheduling or updating lesson information when necessary.
- Select “Change Entire Lesson”:
- Click the three-line menu icon and choose “Change Entire Lesson” from the dropdown.
- Enter the New Lesson Times:
- Update the Lesson Start Time and Lesson End Time fields to the new desired schedule.
- Confirm the Changes:
- Click the Confirm button to save the new lesson time.
- This action applies the updated time to all enrolled students.
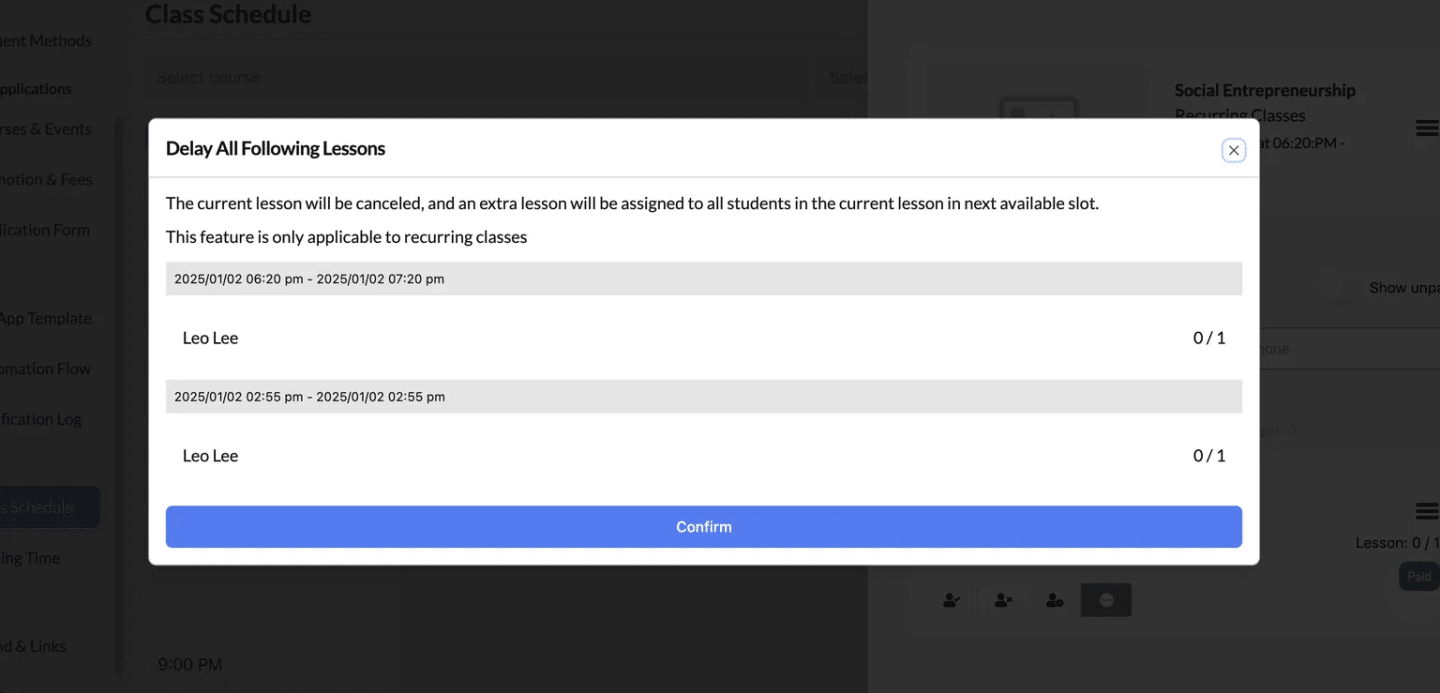
Delay All Following Lessons #
The “Delay All Following Lessons” feature is a game-changer for managing recurring classes seamlessly.
It allows you to cancel the current lesson and push all subsequent lessons to the next available time slots without manual rescheduling. This is perfect for situations like unexpected cancellations or schedule adjustments.
- Message:
- The current lesson will be canceled, and an extra lesson will be added in the next available time slot.
- This feature is only applicable to recurring classes.
- List of Lessons Affected:
- All subsequent lessons in the series will be displayed with their new proposed time slots.
- Check the New Time Slots:
- Review the updated schedule for accuracy.
- Original: 2025/01/02 6:20 PM – 7:20 PM
- Updated: 2025/01/09 6:20 PM – 7:20 PM.
- Click “Confirm”:
- Finalize the changes to apply the delay to all affected lessons.
Use for Recurring Classes Only
This feature is specifically designed for recurring lessons. Use other options if it’s a one-time class.