Managing lessons and payments shouldn’t be complicated. Follow these easy, step-by-step instructions to change lessons and update payment statuses with ea
Change a Lesson #
If you want to assign a new lesson to a student (without prior lessons), please view Assign Lesson To Student
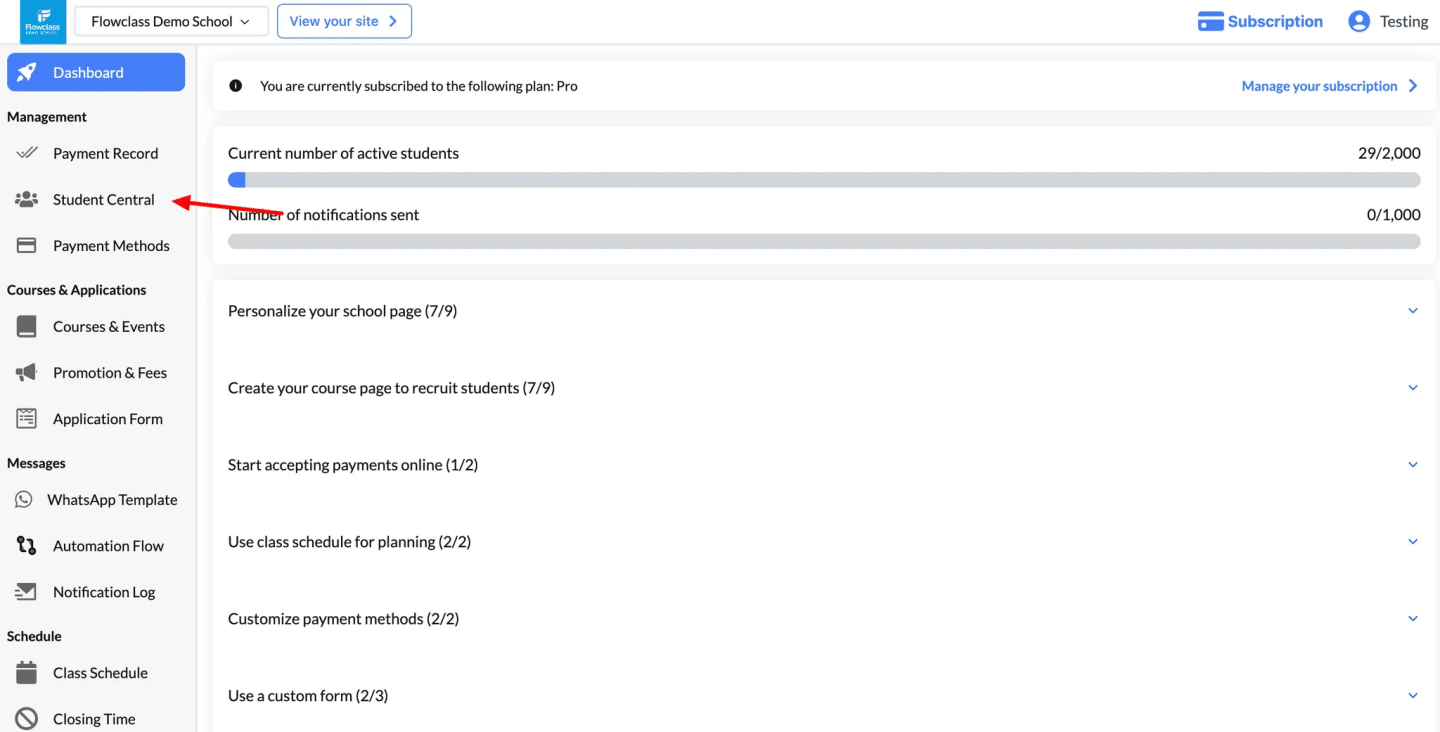
Step 1: Navigate to “Student Central” #
- Begin by logging into your admin dashboard on the Flowclass platform.
- Locate the “Student Central” option in the left-hand menu under the Management section.
- Click on “Student Central” to access the student management interface, where you can view and manage all active students.
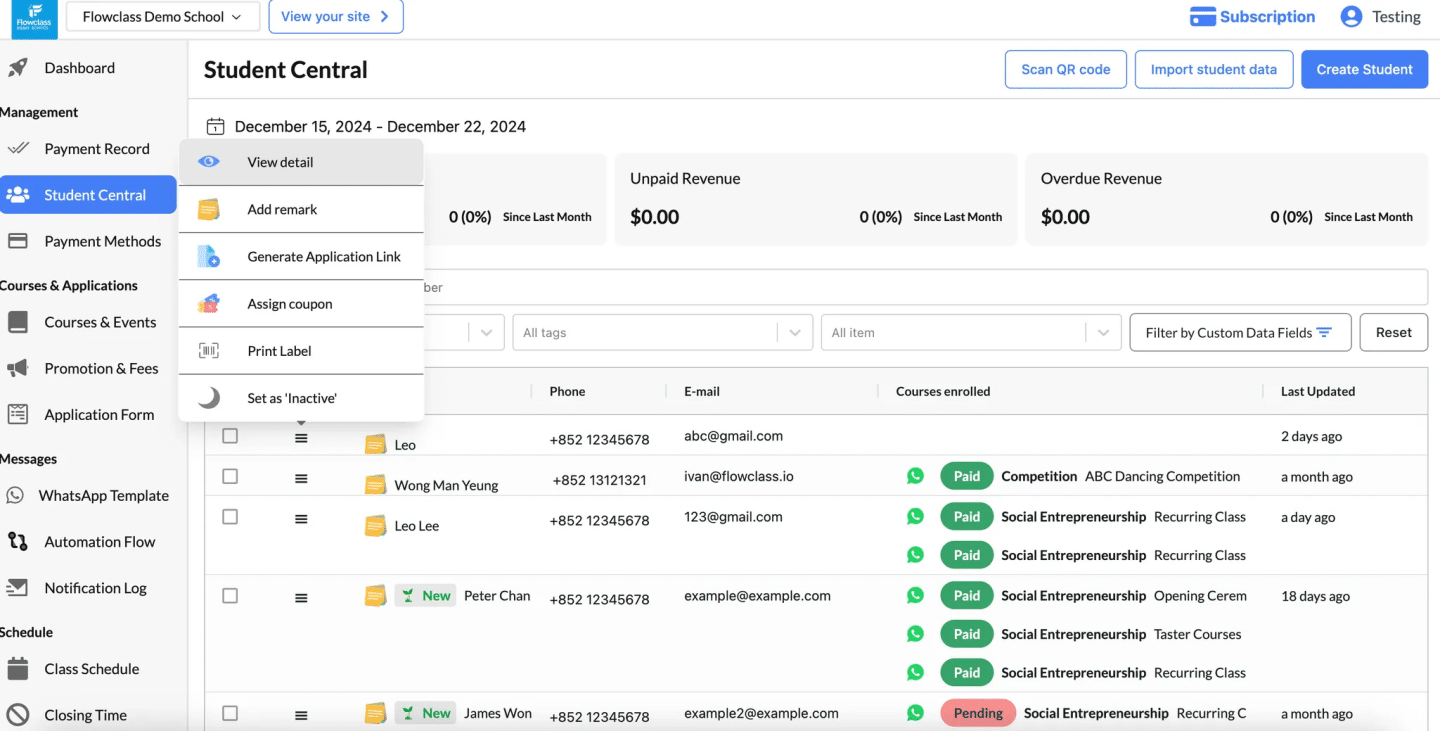
Step 2: Select the Student #
- After accessing the Student Central page, locate the list of students.
- You can use the search bar, filters, or tags to find the specific student quickly.
- Identify the student to whom you want to assign the free lesson.
- Click the three-dot menu (dropdown menu) next to the student’s name.
- In the dropdown menu, select the “View Detail” option.
- This will allow you to assign a free lesson or coupon to the student.
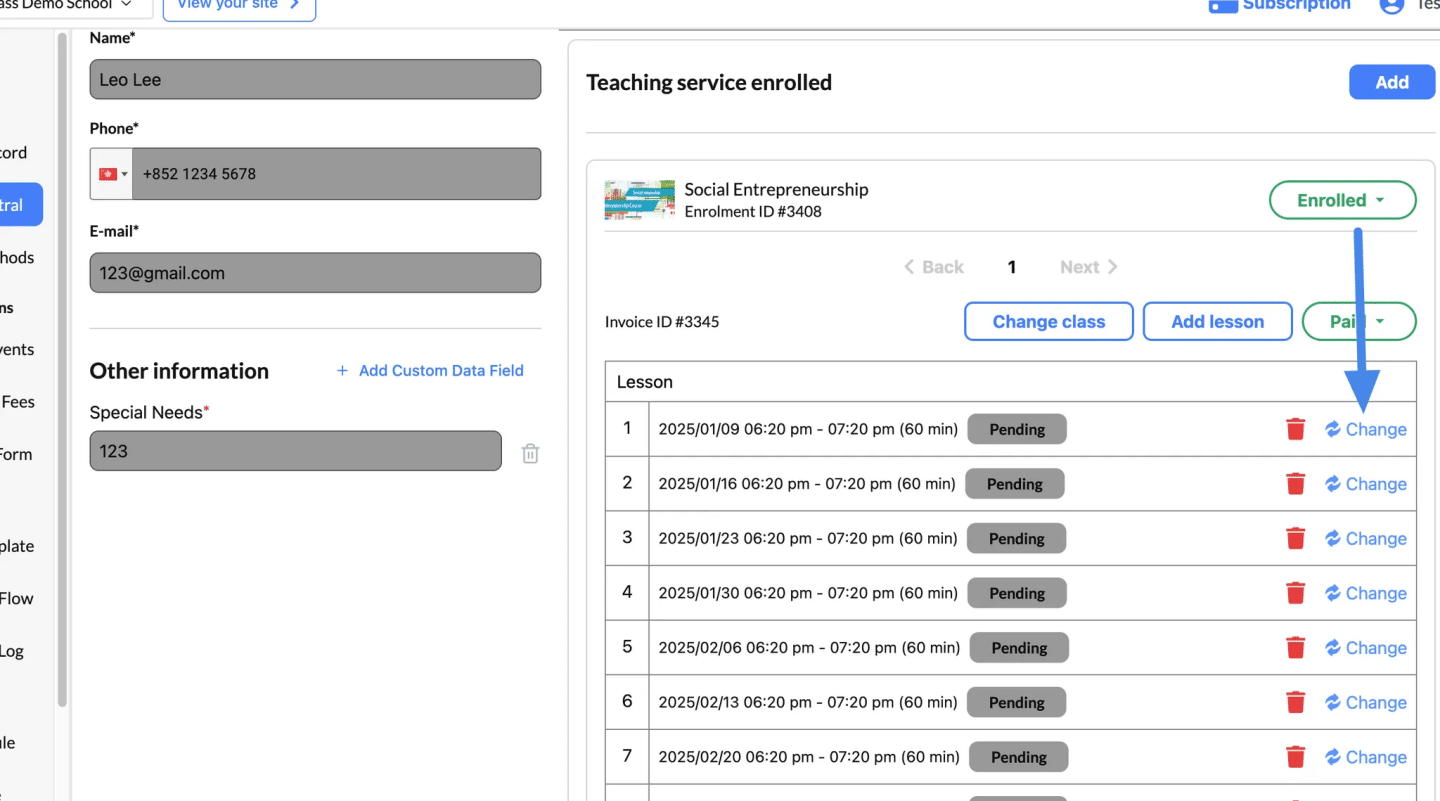
Step 3: Locate the Lesson #
- In the Teaching Service Enrolled section, find the course containing the lesson you want to modify.
- Review the list of scheduled lessons.
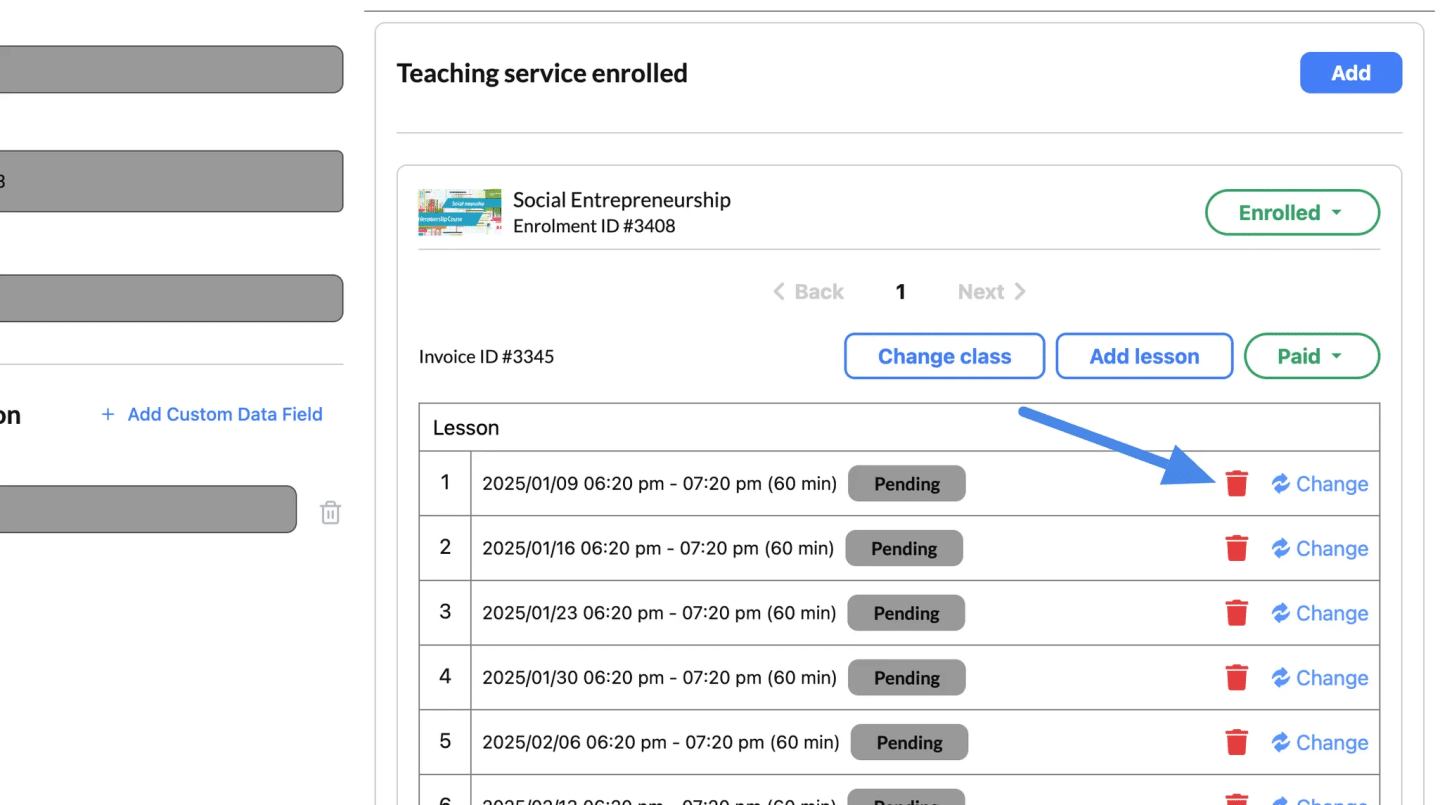
Step 4: Edit the Lesson #
- Click the Change button next to the lesson you want to update.
- A popup will appear with the lesson details.
Step 4: Update Lesson Information #
- Modify the following fields as needed:
- Course: Ensure the correct course is selected.
- Class: Update the specific class if necessary.
- Period: Adjust the schedule or time period.
- Lesson Date Time: Change the date and time for the lesson.
- Optional: Toggle the option to Send Email to Student if you’d like to notify the student of the changes.
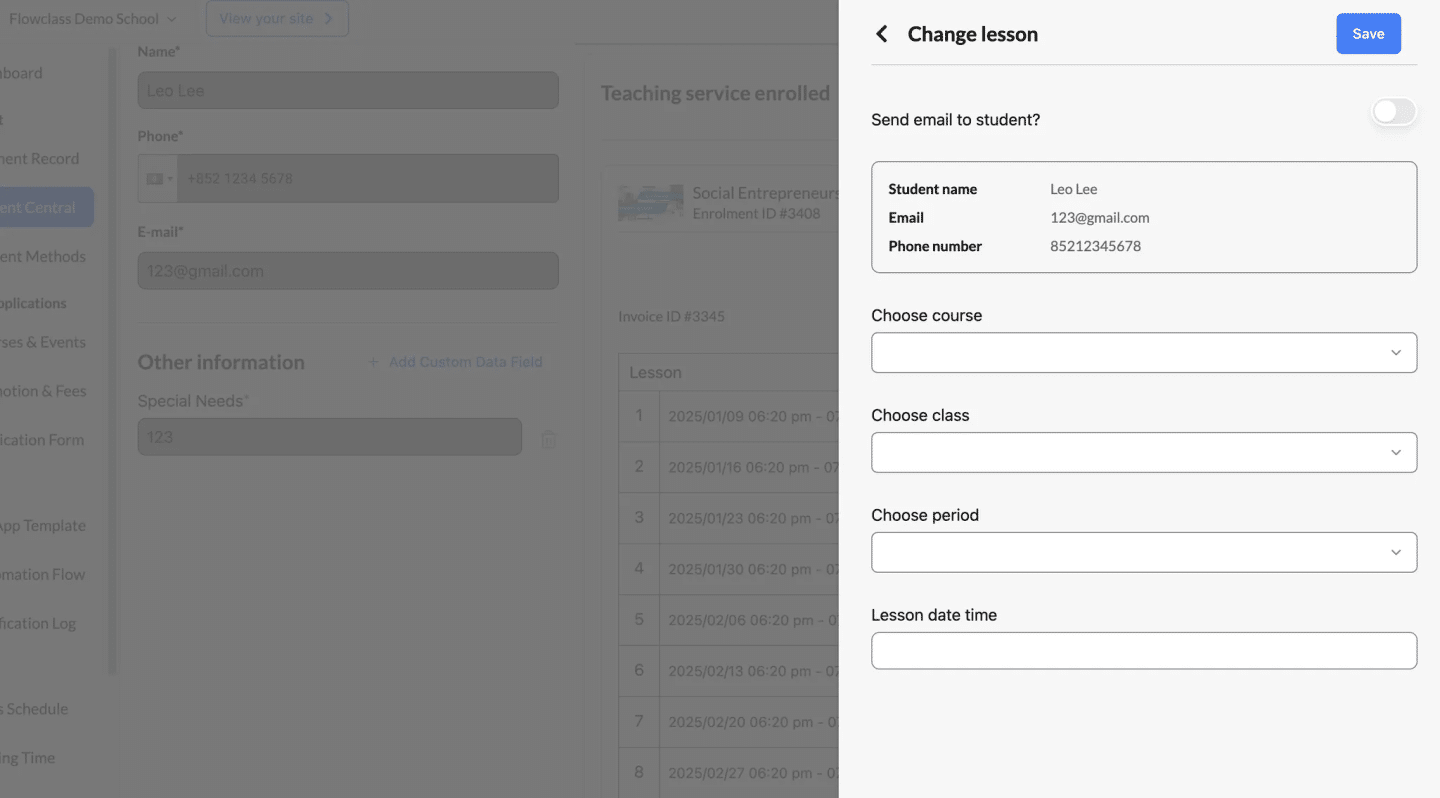
Step 5: Save Changes #
- Click Save to confirm the updates.
- The revised lesson details will be reflected in the student’s schedule.
If you want to update the attendance status, you must do it in the Course Calendar, which you can know more about here: Mark Attendance
Deleting a lesson #
- Identify the lesson you want to remove.
- Click the Trash Bin Icon next to the lesson (highlighted in red).
- A confirmation popup may appear asking you to confirm the deletion.
- Confirm the action to permanently delete the lesson.
Update Payment Status #
Step 1: Open the Payment Section #
- In the Teaching Service Enrolled section of the student’s profile, locate the payment status dropdown menu.
- Review the current status for the course or lesson.
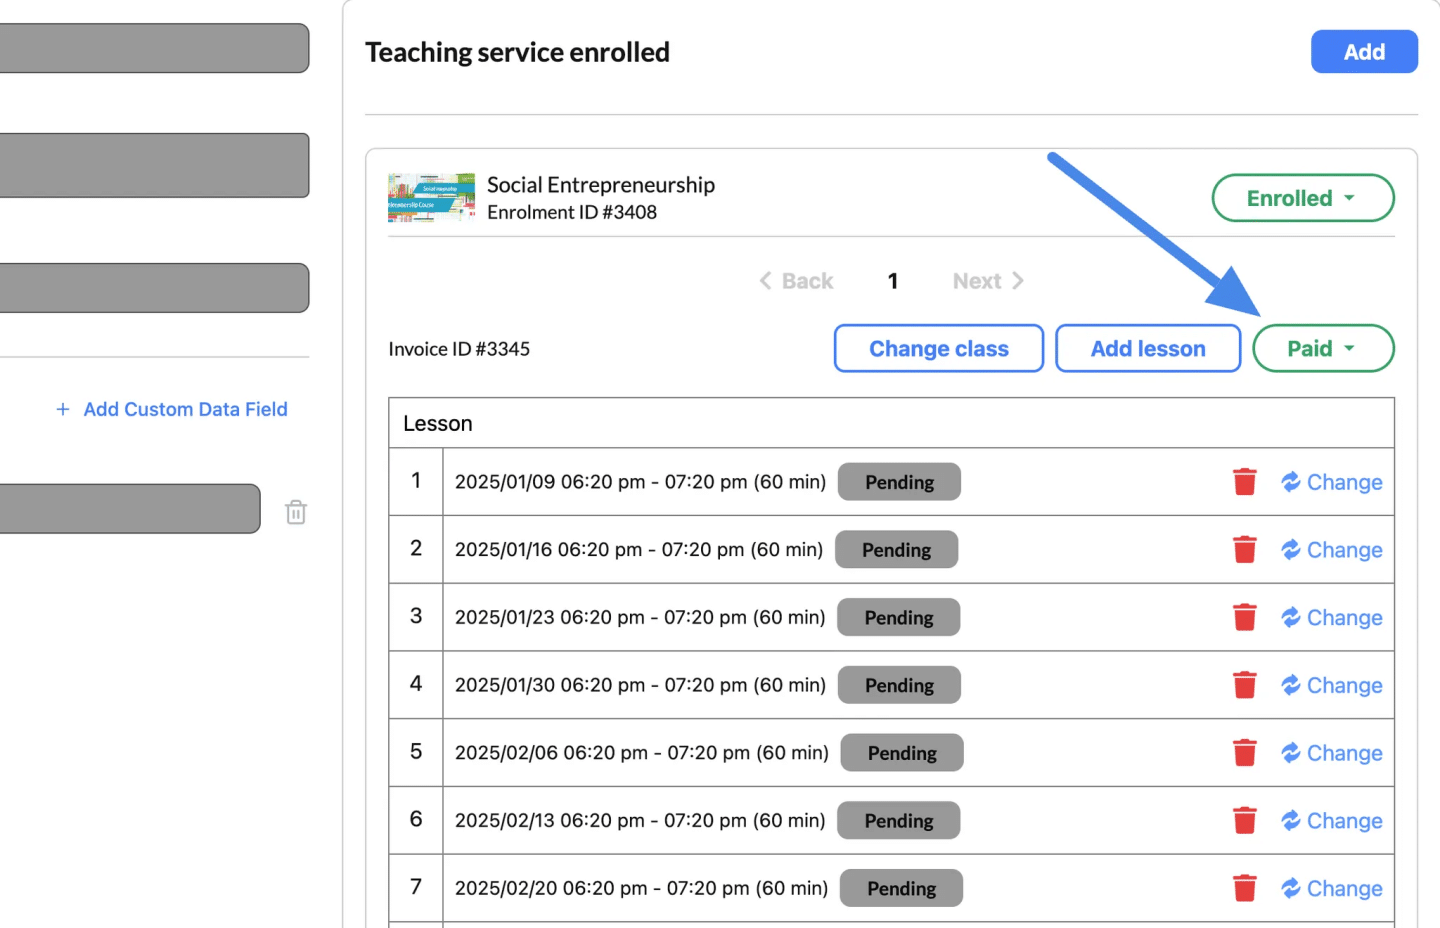
Step 2: Update Payment Status #
- Click the dropdown menu labeled Paid, Pending, or similar.
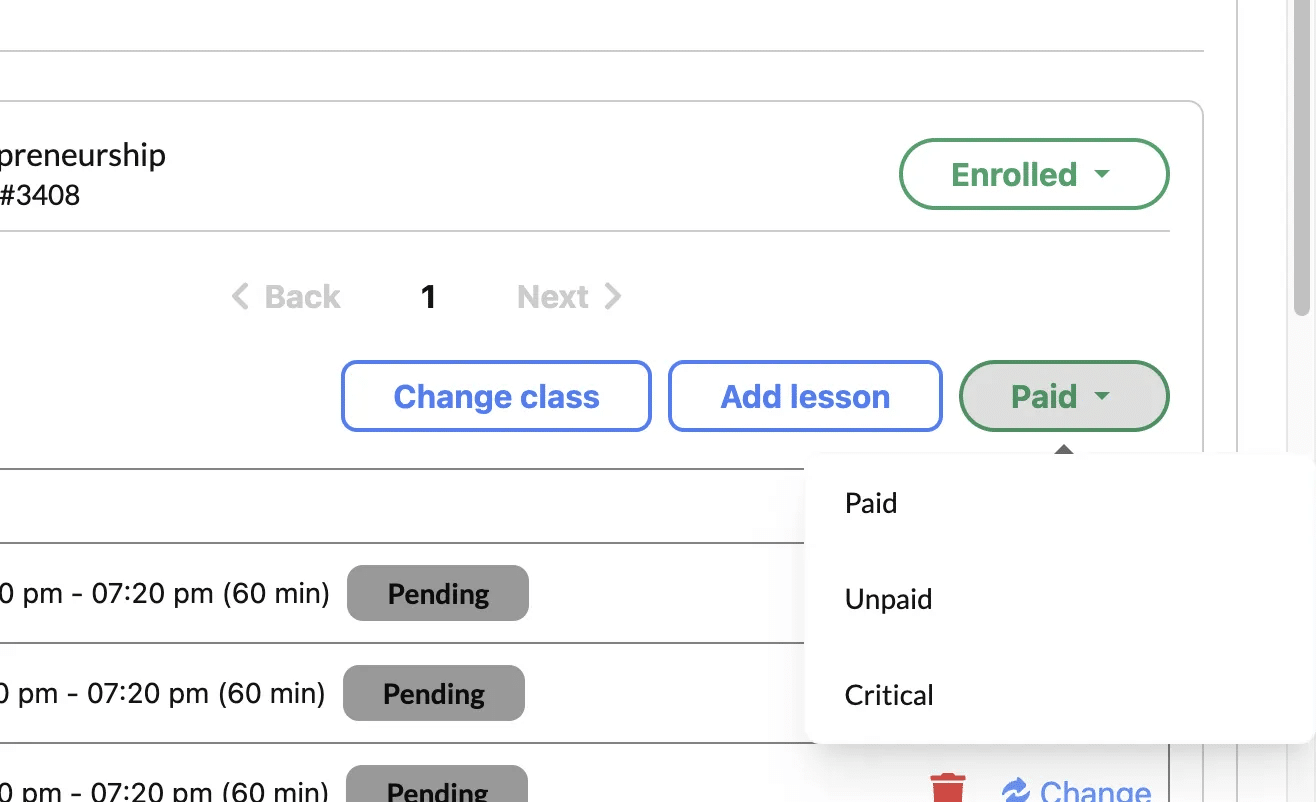
- Select the appropriate payment status:
- Paid: If the payment has been received.
- Pending: If the payment is outstanding.
- Changes will be saved automatically.
Explanation of the payment statuses #
1. Paid
- Definition: The payment for the course or lesson has been successfully received.
- What It Means:
- No further action is required from the student regarding this payment.
- The record reflects a completed transaction.
- When to Use:
- After verifying the payment has been processed through your payment gateway or manually received.
2. Unpaid
- Definition: The payment has not been received yet.
- What It Means:
- The student still needs to complete the payment for the course or lesson.
- This status serves as a reminder for pending balances.
- When to Use:
- For students who have registered but not yet paid.
- To track students requiring payment follow-ups.
3. Critical
- Definition: The payment is overdue, and immediate action is required.
- What It Means:
- This status indicates a significant delay in payment.
- It may lead to restricted access to lessons or services if unresolved.
- When to Use:
- For students who have failed to pay within the deadline.
- To escalate unresolved payment issues and prioritize follow-up.
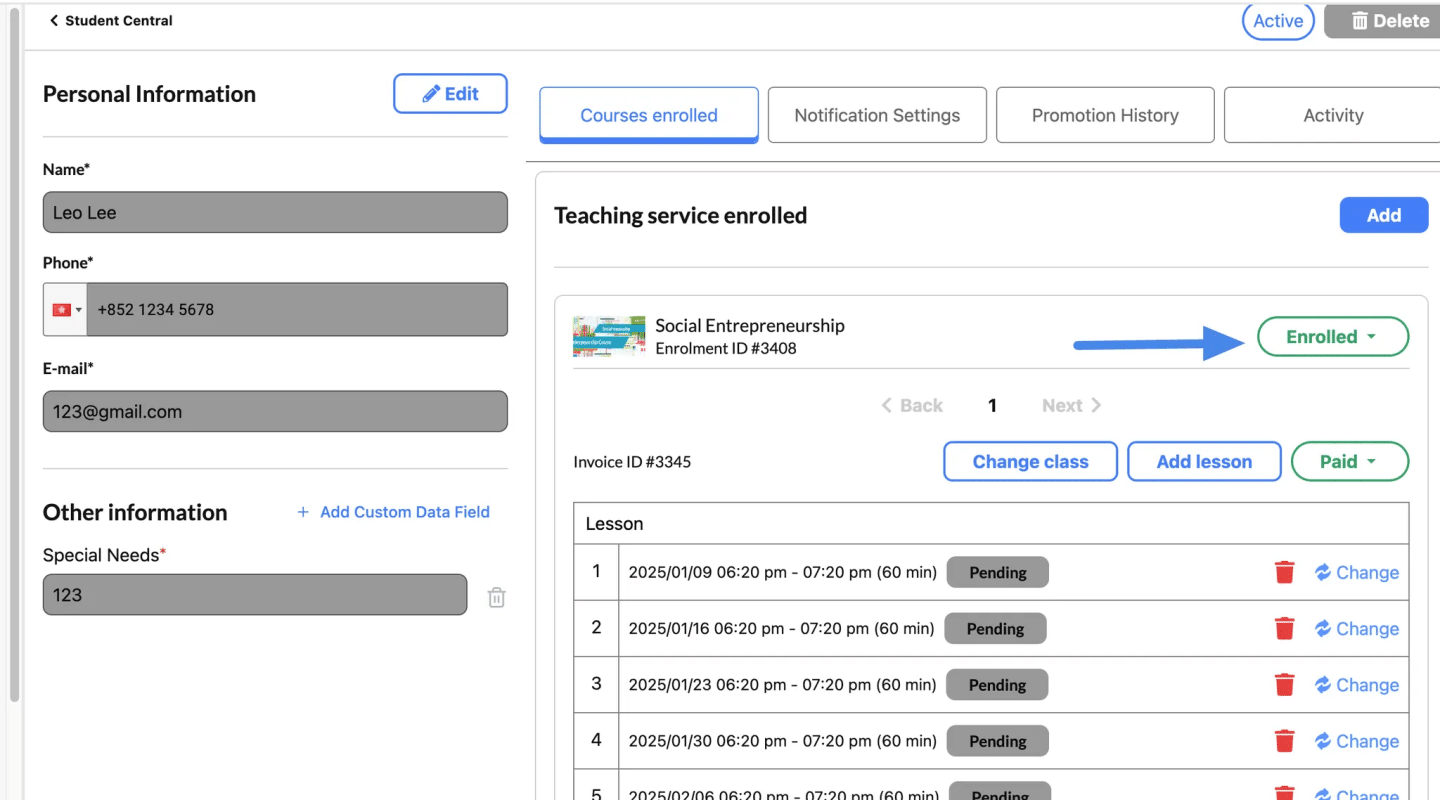
Update Application & Payment Status #
Step 1: Access the Student’s Profile #
- Go to the Student Central section.
- Search for the student by name, email, or phone number.
- Click on the student’s profile to view their details.
Step 2: Navigate to the Teaching Service Section #
- In the Teaching Service Enrolled section, locate the course for which you want to change the application status.
- Find the Application Status Dropdown Menu (e.g., labeled Enrolled).
Step 3: Select the New Status #
- Click the dropdown menu and choose one of the following options:
- Enrolled
- Stopped
- Delete
- Confirm your selection. The application status will update immediately.
Explanation of the statuses #
1. Enrolled
- Definition: The student is actively participating in the course.
- What It Means:
- The student will receive notifications and reminders about upcoming lessons.
- They are expected to attend all future lessons as scheduled.
- When to Use:
- For students who are currently attending and engaged with the course.
2. Stopped
- Definition: The enrollment has been paused or discontinued.
- What It Means:
- The student will no longer receive notifications or reminders about future lessons.
- The lessons remain in the schedule but are considered inactive for the student.
- When to Use:
- If the student has dropped out of the course.
- If the student defers their participation or faces unresolved payment issues.
3. Delete
- Definition: The student’s enrollment and all associated data for the course are permanently removed.
- What It Means:
- All lessons, payment records, and notifications related to the course will be deleted.
- The student will no longer appear in the system for this course.
- When to Use:
- If the student was mistakenly enrolled in the wrong course.
- If the course is canceled entirely for that student.


