What is Closing Time? #
The Closing Time feature allows administrators to block specific time periods during which recurring classes will not occur.
This feature is designed to handle situations like holidays, maintenance periods, or any temporary unavailability, ensuring students cannot book lessons during these periods.
Additionally, any recurring classes scheduled during the blocked time will be delayed and adjusted according to their recurring schedule.
Note that the closing time only affects Recurring Type classes right now.
Example Scenario #
Your school observes a holiday on 9 January 2025, and no classes should take place.
- Action:
- Add a closing time from 9/1/2025 12:00 AM to 9/1/2025 11:45 PM.
- Result:
- Any recurring classes scheduled for 9 January 2025 will be delayed to the next available date based on their recurring pattern.
- Students will not be able to book classes during this time.
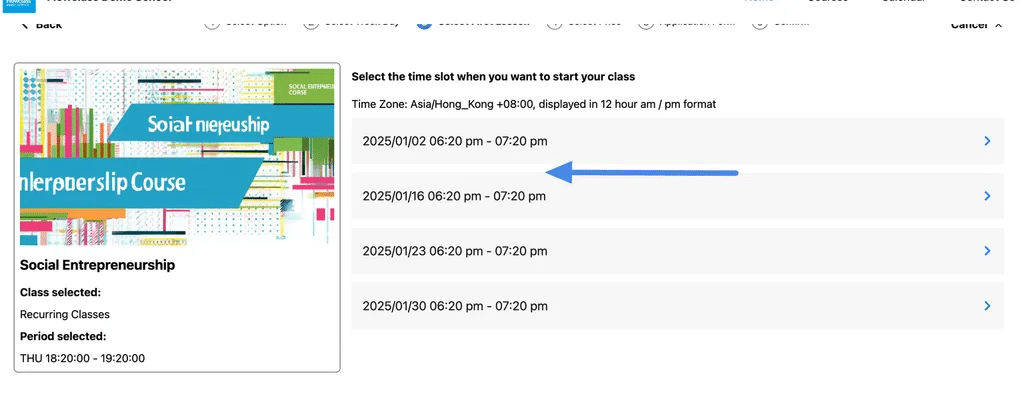
- Example from Schedule:
- Class Date on 2025/01/09 was skipped due to Closing Time.
- The next available recurring class is scheduled on 2025/01/16, following the recurring class pattern.
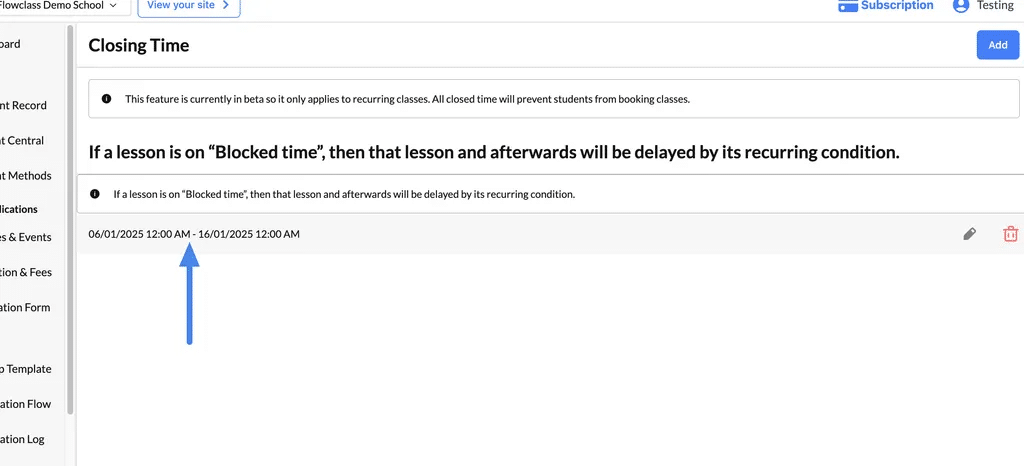
Adding a closing time #
Step 1: Open the Add Closing Time Panel #
- After clicking the “Add” button in the previous step, the Closing Time panel appears.
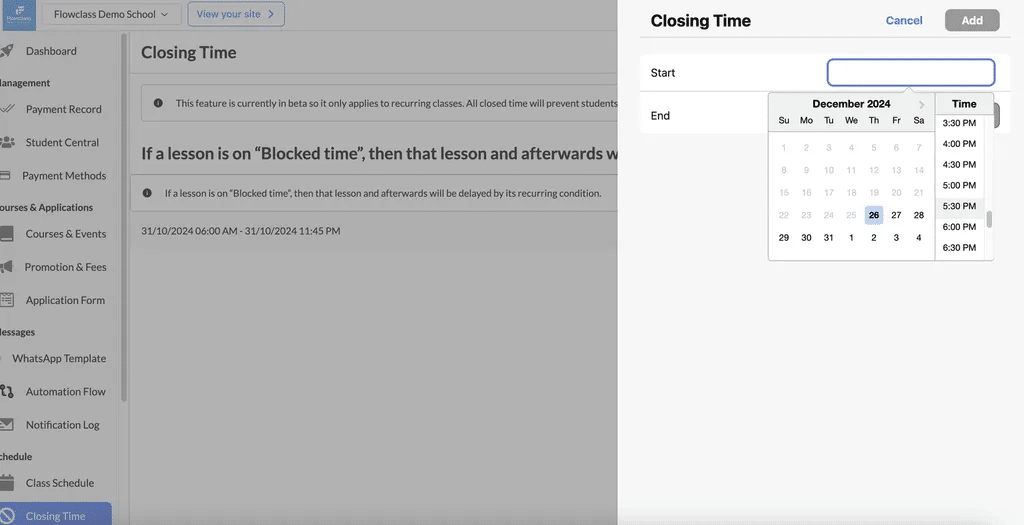
Step 2: Set the Start Time #
- Click on the “Start” Field:
- A calendar dropdown will appear, allowing you to select the start date and time for the blocked period.
- Choose the Date:
- Use the calendar to pick the start date. Example: Select December 26, 2024.
- Set the Time:
- After selecting the date, choose the desired start time from the dropdown. Example: Pick 6:00 AM.
Step 3: Set the End Time #
- Click on the “End” Field:
- A similar calendar dropdown will appear for the end date and time.
- Choose the Date:
- Select the last date for the blocked period. Example: December 26, 2024.
- Set the Time:
- Choose the specific time when the blocked period will end. Example: Pick 11:45 PM.
Step 4: Save the Closing Time #
- Review the Dates and Times:
- Double-check the selected start and end times to ensure accuracy.
- Click the “Add” Button:
- Once satisfied, click the “Add” button in the upper-right corner to save the Closing Time.

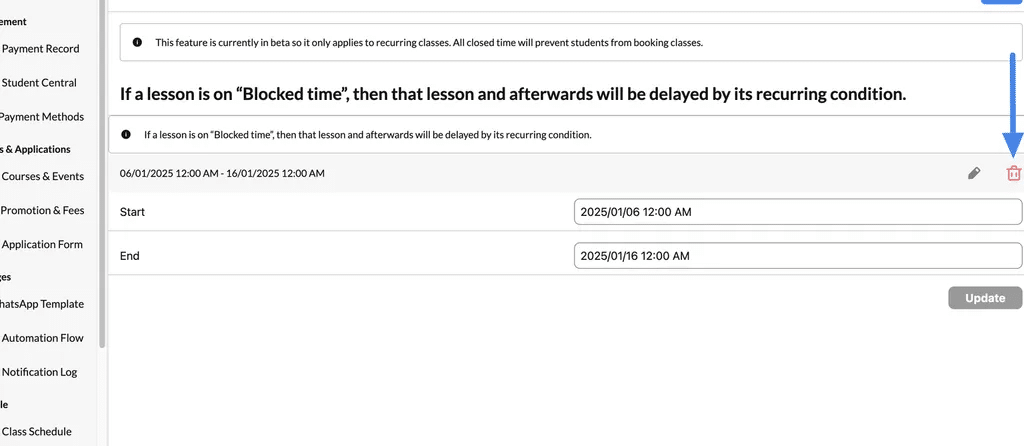
Editing a closing time #
Step 1: Enter Edit Mode #
- Click the Edit Icon: On the right side of the Closing Time entry, click the pencil icon to open the editing panel.
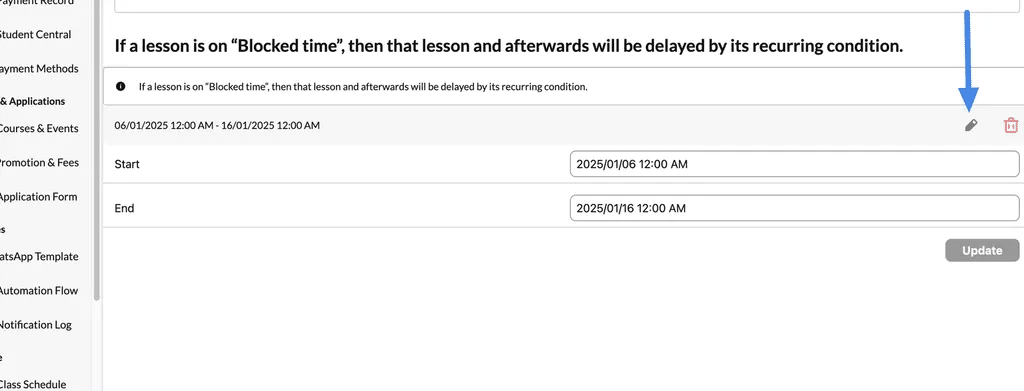
Step 2: Update the Start and End Times #
- Adjust the Start Time:
- Click the “Start” field to update the date and time.
- Use the calendar and time selector to set the desired start time.
- Adjust the End Time:
- Click the “End” field to modify the closing period’s end date and time.
- Ensure the updated end time reflects the desired blocked period.
Step 3: Save Your Changes #
- Review the Updated Timeframe: Double-check the details to ensure accuracy. Incorrect settings can disrupt your schedule.
- Click the “Update” Button: Once satisfied with the changes, click “Update” to save them.
Deleting a closing time #
Step 1: Delete the Entry #
- Click the Delete Icon:
- On the right side of the Closing Time entry, click the trash can icon to delete the entry.(See the image above for reference.)
- Confirm Deletion:
- A pop-up or confirmation message may appear to ensure you want to proceed.
- Confirm your action by clicking “Yes” or “Delete” to finalize.


