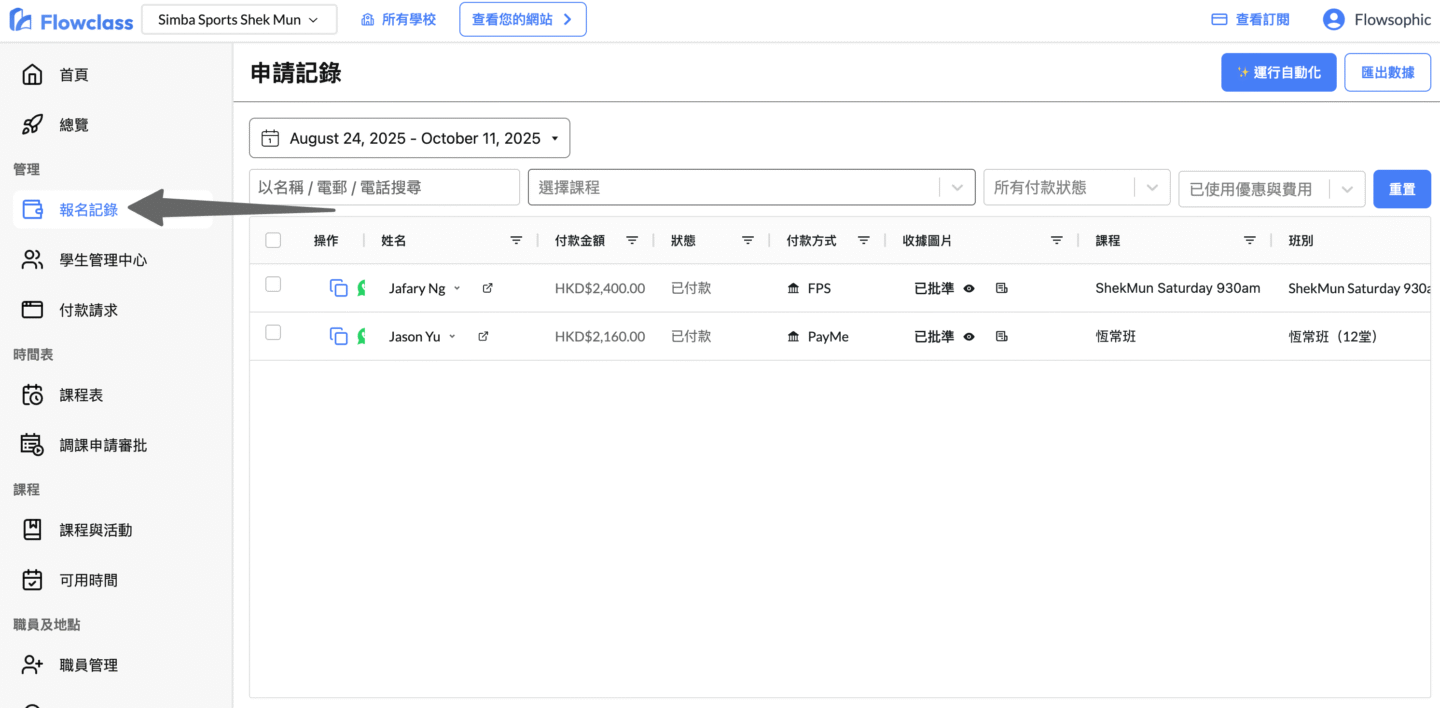
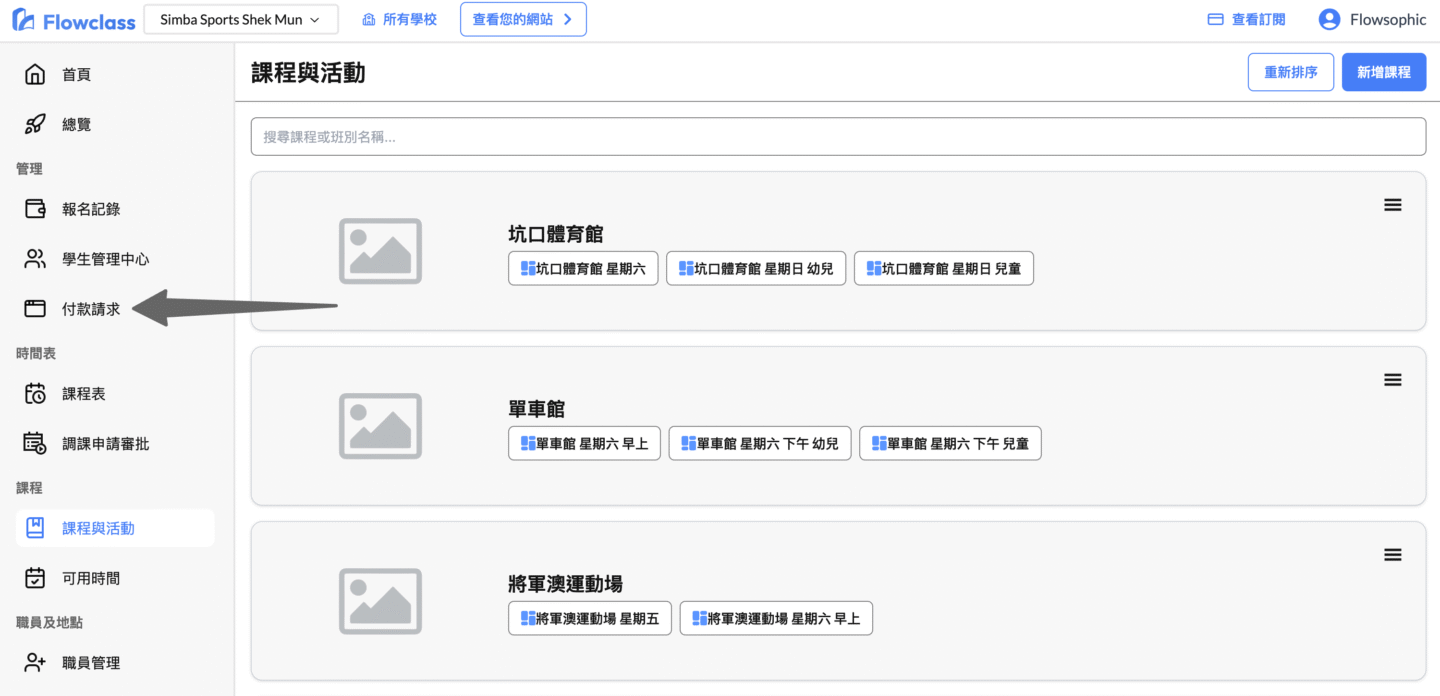
1. Go to “Payment Request” #
Log in to your Flowclass account
Go to the Flowclass platform and log in with your account.
Go to the “Payment Request” page
In the left function menu, click on the “Payment Request” option (as shown in the arrow above).
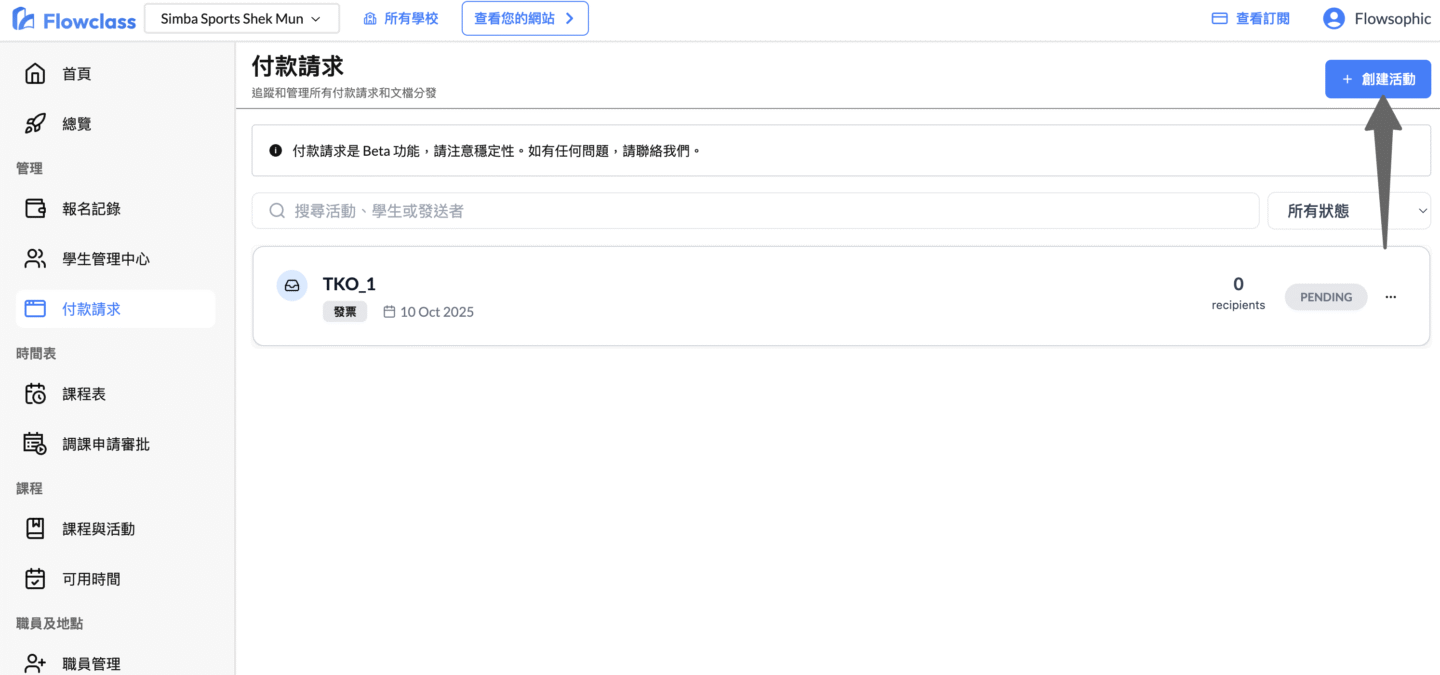
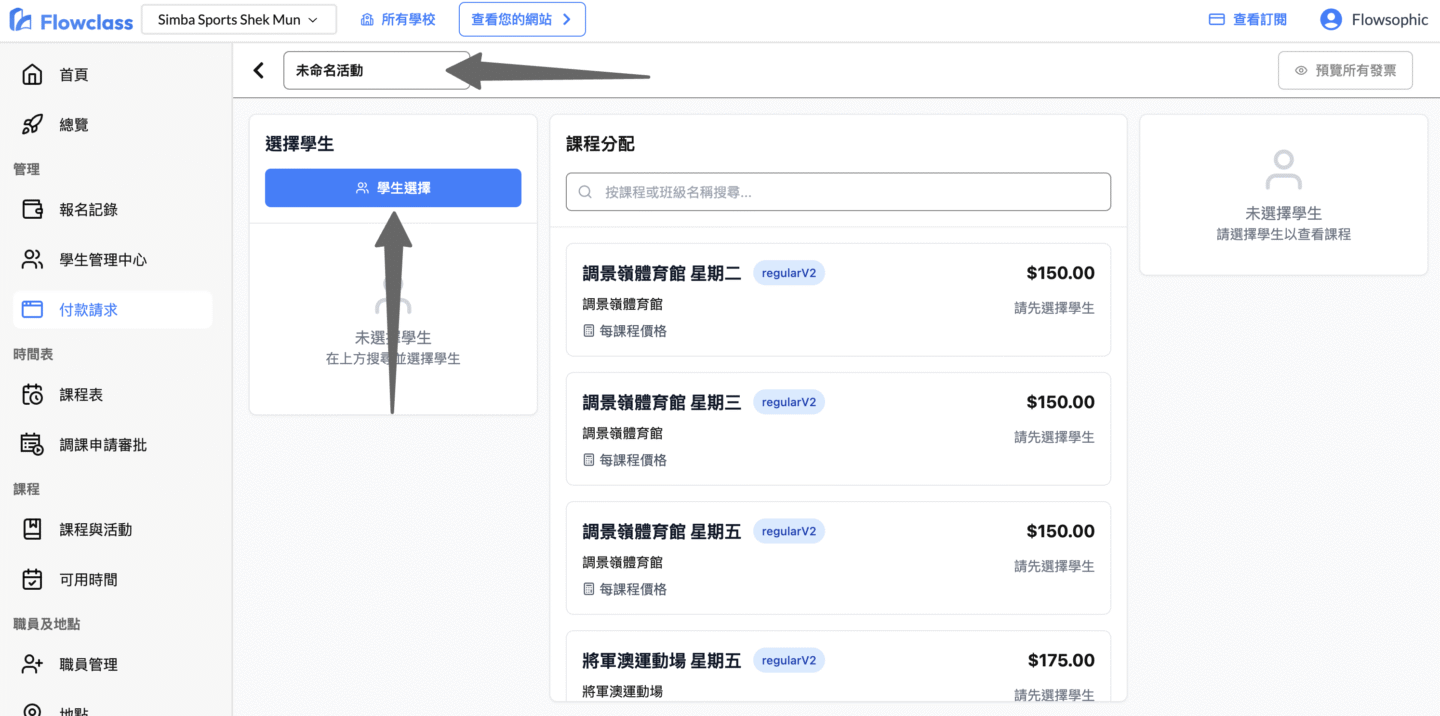
2. Create a “Payment Request” #
Create a new invoice
On the “Payment Request” page, look for the “Create Activity” button and click to enter the invoice creation page.
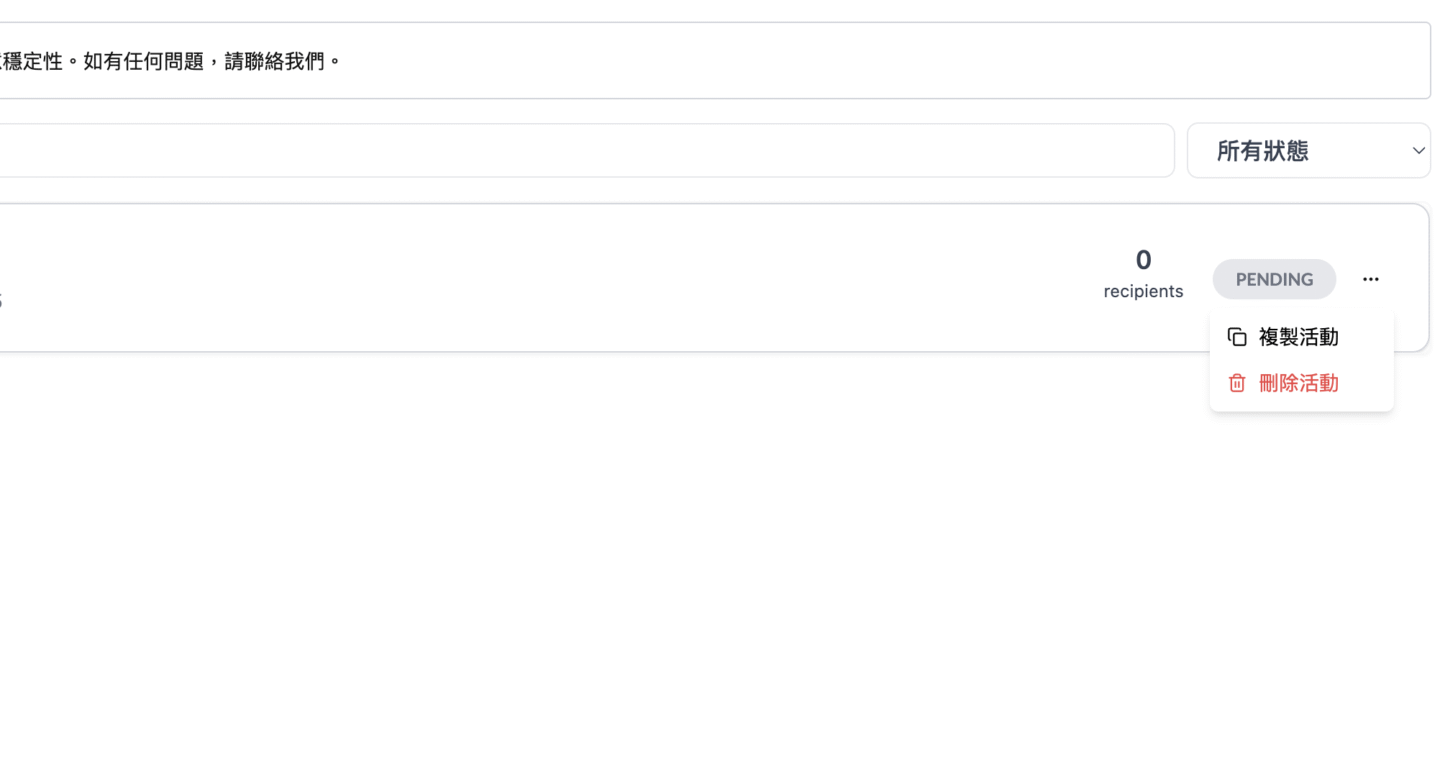
Quickly create monthly recurring invoices #
To create the same recurrence as the previous month, including student, class, and discount settings, click the ⋯ button to the right of the event and select Copy Activity.
This feature automatically copies all student, class data, and discount settings for the activity, allowing you to quickly create similar new routines and significantly reduce the time spent on duplicate entries.
3. Select students #
You can rename your event to make it easier to track and manage it later.
First, click on the “Student Select” button to select the students who need to join this activity.
On the Student Center screen, you can see a list of all your students.
- To quickly filter students in a specific class, you can enter or select the class/class name in the filter field above, and the system will automatically display students who meet the criteria.
- After filtering, you can directly click the checkbox to the left of the student’s name, or click the “Select All” button to select all students in the class at once.
- Once you have made your selection, click the “Select All Screened Students” or “Confirm” button in the upper right corner to add these students to this event.

On the Student Center screen, check the box to the left of the student’s name to select the students you want to join.
Once you have selected your students, click the “Select All Screened Students” or “Replace All Students” button in the upper right corner to add the selected students to this event.
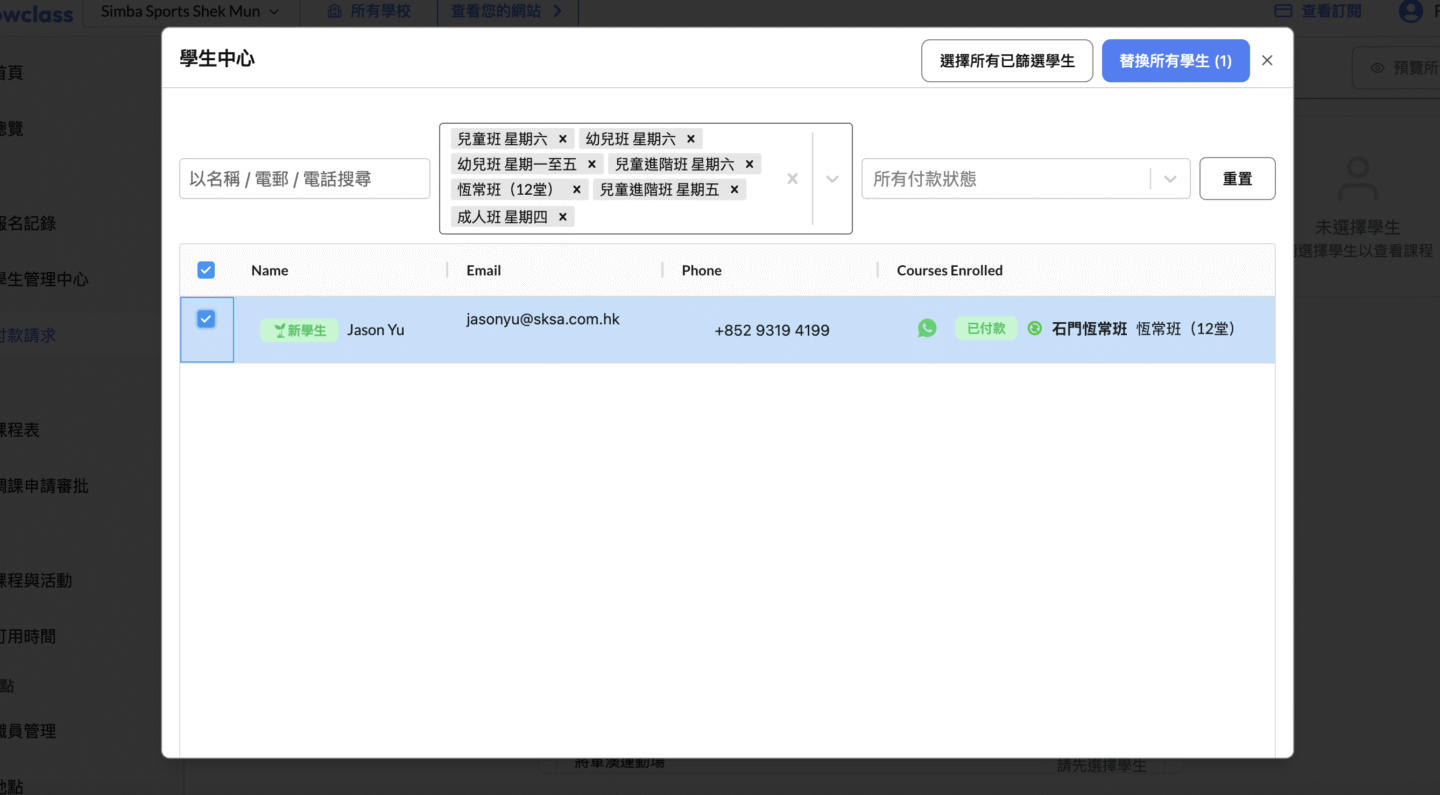
The list of selected students is displayed on the left side of the screen for easy oversight.
You can click on the name of any student to view the class and time slot details that the student has selected.
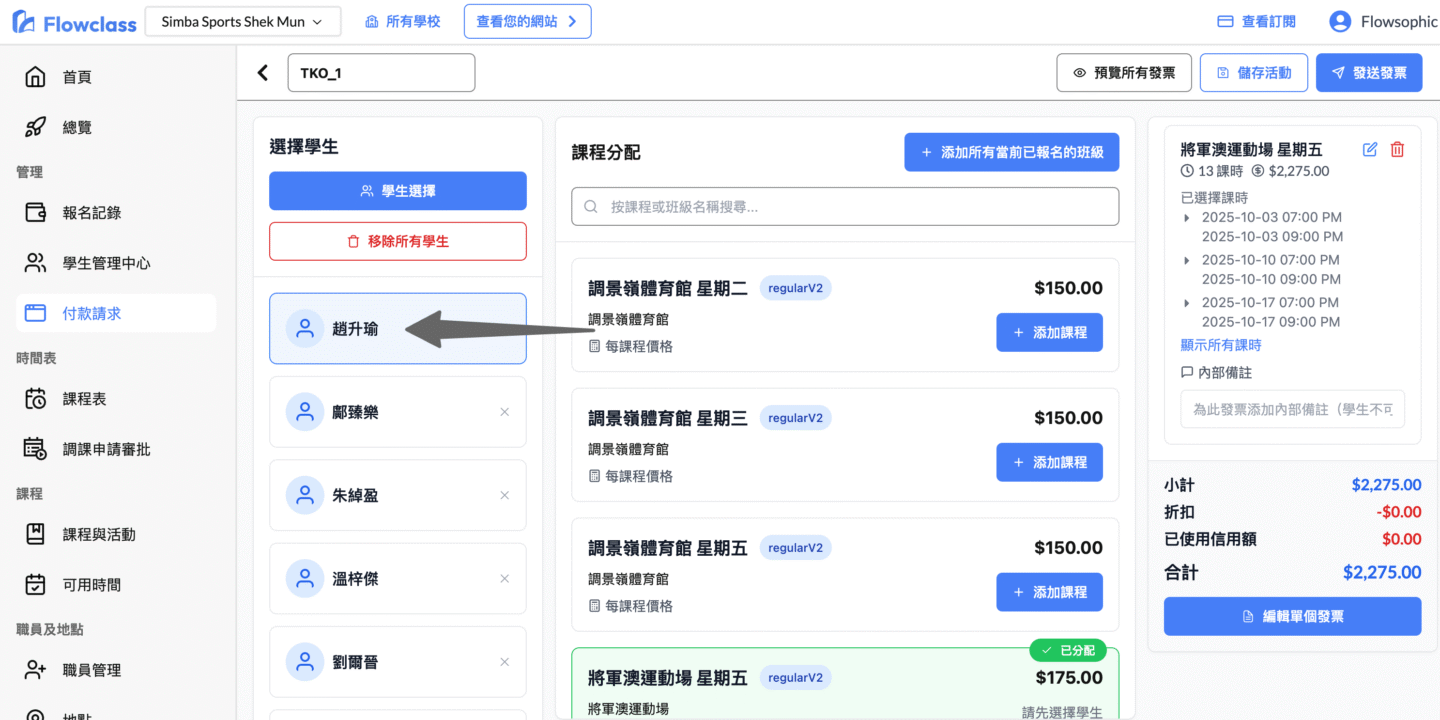
4. Choose a time #
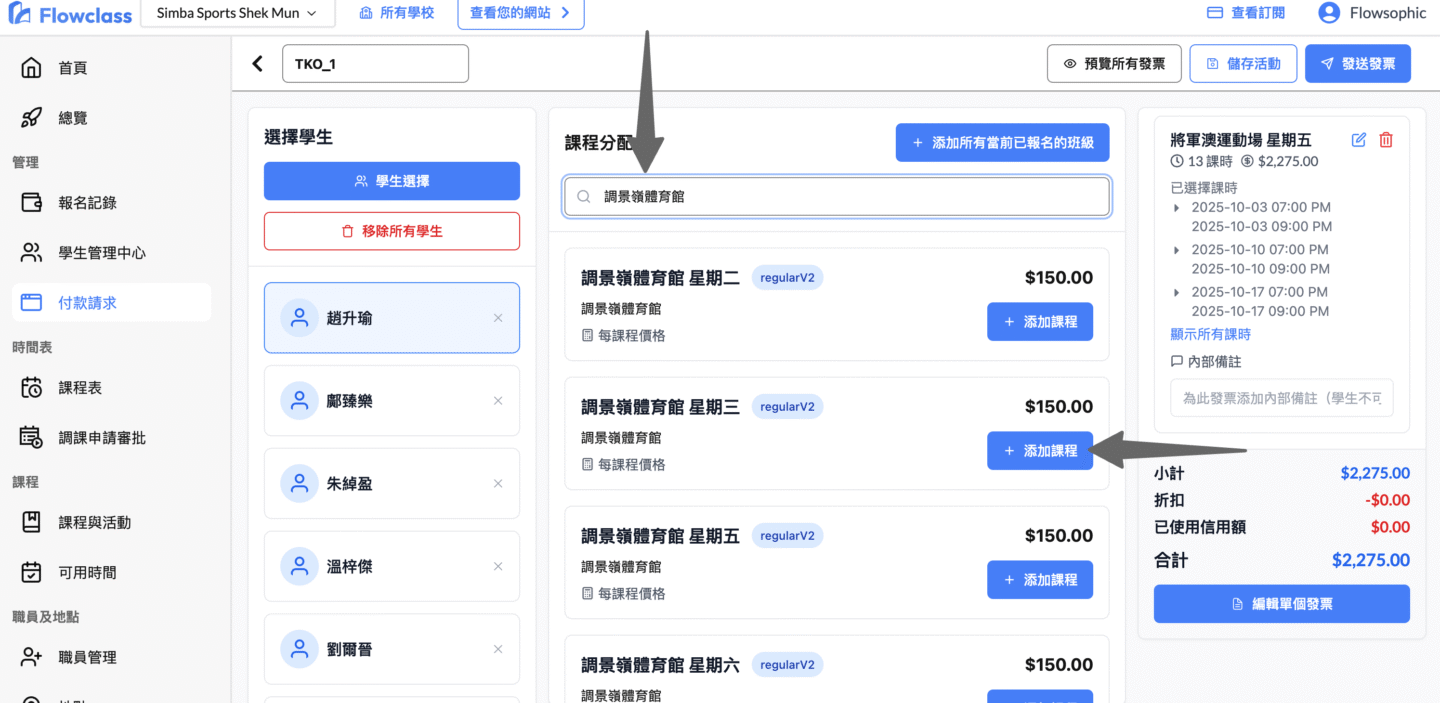
You can first enter the course name or keyword in the search bar above to quickly find the class you need.
Once searched, click the “+ Add Class” button to view and select all available classes and add them to your student’s class assignment.
In the class calendar, click on the class time you want to join.
After selecting the first class, you can click the “Add All Current Schedule Class Hours” button on the right to add all classes of the same type this month at once, saving operation time.
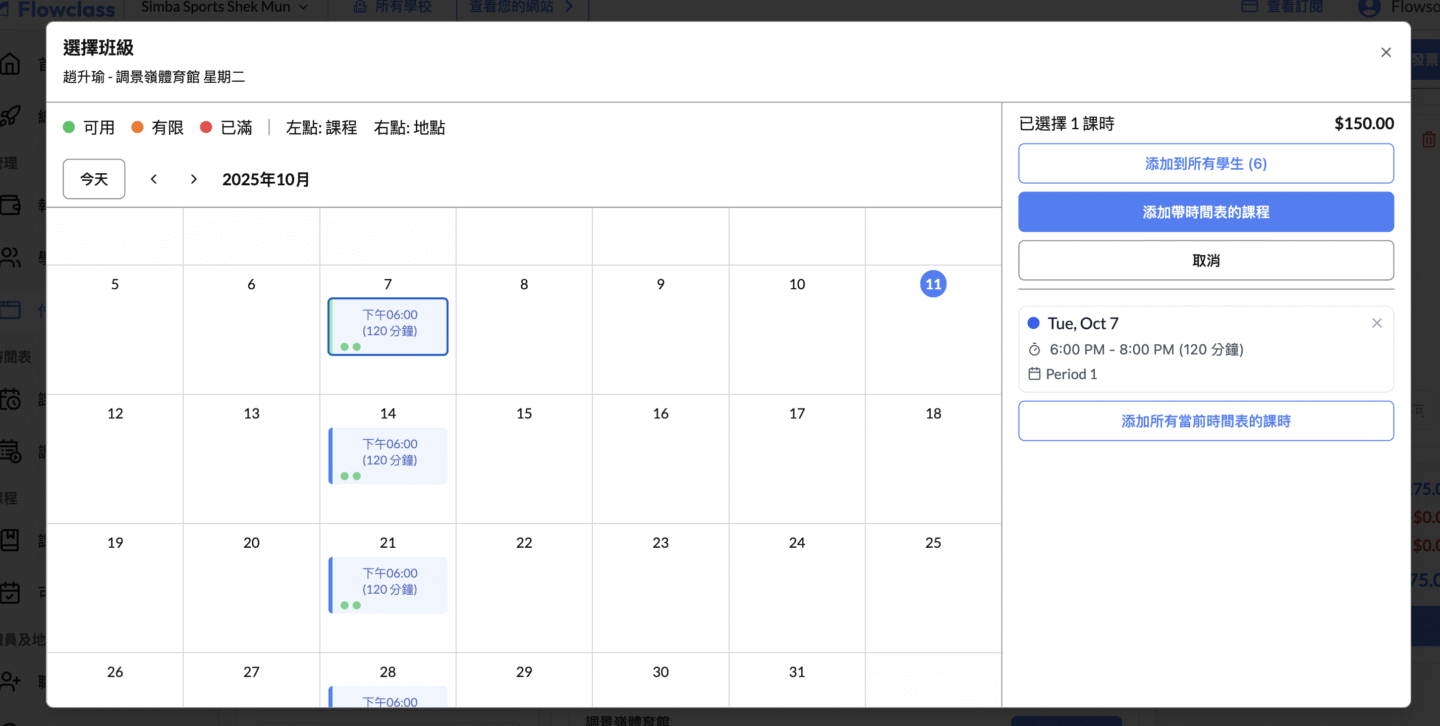
You can also click the “Add to All Students” button to assign the selected class to all selected students at once, without having to repeat the operation one by one
Add to All Students:
By clicking this button, you can assign all selected classes to all selected students at once, without adding them for each student one by one, suitable for situations where the whole class is in the same class.
Add a course with a timetable:
This button adds the class you just selected, including the date and time of the class, to the current student’s class assignment. It is suitable for assigning classes to only individual students, or when each student has different class times.
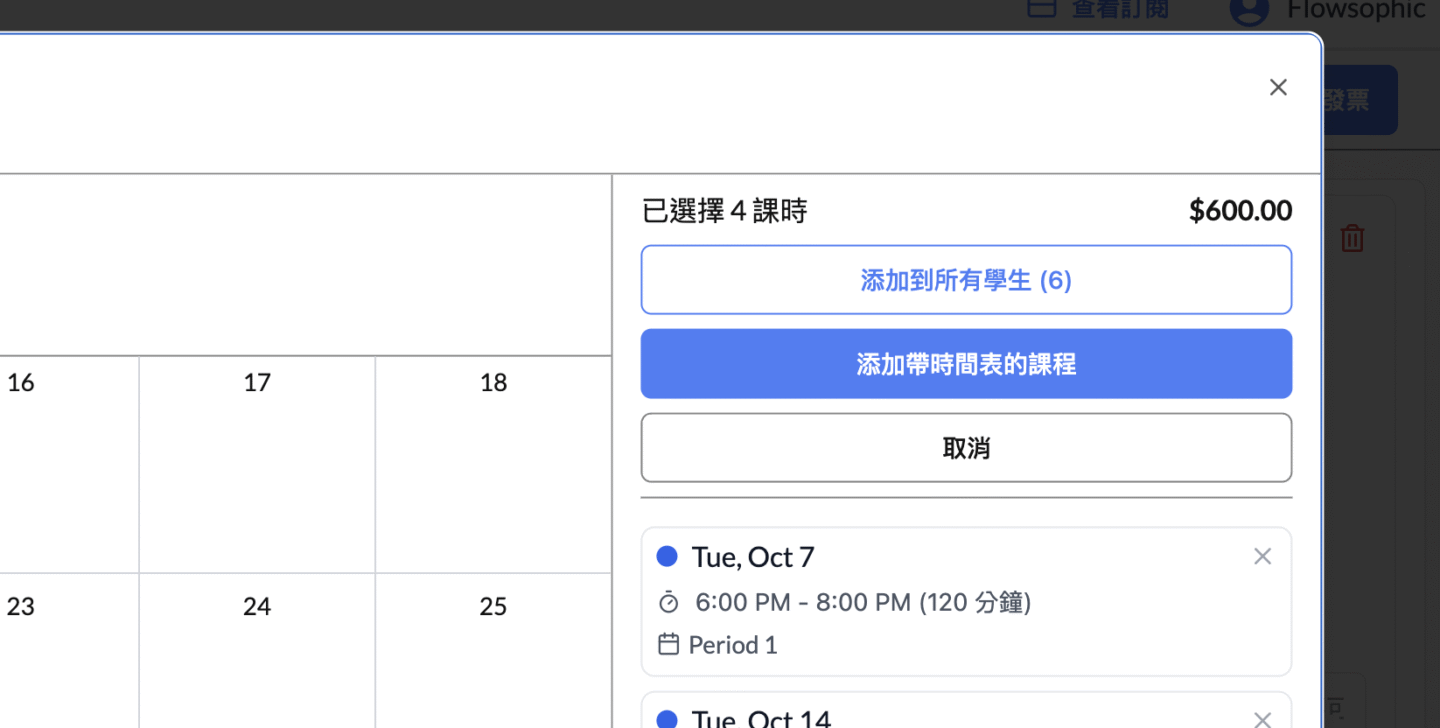
You can click the “Edit” icon to modify the class content in the list of selected classes on the right, or click the “Trash” icon to delete/remove the class.
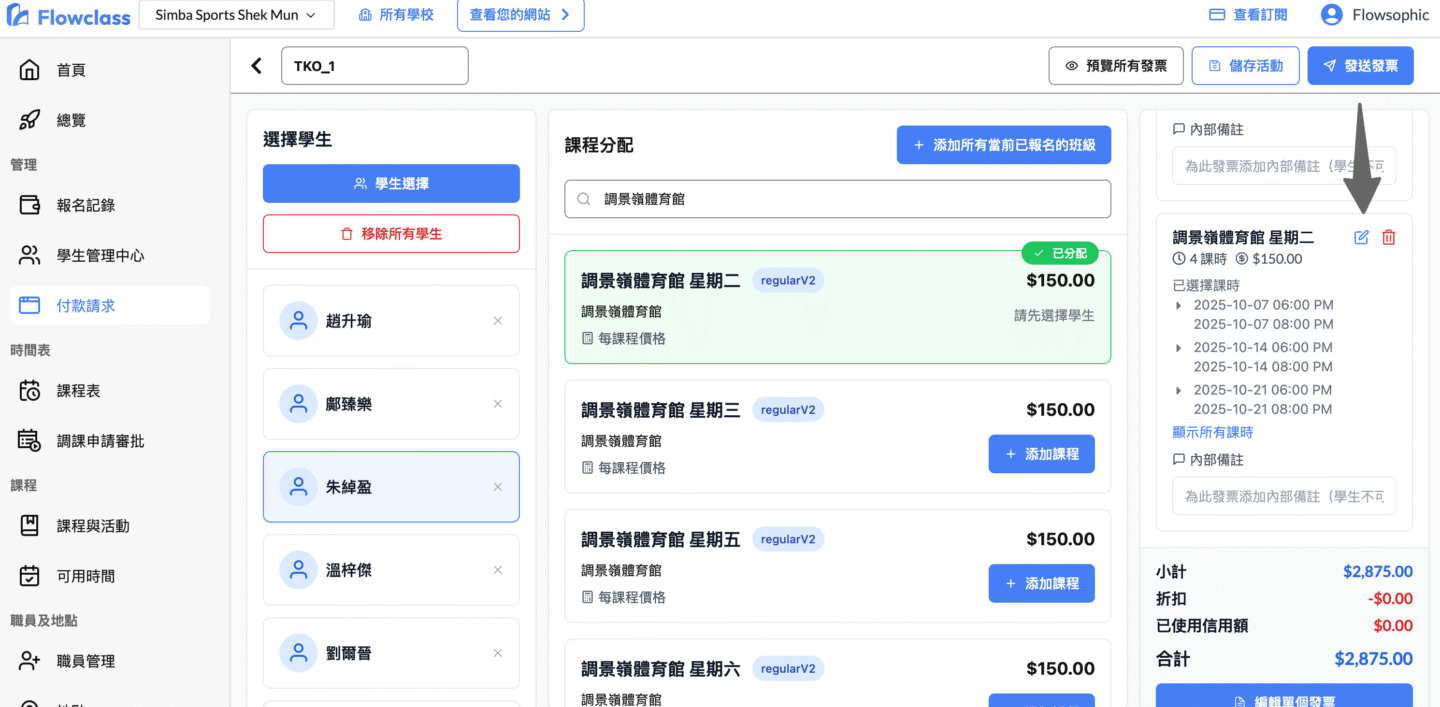
5. Change the invoice price #
If you need to modify the class price or add a discount for students, click the “Edit Individual Invoice” button in the bottom right.
After entering the editing page, you can directly adjust the price of each class or enter the corresponding discount amount in the discount field, and the system will automatically calculate the total amount.
Once you’re done setting up, remember to save your changes to ensure that all prices and discounts are correctly applied to your invoice.
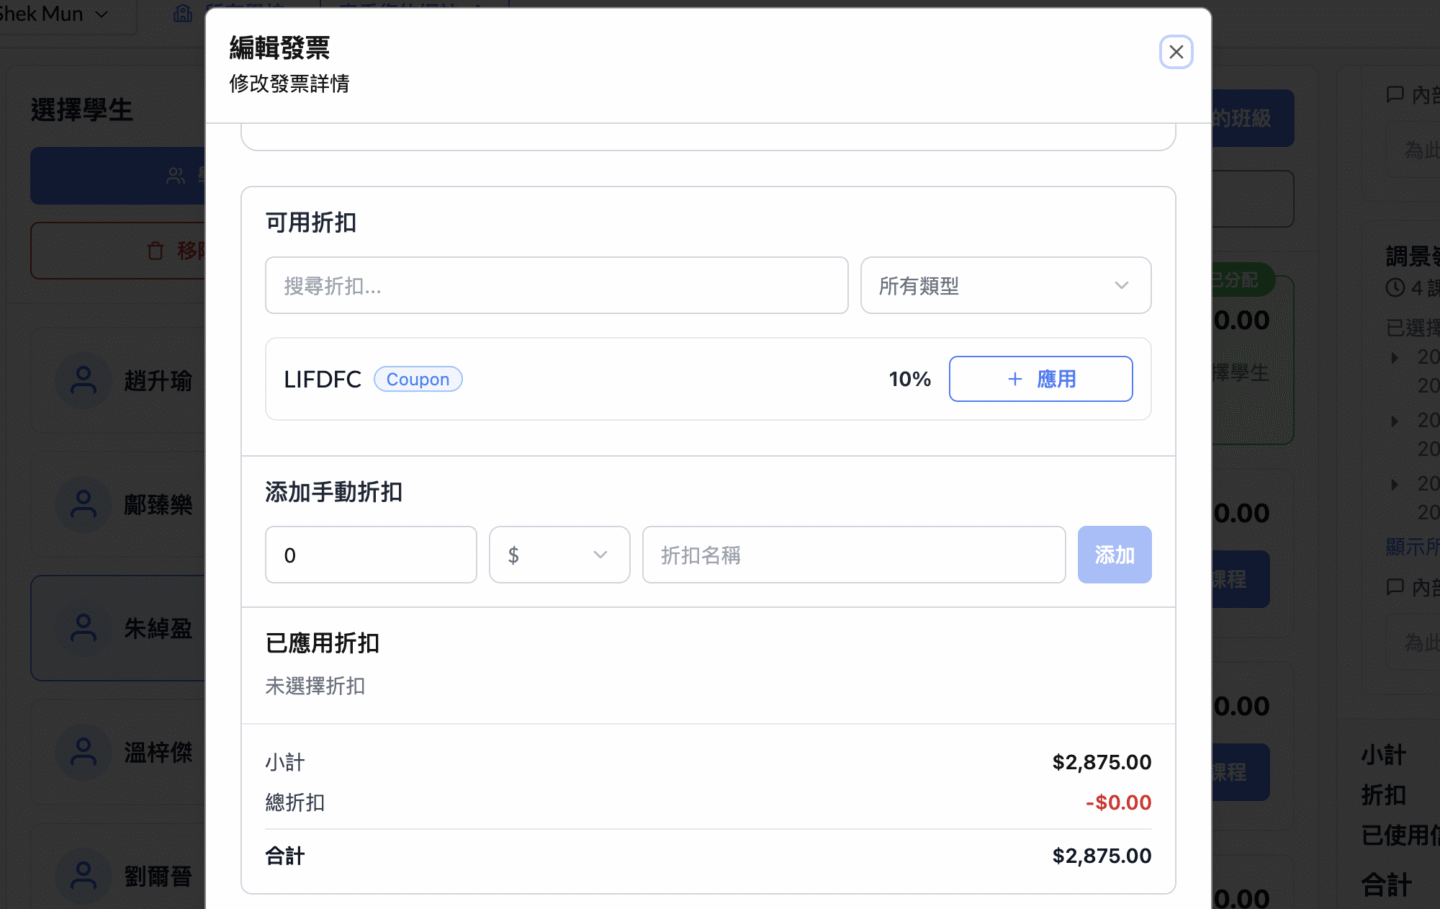
Use a default coupon
You can enter or select a pre-set coupon in the “Available discount” field (e.g., a three-month course discount with a lower tuition fee, etc.). After selecting, click “Apply” to automatically apply the discount, such as 90% off, 85% off, etc., and the system will automatically calculate the discounted amount.
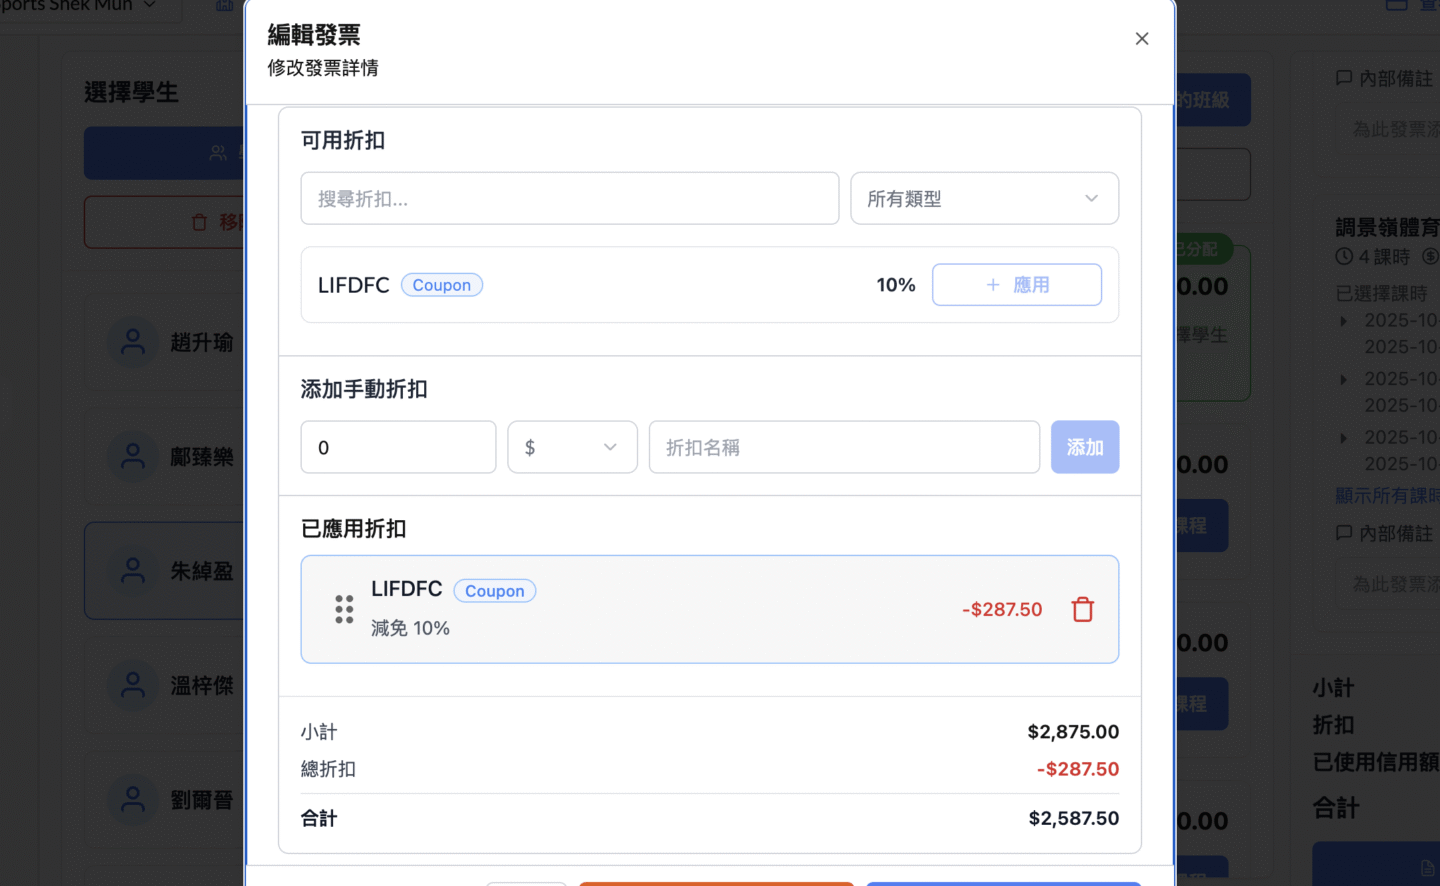
Add a manual discount
To customize the discount, fill in the discount amount or percentage under “Add manual discount”, enter a discount name (e.g., “long-term discount”), and click “Add”. This applies to individual offers in temporary or special circumstances.
Discount list with removal
All applied discounts will be displayed below, and you can remove unwanted discounts at any time by clicking the trash can icon, and the amount will be updated in real time.
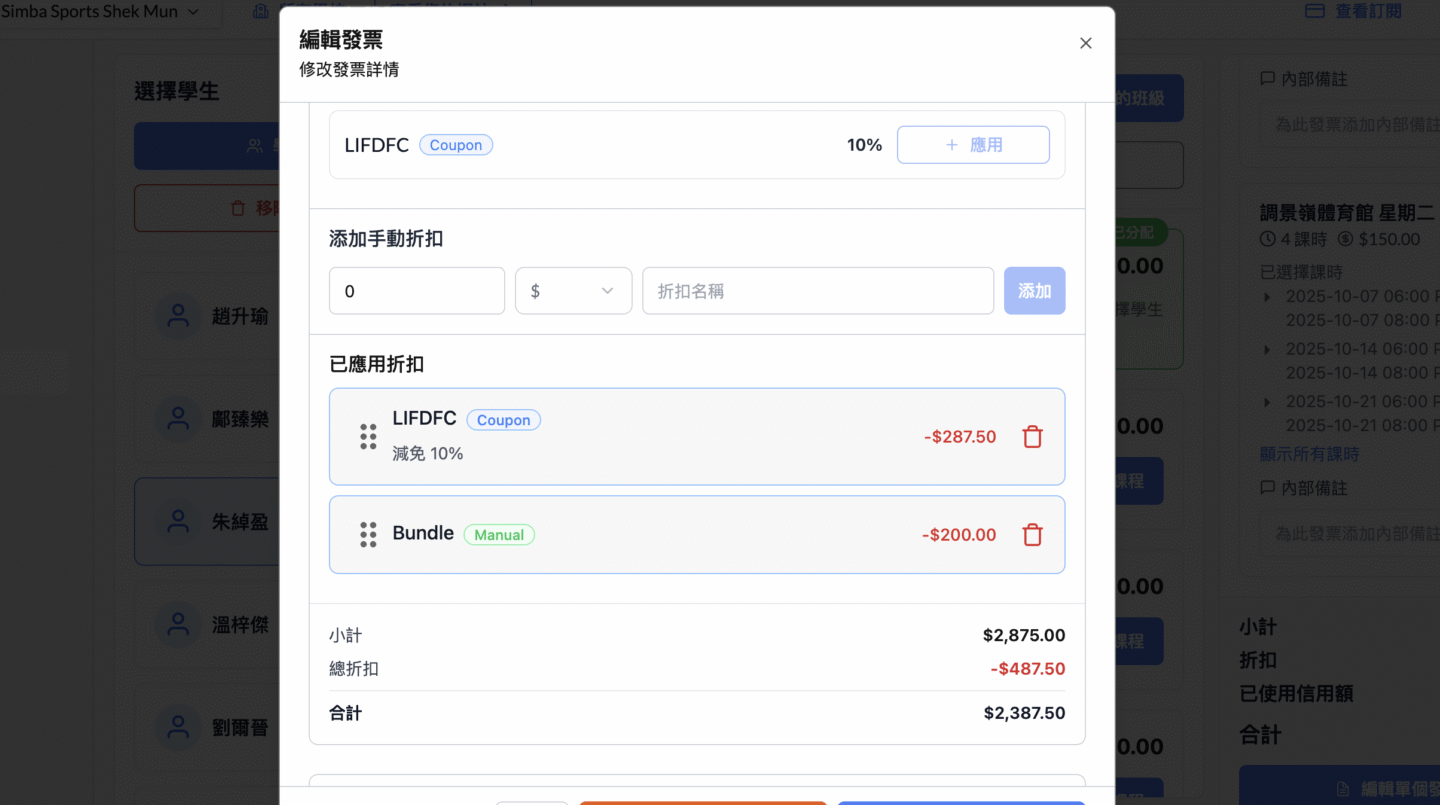
You can click the “Apply to All Invoices” button below to apply the currently set discounts and discounts to all selected students’ invoices at once, eliminating the need to repeat the settings one by one, greatly improving operational efficiency.
6. Final confirmation #
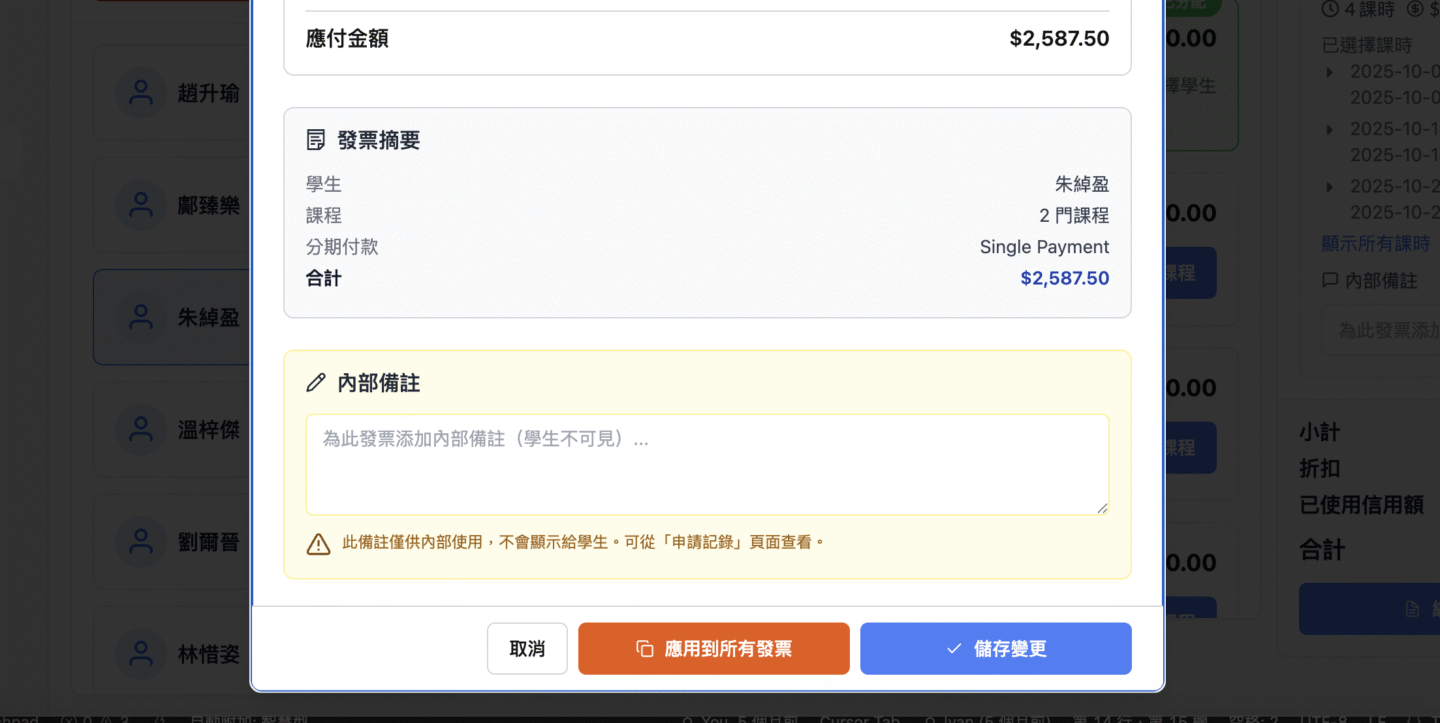
After completing all classes and discount settings, please confirm that the final amount displayed in the lower right corner is correct to ensure that all students’ invoices are correct.
If you don’t have time to complete it or need to make changes later, click the “Save Activity” button, and your current settings will be saved, so you can come back to continue the operation at any time in the future.

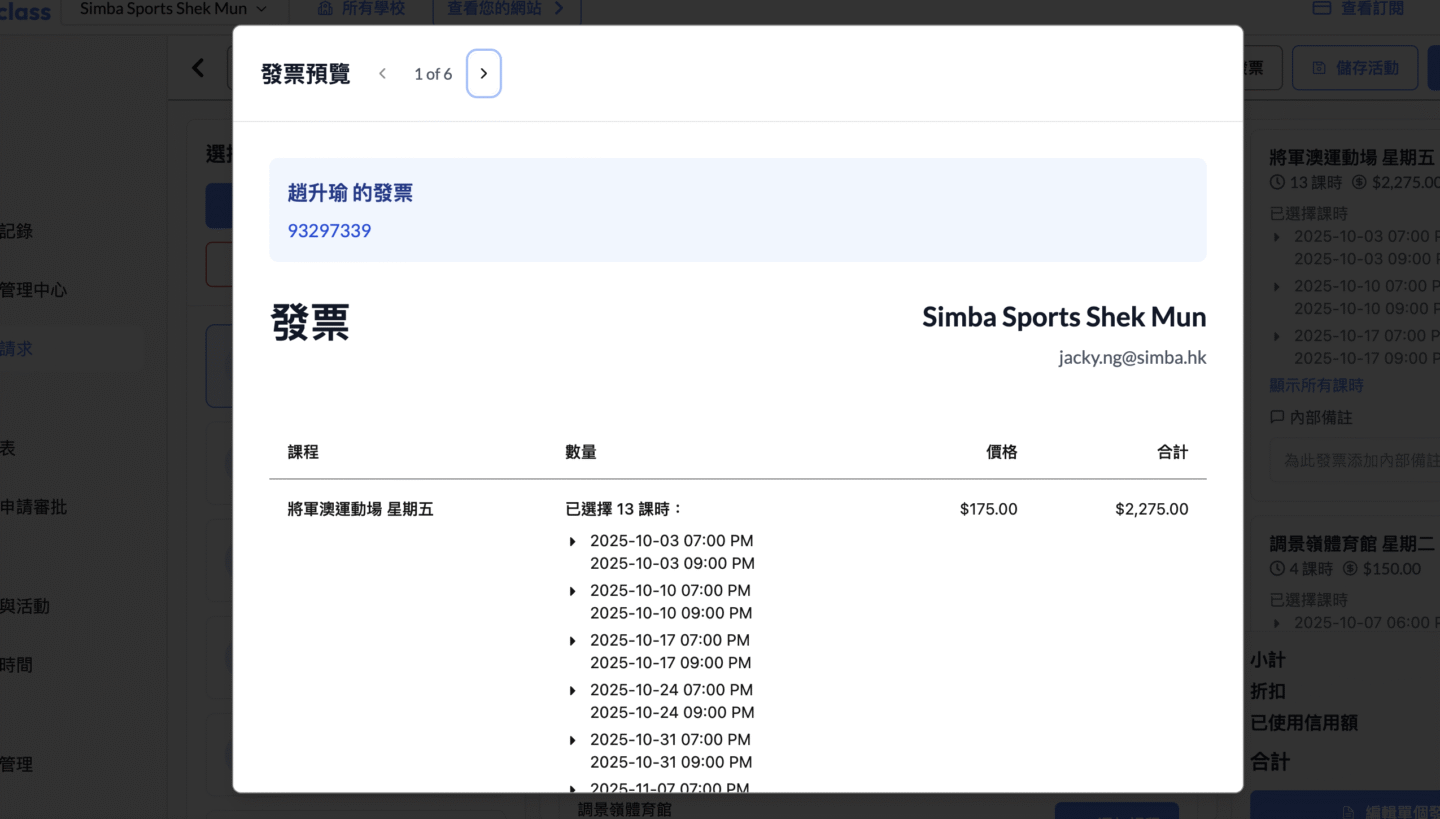
You can click the “Preview all invoices” button in the upper right corner to check the details of all invoices in advance for easy review again.
On the “Preview All Invoices” page, you can see a list of invoices for all students, and you can use the left and right arrow buttons above to switch between different students to view each student’s invoice details and class records one by one to ensure that all information is correct.
When sending invoices, you can choose to turn on the “Email Notifications” or “WhatsApp Notifications” switch to let the system automatically send invoice PDFs and notifications to students.
If neither notification method is turned on, the invoice will still be created, but will not be automatically sent to the student. You can manually send it later or download the PDF to distribute yourself.
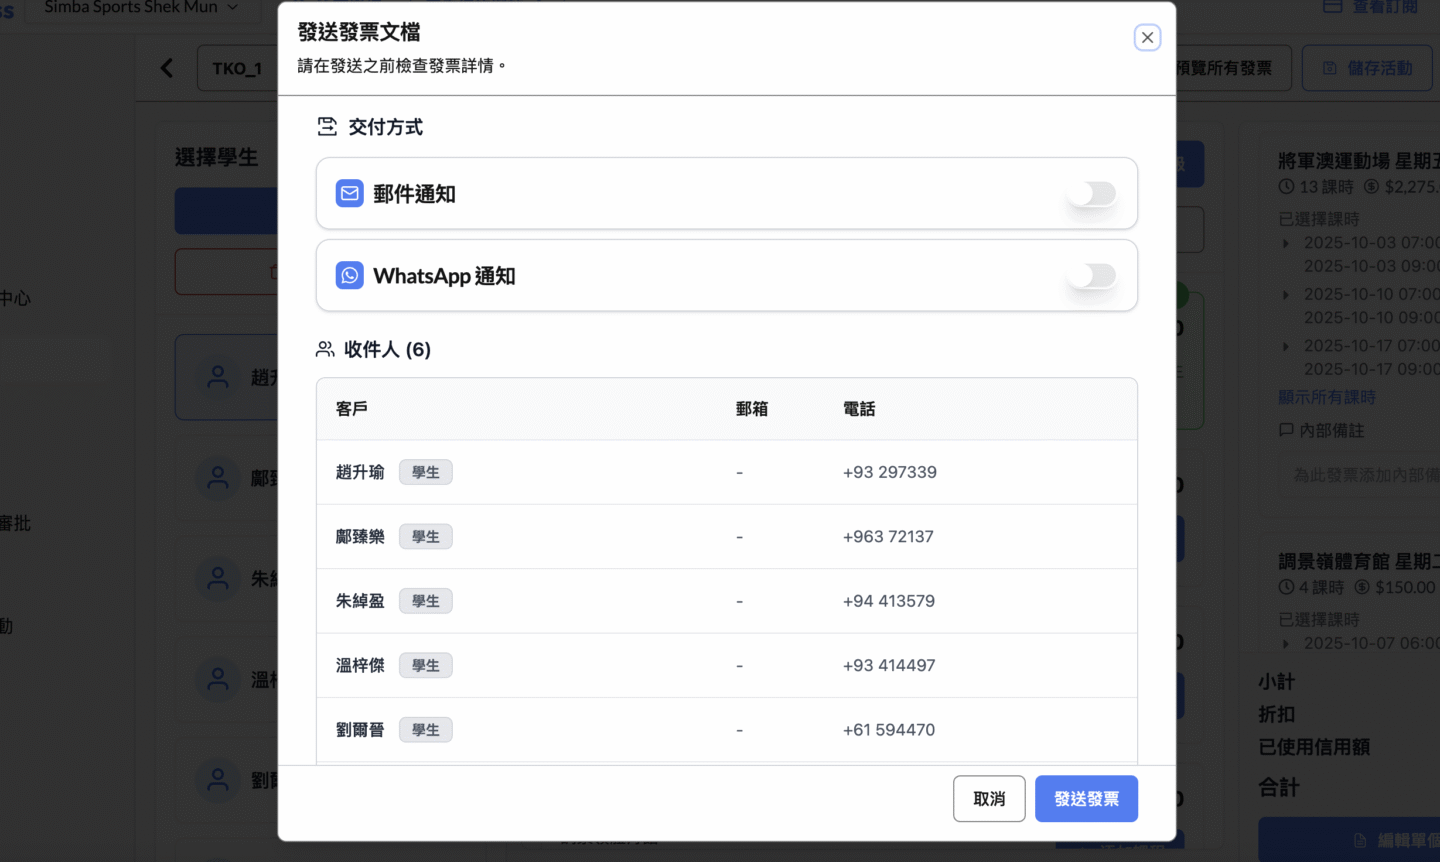
Once you have everything set up, click the “Send Invoice” button to create and send the invoice.
When you click “Send Invoice”, the system will display the “Invoice Processing” screen, and you can see the progress of invoice creation and sending in real time. After all invoices are successfully created and sent, the screen will display “All completed!” and list all successfully created invoices and amounts, so that you can check the status of each invoice.
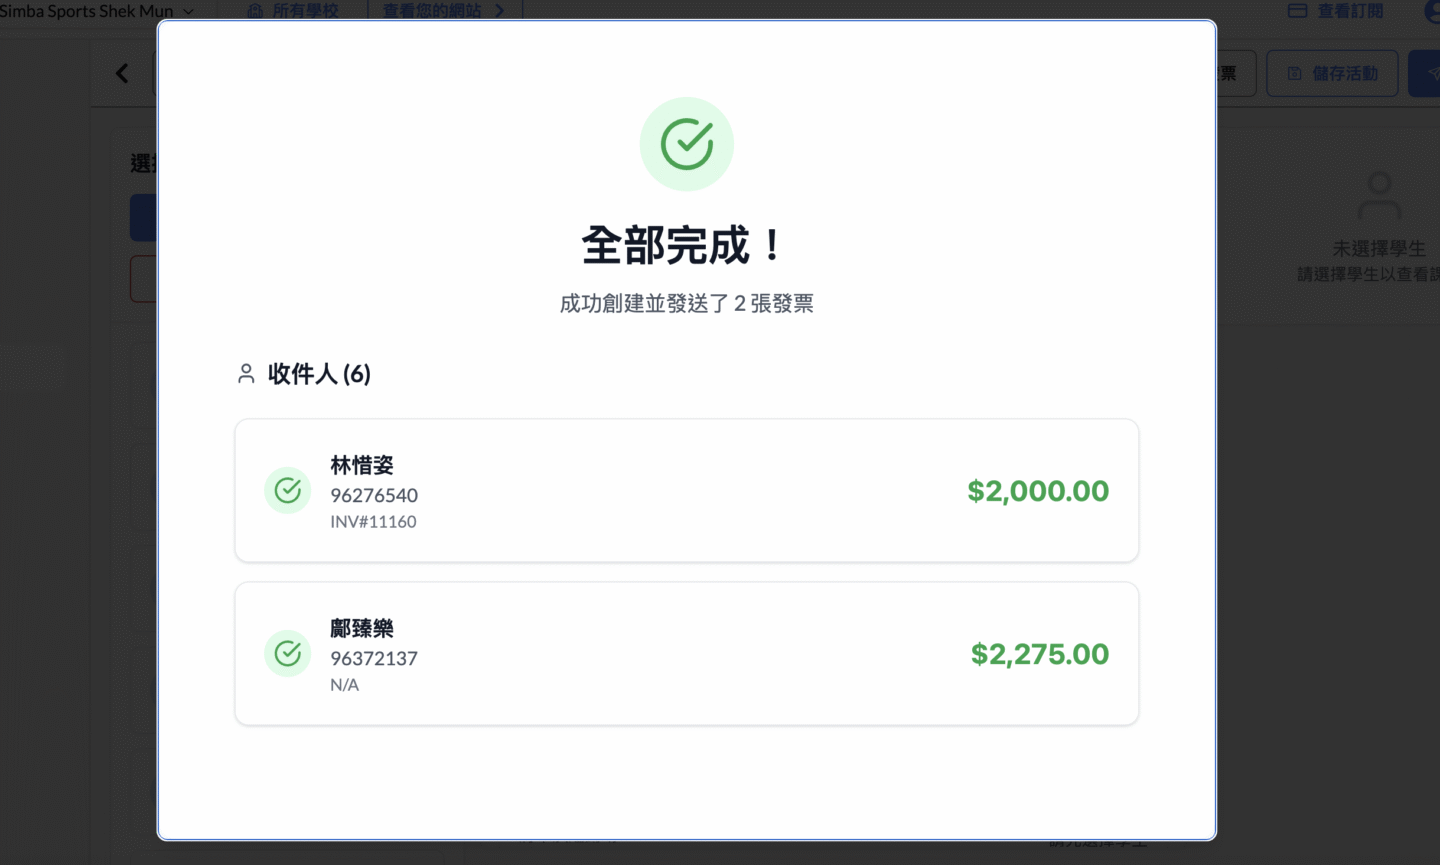
All created invoices can be viewed on the “Enrollment History” page in the left menu, allowing you to track and manage all students’ payment records in the future.