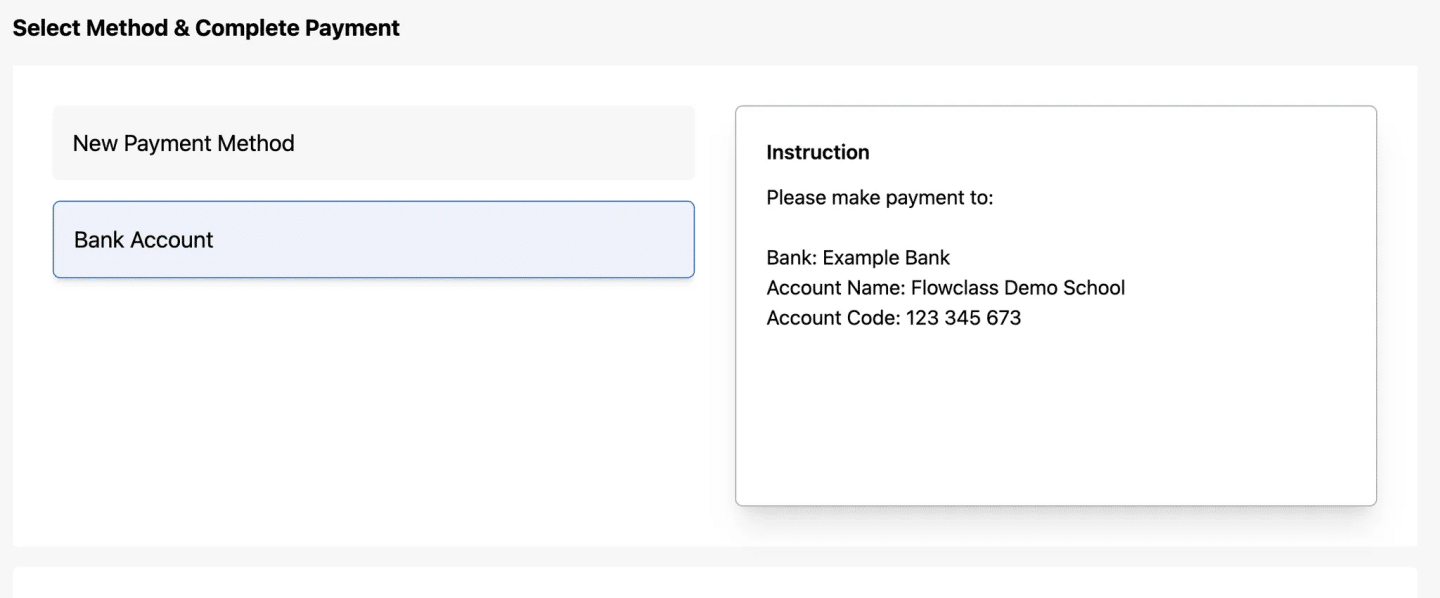
How it looks like in the front end #
The front-end payment selection interface is designed to provide a clean and user-friendly experience for completing payments.
The payment will go directly to the accounts that you have entered.
1. Navigate to Payment Methods
- On the left-hand menu, click on “Payment Methods” under the Management section.
- This will open a page displaying your existing payment methods.
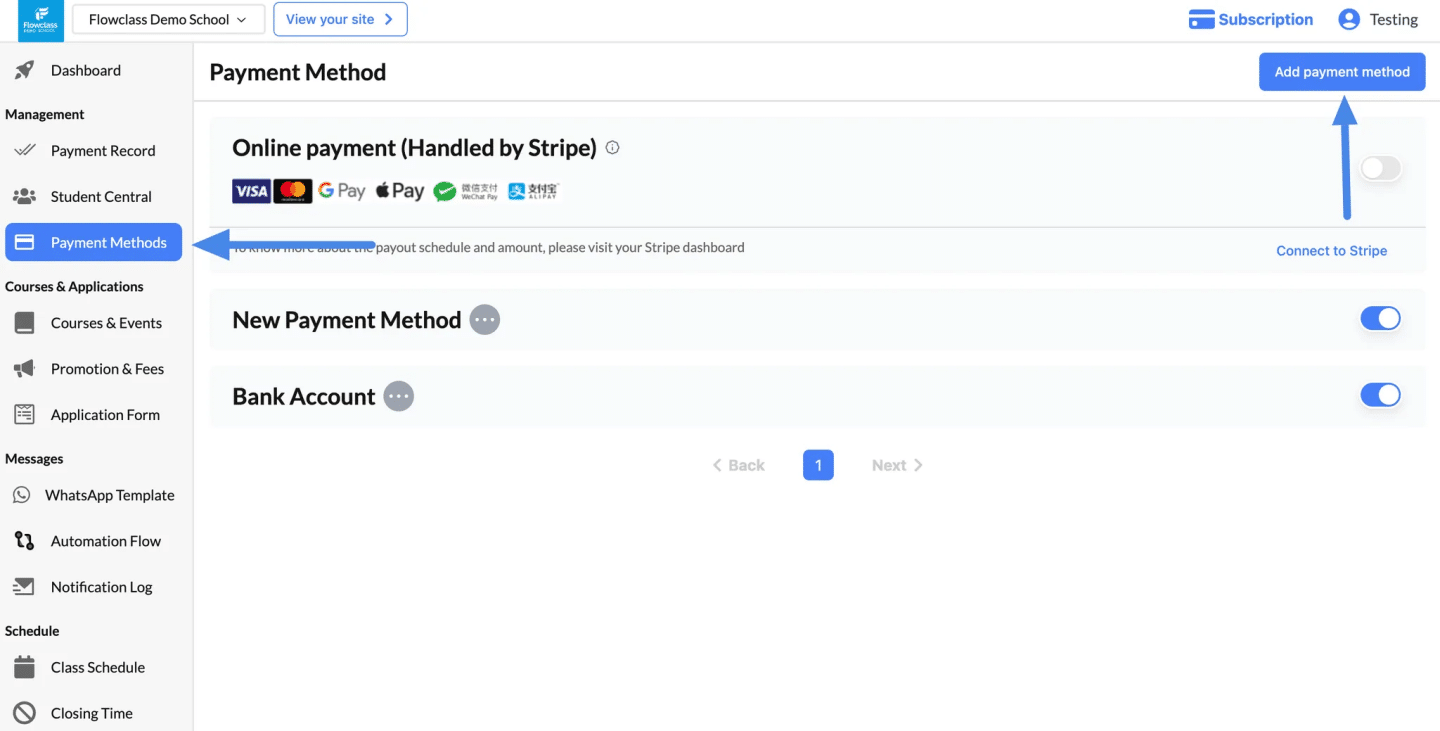
2. Click “Add Payment Method” #
- Locate the “Add Payment Method” button in the top-right corner of the page.
- Click the button to start the process of adding a new payment method.
Add Payment Method #
1. Enter the Payment Method Name
- In the “Payment Method Name” field, type the name of the payment method.
- Examples: “Bank Transfer,” “Cash Payment,” or “QR Code Payment.”
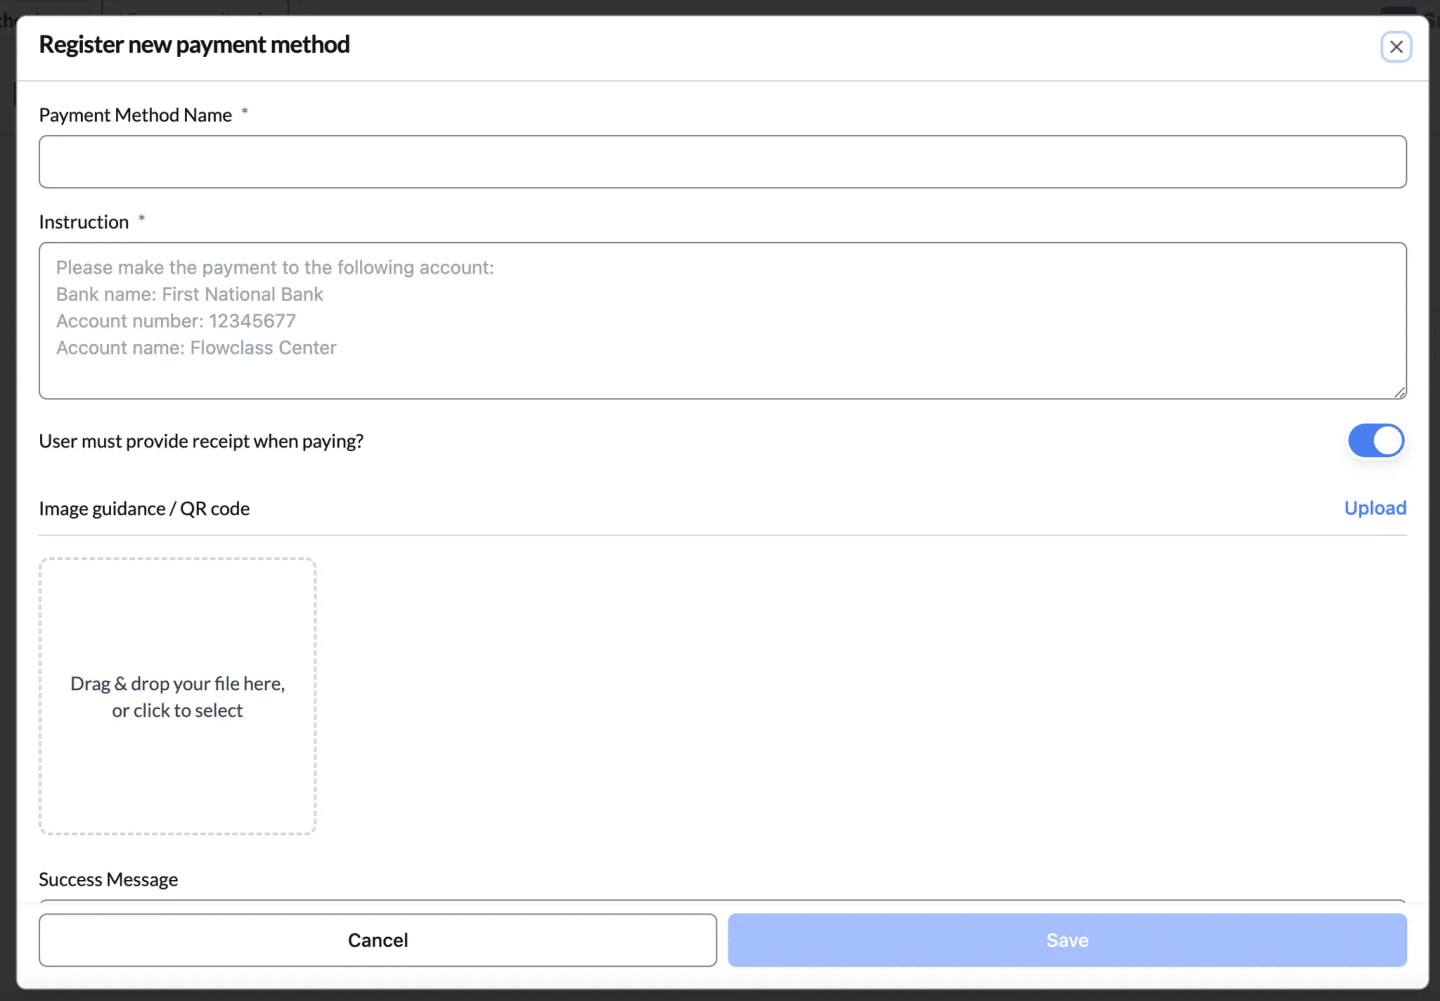
2. Provide Instructions
- In the “Instruction” field, write clear and concise steps for the user to make the payment.
- Example for Bank Transfer:
Please make the payment to the following account: Bank Name: First National Bank Account Number: 12345677 Account Name: Flowclass Center
- Example for Bank Transfer:
3. Require Receipt Upload (Optional)
- Toggle the “User must provide receipt when paying?” switch to ON if you require users to upload proof of payment.
- This is useful for verifying bank transfers or manual payments.
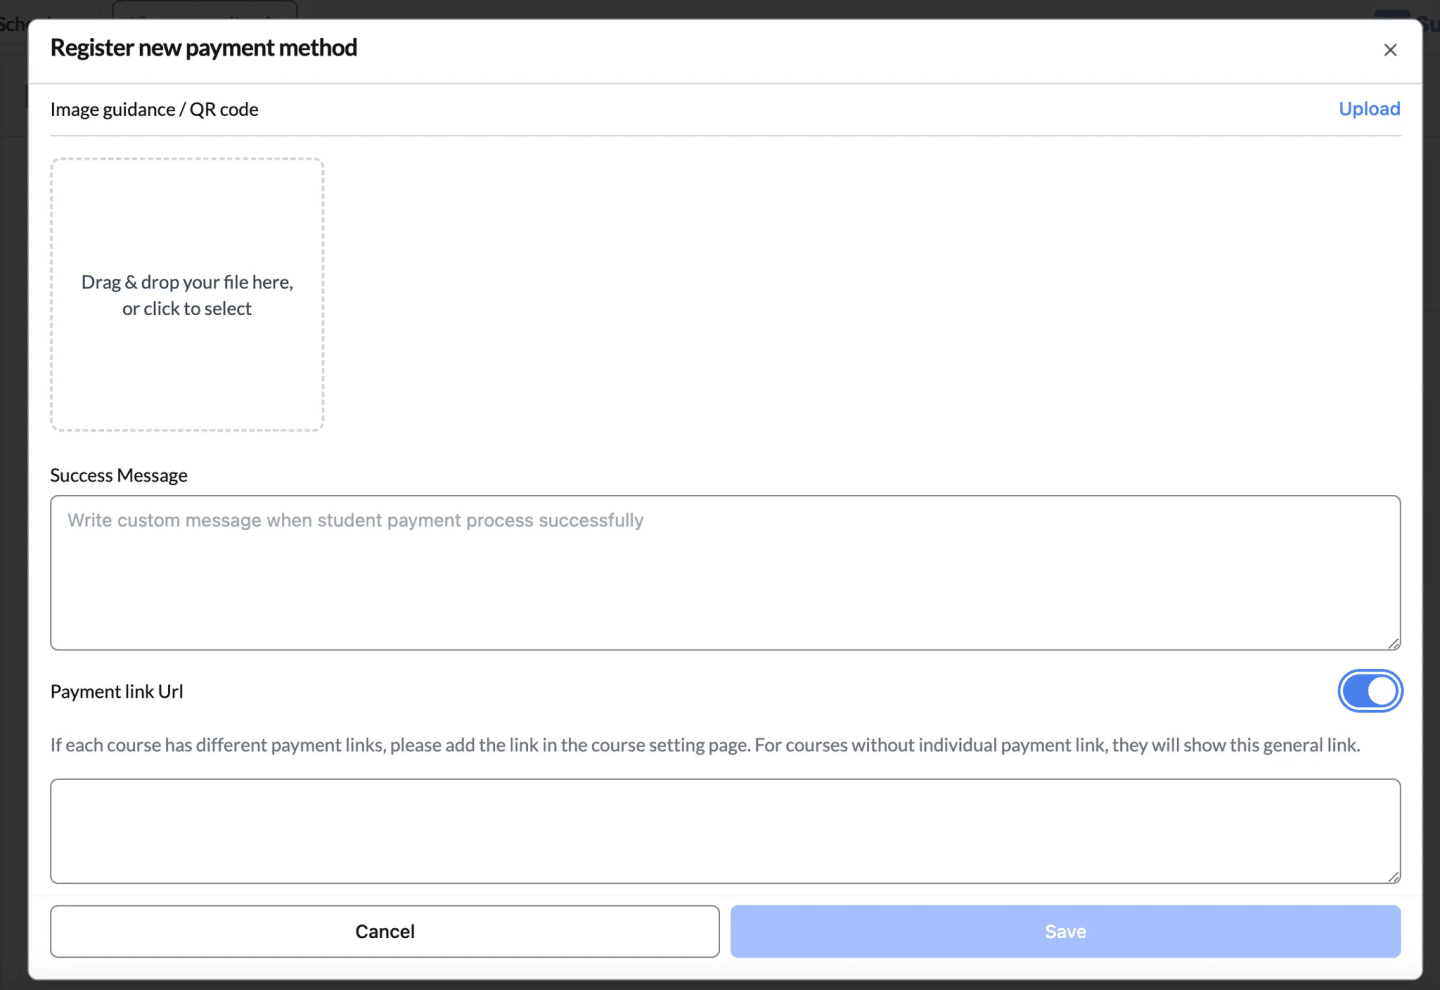
4. Add Image Guidance or QR Code
- Use the “Image guidance / QR code” upload section to provide additional visual instructions:
- Drag and drop an image file or click to upload it.
- Examples:
- Upload a QR code for mobile payment.
- Upload a sample receipt with instructions for users.
5. Set a Success Message (Optional)
- In the “Success Message” field, write a custom message to confirm successful payment registration.
- Example: “Thank you! Your payment has been registered successfully. We’ll process it shortly.”
6. Write a Custom Success Message
- Use the “Success Message” field to write a personalized confirmation message that will display to users after successful payment registration.
- Example Messages:
- “Your payment has been successfully recorded. Thank you!”
- “Payment received! We’ll process your request shortly.”
- Example Messages:
Edit or Remove Payment Method #
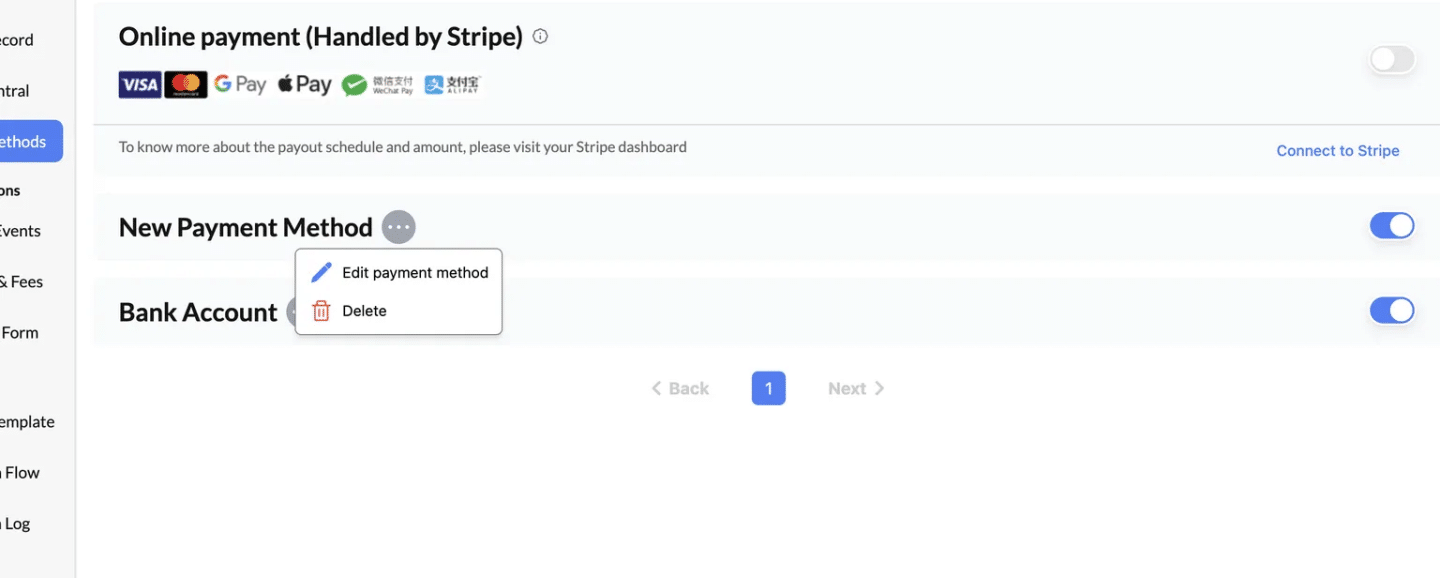
1. Edit a Payment Method
- Locate the payment method you want to edit in the list.
- Click the three-dot menu (
...) next to the payment method. - Select “Edit payment method” from the dropdown.
- Update the details in the modal that appears (e.g., payment method name, instructions, or success message).
- Click “Save” to apply the changes.
Tip: Use this to update account details or improve instructions for users.
2. Delete a Payment Method
- Find the payment method you want to remove from the list.
- Click the three-dot menu (
...) next to the payment method. - Select “Delete” from the dropdown.
- A confirmation prompt will appear to ensure you want to proceed.
- Confirm the deletion, and the payment method will be permanently removed.
Important: Deleting a payment method will make it unavailable for future transactions. Consider disabling it instead if you might need it later.
3. Enable or Disable a Payment Method #
- Use the toggle switch next to each payment method to enable or disable it:
- Enable: The toggle turns blue, making the payment method active and available to users.
- Disable: The toggle turns gray, temporarily hiding the payment method from users.
Use Case: Temporarily disable methods during maintenance or if they’re not currently in use.


