Edit WhatsApp Templates #
Editing or managing your existing WhatsApp templates ensures that your communication is always relevant and up-to-date. Follow these simple steps to modify or delete templates on your platform.
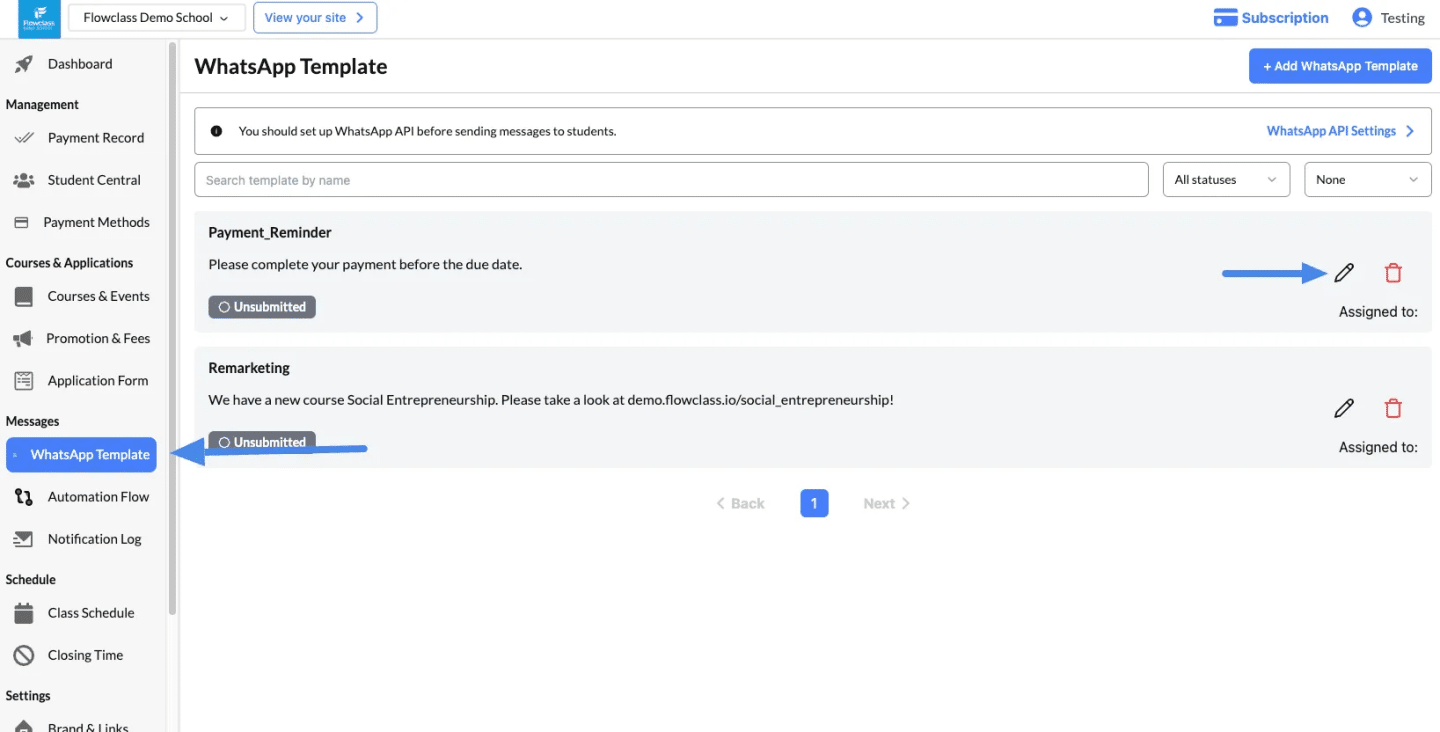
1. Access the WhatsApp Template Section #
- Navigate to the Messages section on the left-hand menu.
- Click on WhatsApp Template to view the list of existing templates.
2. View the List of Templates #
- You will see all previously created WhatsApp templates displayed with their:
- Name (e.g., Payment_Reminder, Remarketing).
- Content (a preview of the message).
- Status (e.g., Unsubmitted, Approved).
Tip: Use the search bar or filters (e.g., by status or name) to quickly locate a specific template.
3. Edit a Template #
- Locate the template you want to modify.
- Click the pencil icon on the right-hand side of the template.
- Make the necessary changes:
- Update the template name.
- Modify the message content to reflect new details or adjust placeholders (e.g.,
{{name}},{{date}}). - Revise the category if needed.
Template Name
4. Edit the Template Details #
- Ensure the name is descriptive and uses lowercase alphanumeric characters and underscores (e.g.,
payment_reminder). - Tip: Keep the name short and relevant to its purpose.
Assigned To
- Use the dropdown to assign the template to a specific department, user, or automation flow.
Template Content
- Update the message text to match the latest requirements. Use placeholders like
{{name}}or{{date}}for personalization.- Example: “Dear {{name}}, your payment is due on {{date}}. Please complete it to avoid service interruptions.”
Set as Default Template
- Enable the toggle to make this template the default for its assigned function.
- This will mark all other templates with the same assigned function as non-default.
Language
- Select the language for the template (e.g., English, Spanish).
Category
- Choose the appropriate category for the message, such as:
- Utility: For reminders and updates.
- Marketing: For promotions and event alerts.
5. Save the Changes #
- Once you’ve made all updates, click the Save button at the bottom of the form.
- The updates will be reflected, and the template’s status may need re-approval if changes are significant.
Note that ALL edited templates will be re-submitted to Twilio for approval. Therefore, you have to wait a while until the template can be used to send automated messages.
Delete a Template #
- To remove a template, click the trash bin icon (🗑️) next to the template.
- Confirm the deletion when prompted to permanently delete the template.
Caution: Deleting a template cannot be undone. Ensure you no longer need the template before removal.


