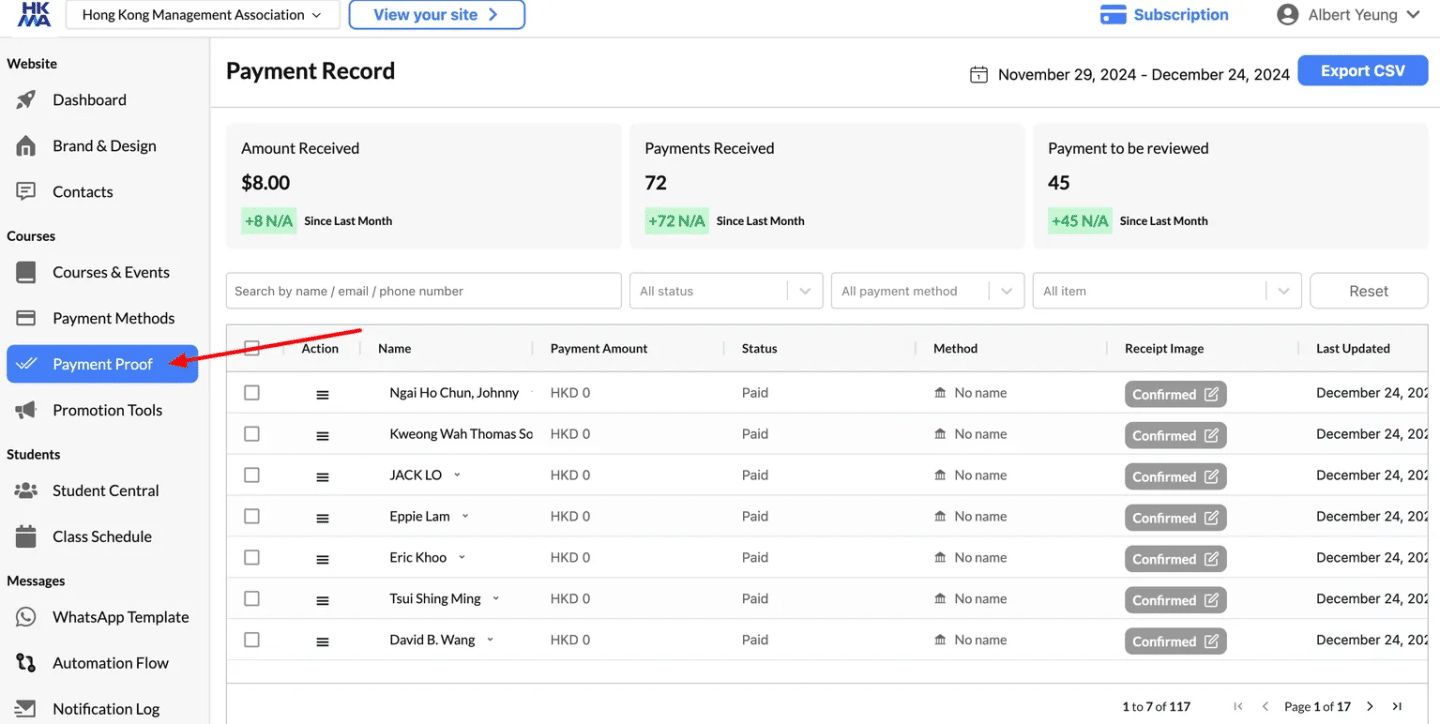
Step 1: Navigate to the Payment Record Section #
- On the left-hand menu, locate the “Payment Proof” option under the “Courses” category.
- Click on “Payment Proof” to access the relevant records.

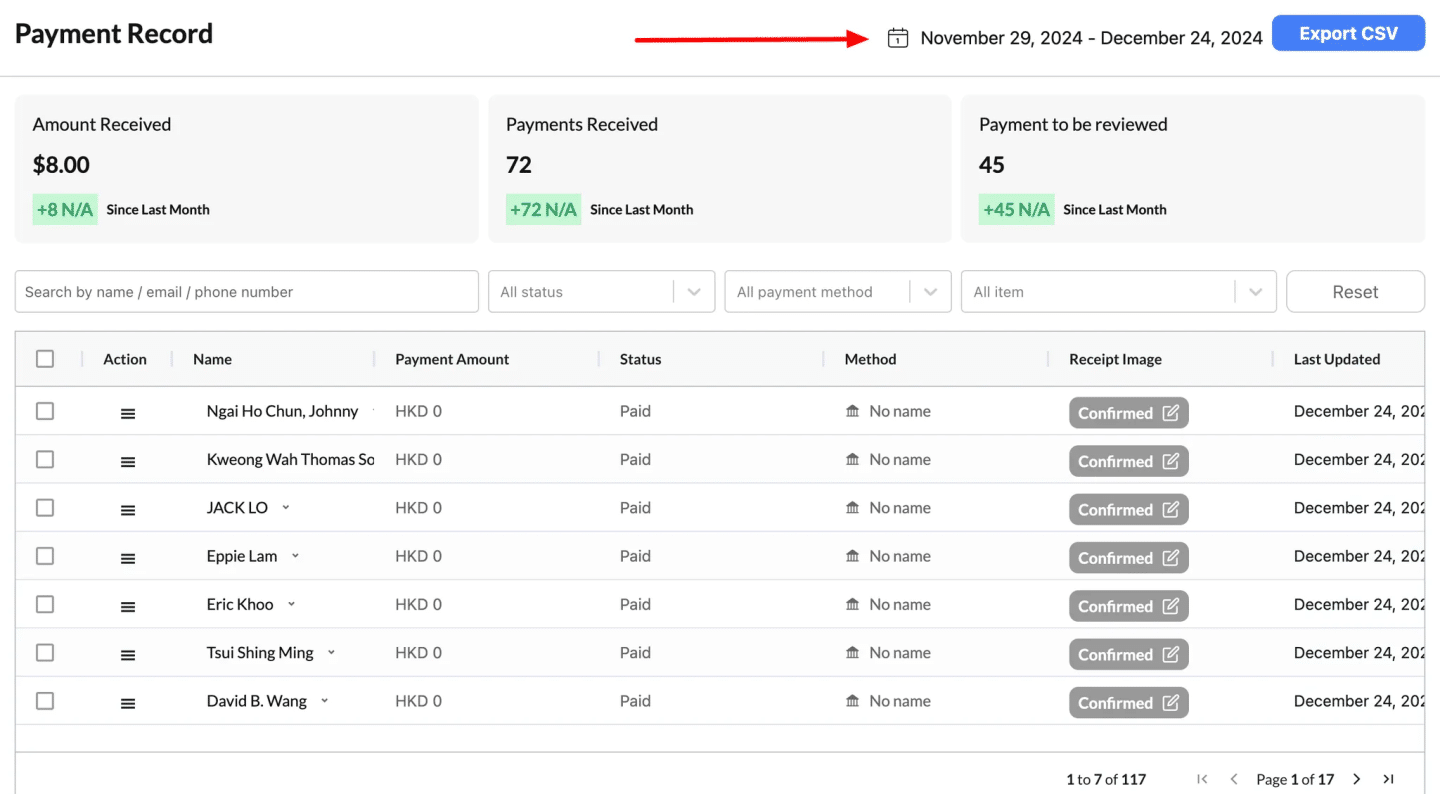
Step 2: Filter by Date to Narrow Your Search #
To refine your payment records based on a specific time frame, follow these steps:
- Locate the Date Selector:
- At the top-right corner of the page, find the date range section (e.g., November 29, 2024 – December 24, 2024).
- Set Your Desired Date Range:
- Choose the start date and end date to define the period you want to review.
- This will filter all payment records within the selected time frame.
- Apply the Filter:
- Once you’ve selected the date range, the system will automatically update the record list to display payments received or reviewed during that period.
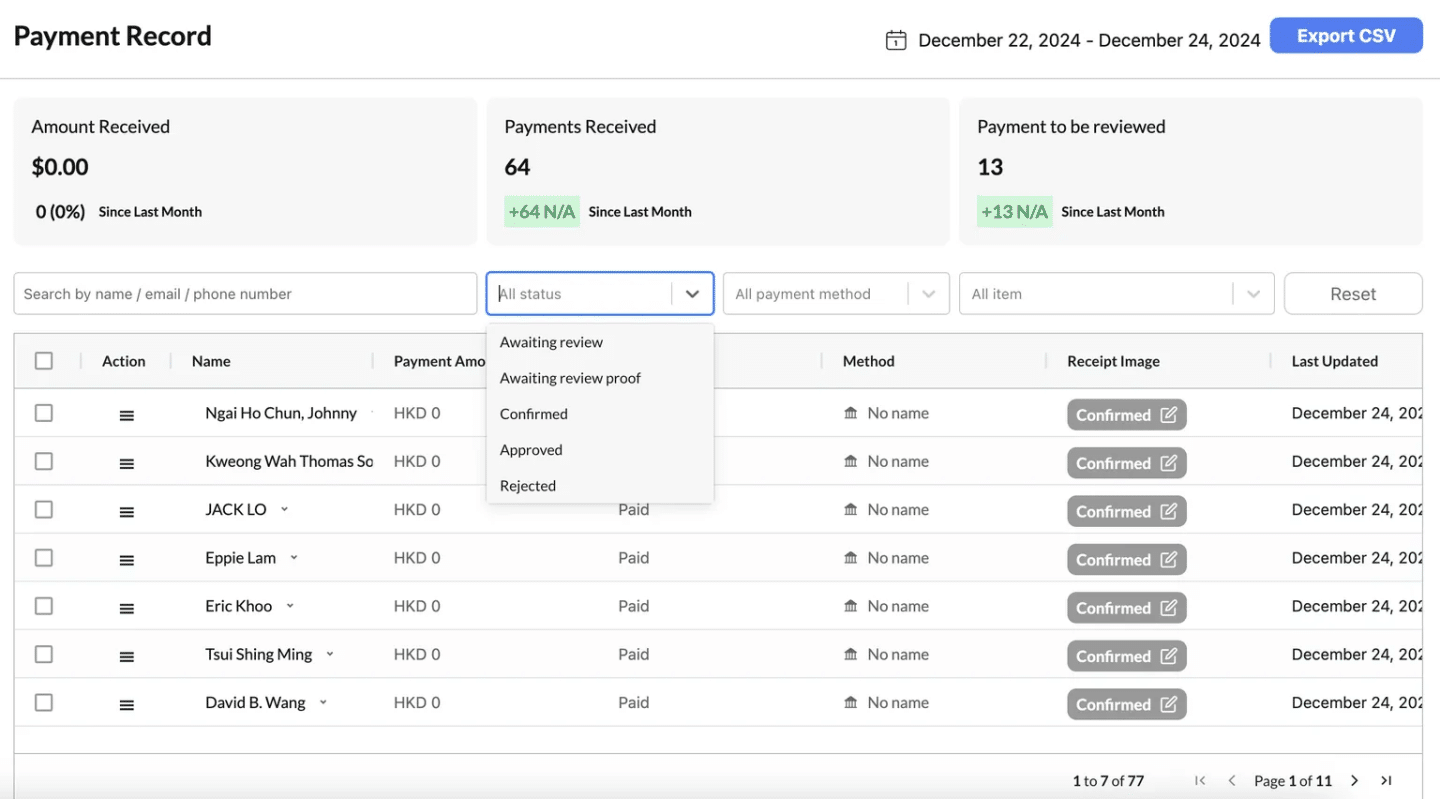
Step 3: Filter Applications by Status #
To manage and review applications effectively, you can filter them based on their current status. Here’s how:
- Locate the “All Status” Dropdown Menu:
- In the filter bar at the top of the table, find the “All Status” dropdown menu.
- Select a Status:
- Click the dropdown and choose from the following options:
| Status | What It Means |
|---|---|
| Awaiting Review | Application submitted but no payment has been made yet. |
| Awaiting Review Proof | Proof of payment uploaded, but awaiting admin approval. |
| Confirmed | Applicant has completed the process or used a coupon code for a free ticket. |
| Approved | Application reviewed and accepted by the admin. |
| Rejected | Application reviewed but did not meet the necessary criteria or requirements. |
- Apply the Filter:
- Once you select a status, the table will automatically update to display only records matching that status.
Step 1: Navigate to the Payment Record Section #
- On the left-hand menu, locate the “Payment Proof” option under the “Courses” category.
- Click on “Payment Proof” to access the relevant records.
Step 2: Filter by Date to Narrow Your Search #
To refine your payment records based on a specific time frame, follow these steps:
- Locate the Date Selector:
- At the top-right corner of the page, find the date range section (e.g., November 29, 2024 – December 24, 2024).
- Set Your Desired Date Range:
- Choose the start date and end date to define the period you want to review.
- This will filter all payment records within the selected time frame.
- Apply the Filter:
- Once you’ve selected the date range, the system will automatically update the record list to display payments received or reviewed during that period.

Step 3: Filter Applications by Status #
To manage and review applications effectively, you can filter them based on their current status. Here’s how:
- Locate the “All Status” Dropdown Menu:
- In the filter bar at the top of the table, find the “All Status” dropdown menu.
- Select a Status:
- Click the dropdown and choose from the following options:
| Status | What It Means |
|---|---|
| Awaiting Review | Application submitted but no payment has been made yet. |
| Awaiting Review Proof | Proof of payment uploaded, but awaiting admin approval. |
| Confirmed | Applicant has completed the process or used a coupon code for a free ticket. |
| Approved | Application reviewed and accepted by the admin. |
| Rejected | Application reviewed but did not meet the necessary criteria or requirements. |
- Apply the Filter:
- Once you select a status, the table will automatically update to display only records matching that status.