Adding a Student to the CRM #
Effortlessly manage your students’ information with the Student Record module. Whether you’re adding new students, tracking payments, or managing course enrollments, this guide will walk you through every step to ensure a seamless experience.
1. Access the Student Record Module #
- Log in to your admin dashboard.
- Click on Student Central in the left-hand menu.
- Pro Tip: The module also provides real-time financial stats like Total Revenue, Unpaid Revenue, and Overdue Revenue for quick insights.

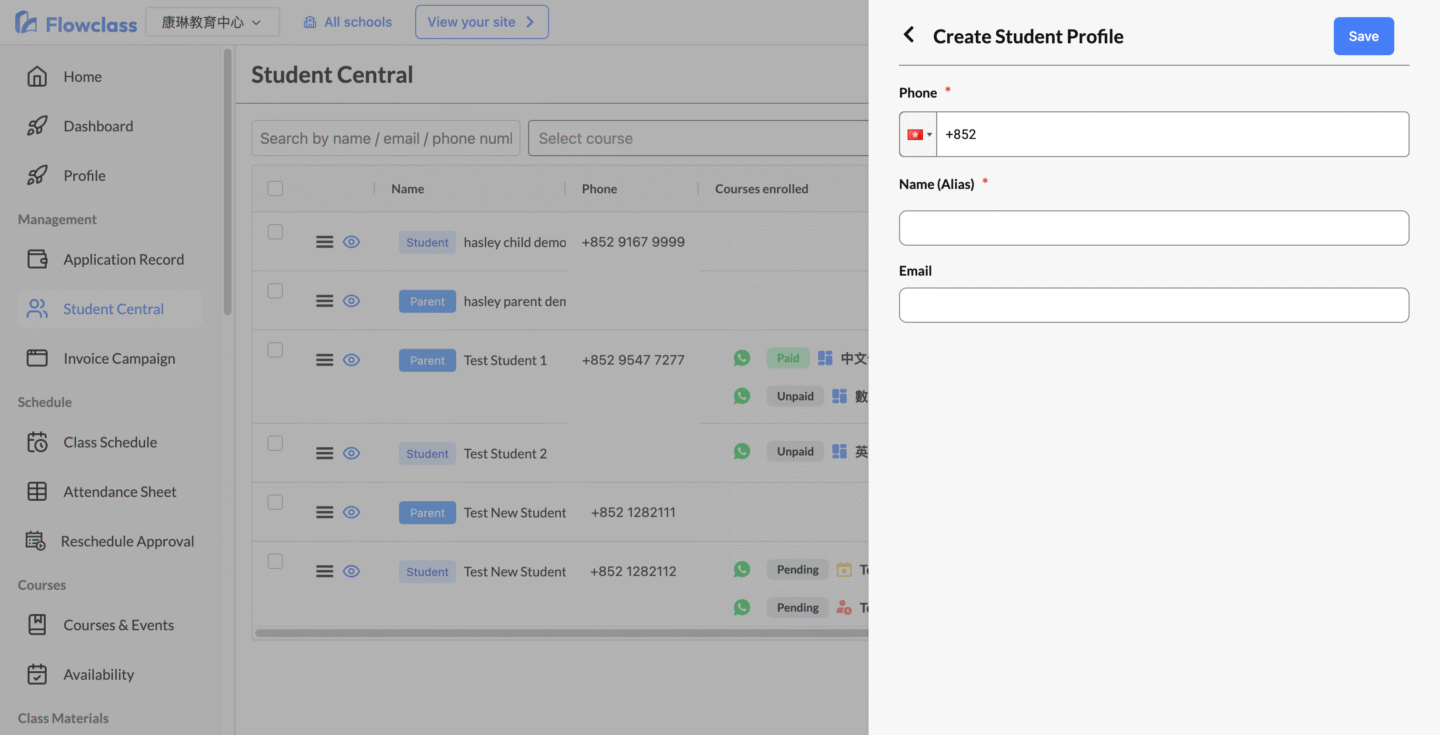
2. Create a New Student #
- Click the Create Student button in the top-right corner.
- Fill in the required fields in the Student Creation Form, including:
- Name
- Email Address
- Any additional custom fields (e.g., tags, notes).
- Email can be optional, depending on the settings of your Flowclass account.
Importing CSV for bulk adding students #
The Import Student Data feature allows you to upload multiple student records in one go. This step-by-step guide will help you efficiently import your data while ensuring accuracy.
1. Prepare Your CSV File #
To ensure a smooth import process, follow these steps before uploading your file:
- Open your preferred spreadsheet software (e.g., Excel or Google Sheets).
- Create a file with the following columns:
- Name
- Phone
- Optional Columns: Course, Class, Payment Status, Tags, etc.
- Save your file in CSV format.
- Pro Tip: Download the system’s example CSV template for reference.
- Click Import Student Data > Download CSV Template.
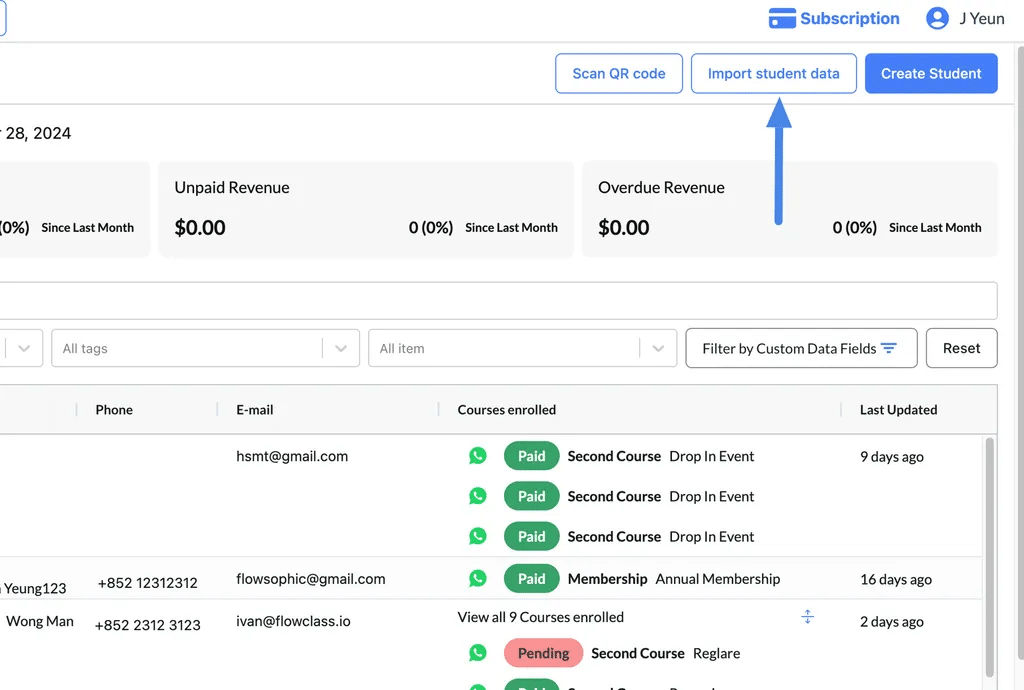
2. Start the Import Process #
- Navigate to Student Central in the left-hand menu.
- Click the Import Student Data button at the top of the page.
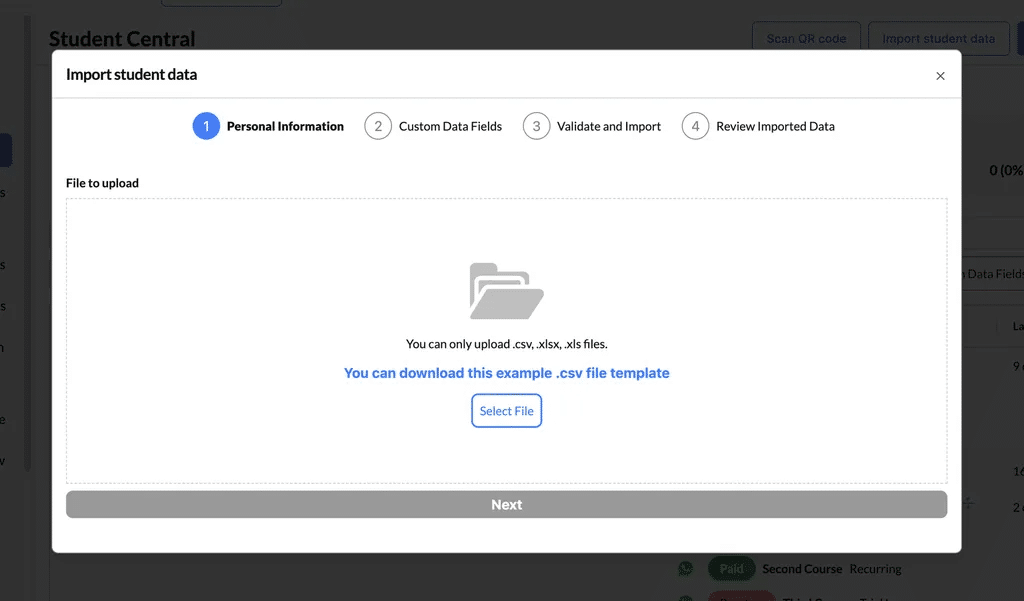
3. Upload Your CSV File #
- In the pop-up window, click Select File under the File to Upload section.
- Choose your prepared CSV file.
- Click Next to proceed.
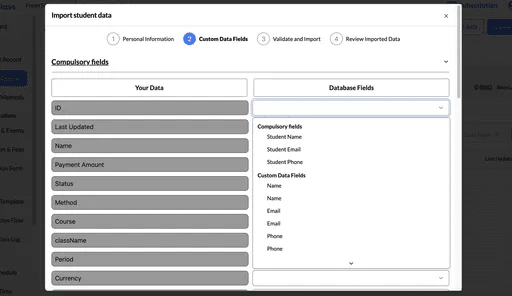
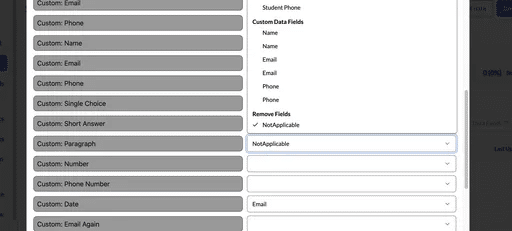
4. Map CSV Data to Database Fields #
- The system will display your CSV columns (on the left) and database fields (on the right).
- Match your CSV columns to the corresponding database fields.
- Example: Map “Student Name” from your CSV to “Name” in the database.
- Ensure compulsory fields (e.g., Name, Email, Phone) are correctly matched.
- Click Next to validate the data.
If a field is not needed, select “Not Applicable” from the dropdown menu.
5. Validate and Review Data #
- The system will validate your CSV file to ensure all data is correctly formatted.
- If errors are detected:
- Review the error messages (e.g., invalid email format, missing required fields).
- Correct the errors in your original CSV file.
- Re-upload the corrected file.
- If no errors are found, click Next to confirm the import.

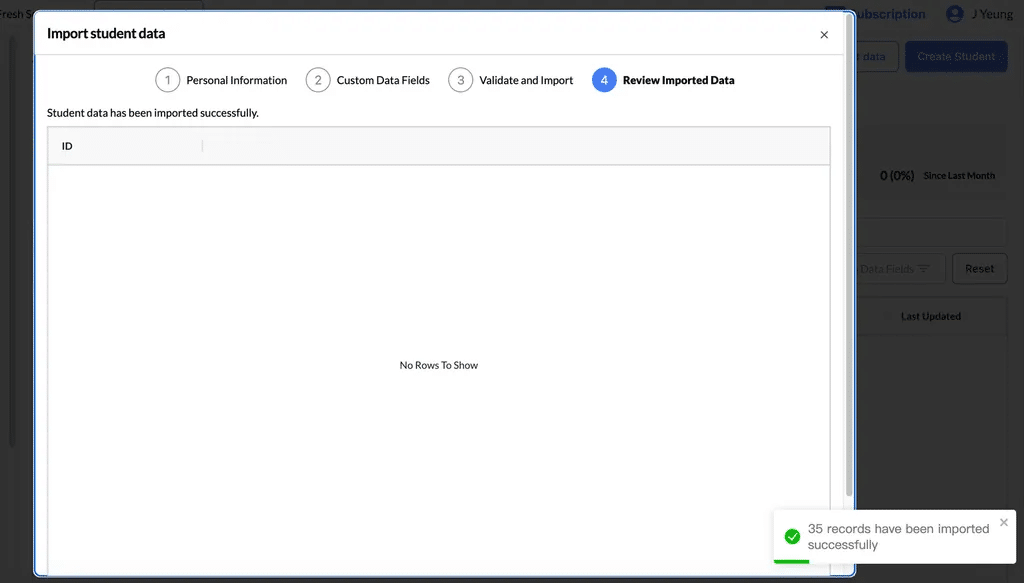
6. Complete the Import #
- Once the data is validated, the system will display a summary of the imported records.
- Example: “35 records have been imported successfully.”
- Click Finish to complete the process.
Common Errors and How to Fix Them #
| Error | Cause | Solution |
| Missing Required Fields | Name, Email, or Phone columns are empty. | Ensure all required fields are filled out. |
| Invalid Email Format | Email addresses are misspelled or improperly formatted. | Correct the email format (e.g., example@gmail.com). |
| Duplicate Records | The same student appears multiple times in the CSV. | Remove duplicate entries from your file. |
| Unmatched Fields | CSV column headers don’t match database fields. | Map the CSV columns to the correct database fields during the mapping step. |


