How to Use the Course Calendar #
The Course Calendar feature not only allows you to view scheduled classes but also provides detailed insights into individual lessons. With just a few clicks, you can access essential class details, manage student lists, and ensure smooth operations. Let’s walk through the process step-by-step.
Step 1: Access the Class Schedule #
- Log in to Your Dashboard: Navigate to the “Class Schedule” option under the Schedule section in the sidebar.
- Filter for Specific Classes (Optional):
- Use the Select Course or Select Class dropdown to narrow the schedule view.
- This helps you quickly locate the class you’re interested in.
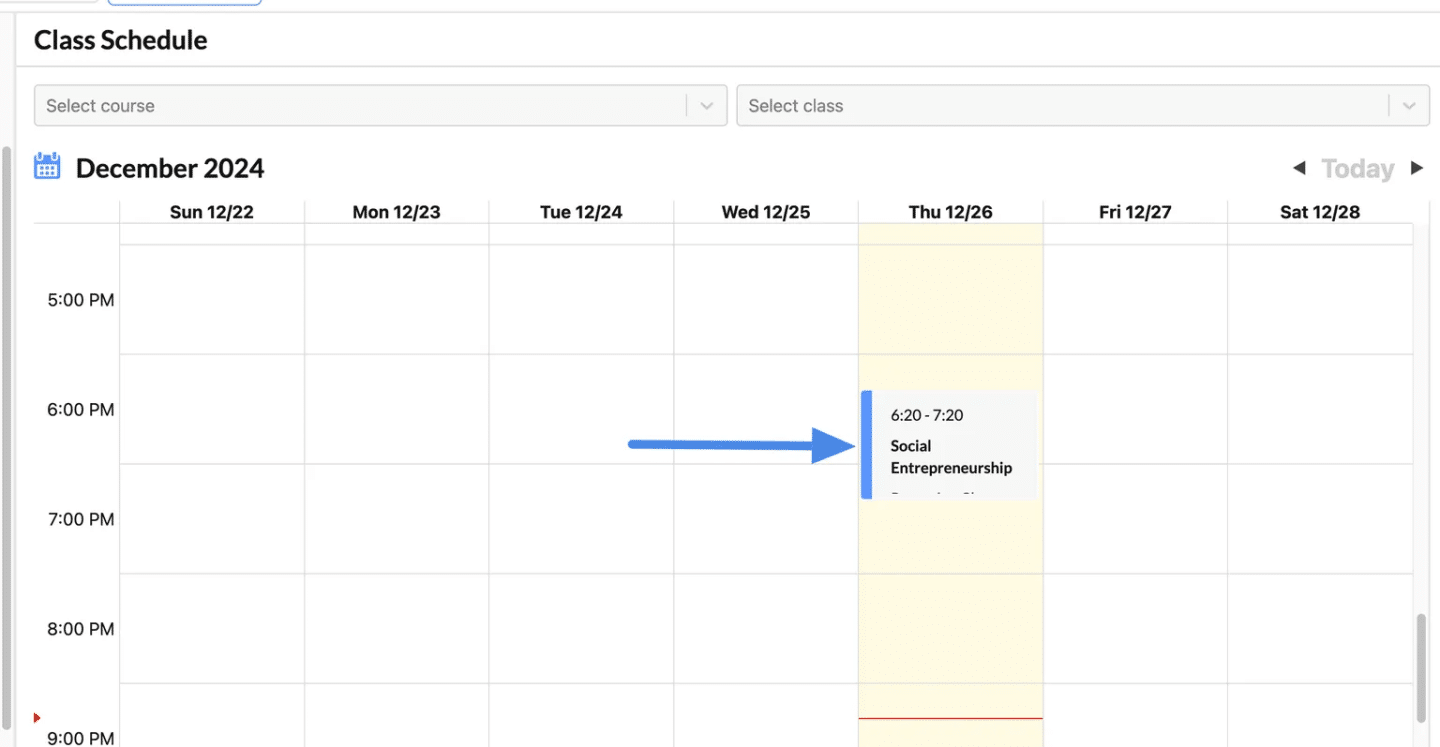
Step 2: View Your Class #
- Locate the Class:
- On the calendar, find the class you want to manage.
- Example: “Social Entrepreneurship” on Thursday, December 26, 2024, from 6:20 PM to 7:20 PM.
- Click on the Class Block:
- Clicking the class will open a Lesson Details window on the right-hand side.
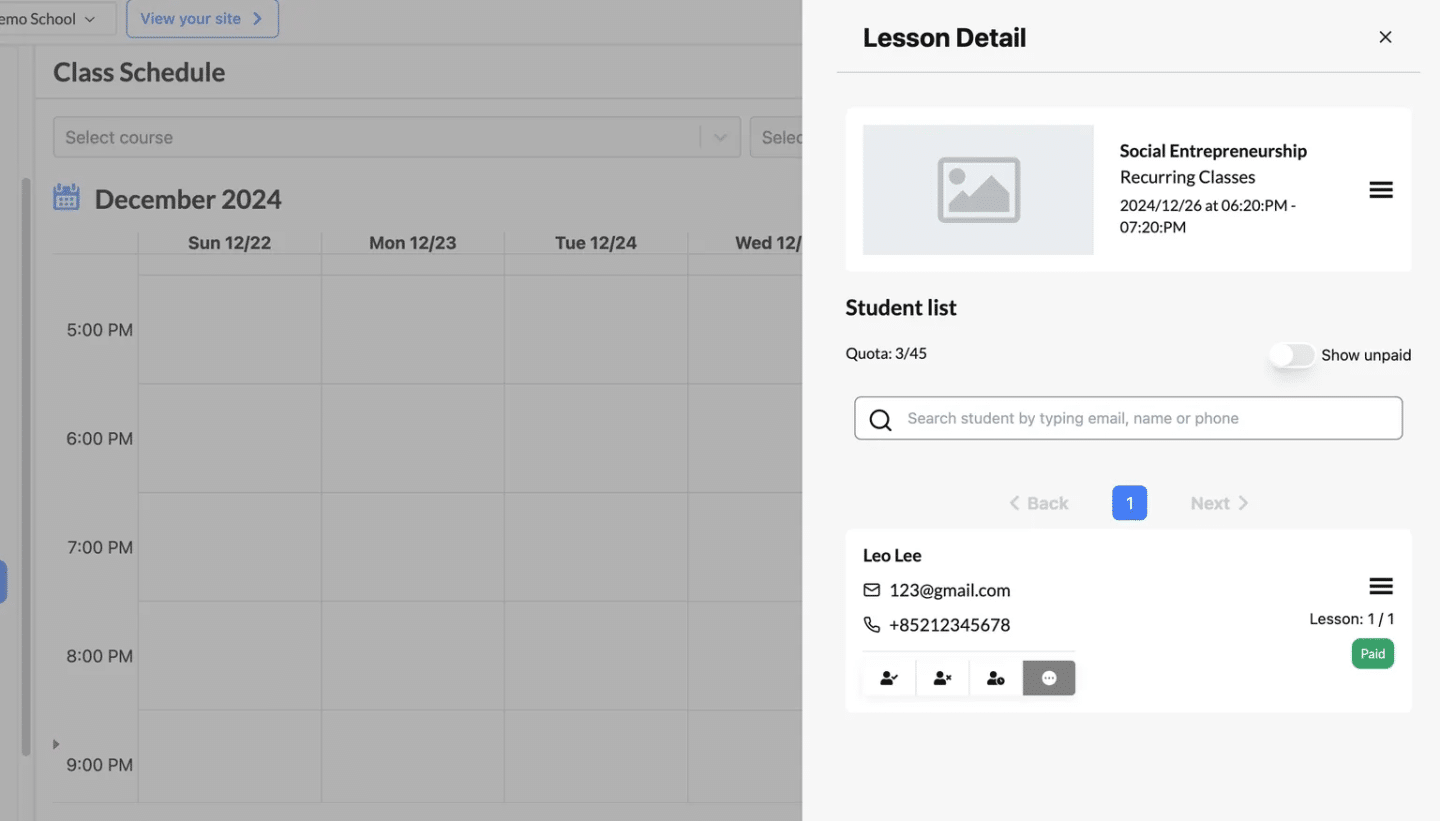
Step 3: Explore Lesson Details #
- Basic Class Information:
- The Lesson Detail pane displays:
- Class Name: Social Entrepreneurship
- Type: Recurring Classes
- Date and Time: December 26, 2024, from 6:20 PM to 7:20 PM
- The Lesson Detail pane displays:
- Student List Overview:
- Quota Information:
- Example: 3 out of 45 seats are occupied.
- Search Functionality:
- Use the search bar to find enrolled students by name, email, or phone number.
- Quota Information:
- Student Management Options:
- View detailed student information, including:
- Email and phone number.
- Manage student status:
- Add or remove students.
- Mark payment status (e.g., “Paid”).
- Show Unpaid Toggle:
- Quickly view students with outstanding payments.
- View detailed student information, including:
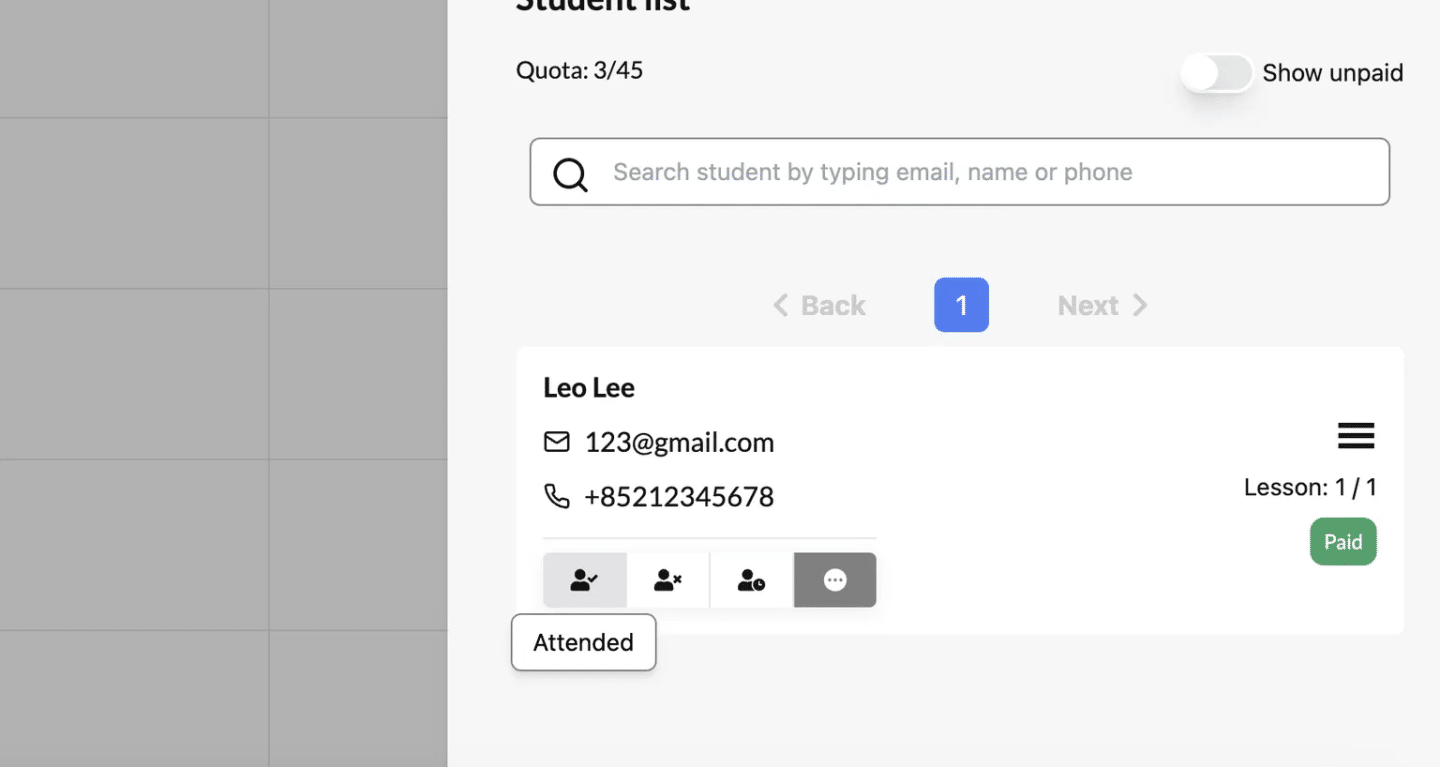
Marking Attendance #
- Locate the Action Icons:
- Below each student’s name in the Student List, you will find four attendance-related icons:
- Attended (✅)
- Not Attended (❌)
- Postponed (🔄)
- Pending (default status)
- Below each student’s name in the Student List, you will find four attendance-related icons:
- Select the Appropriate Status:
- Click the relevant icon based on the student’s attendance for the lesson.
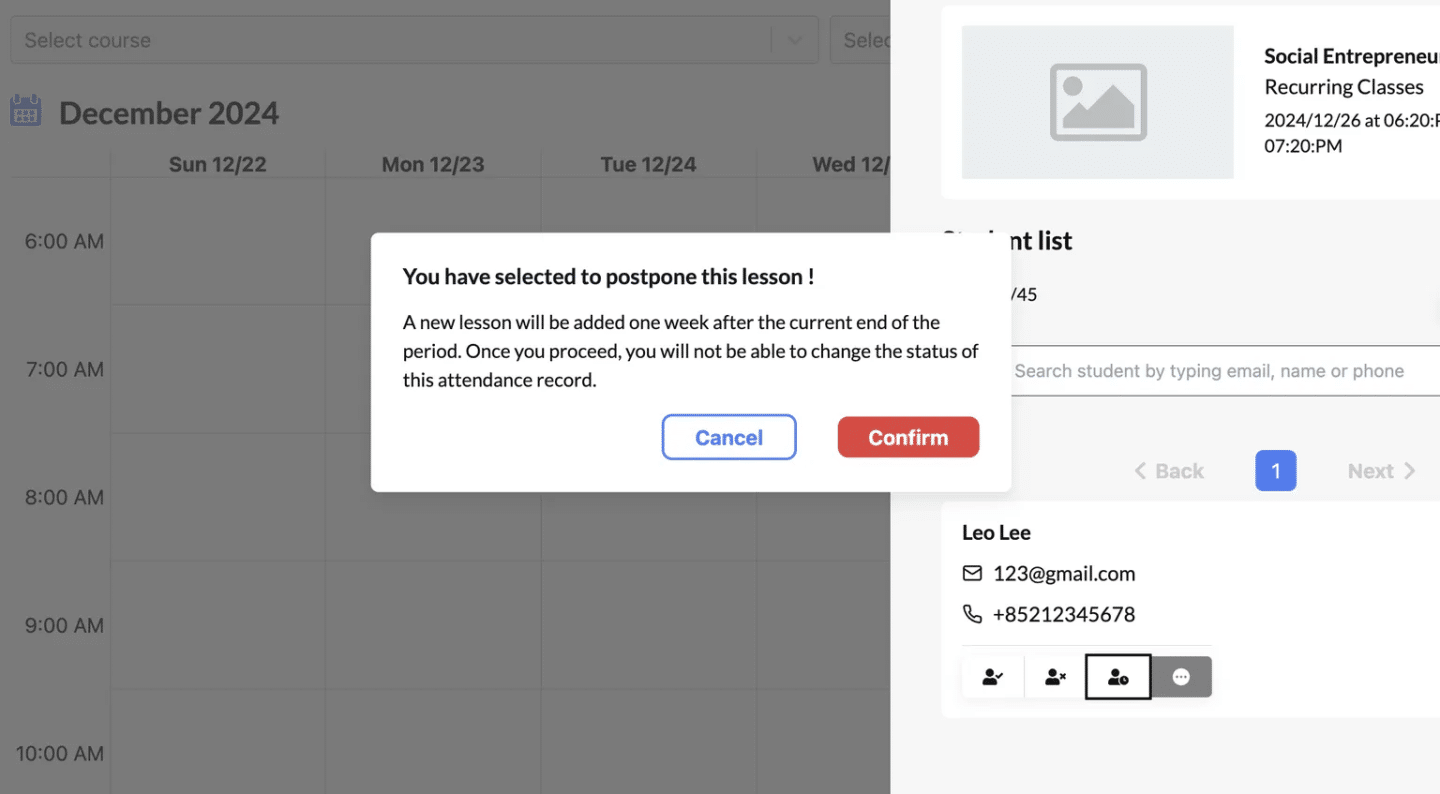
More about the postpone option #
Postpone is a special action that is more complicated than simply marking the attendance
When a lesson is postponed, the system automatically schedules a new session one week after the course’s end date. This eliminates the need for manual calendar adjustments and reduces administrative overhead.