These fields are essential for collecting specific information from students or applicants and can be customized, reordered, and reused across forms.
Reorder Fields #
1. Accessing Custom Data Fields #
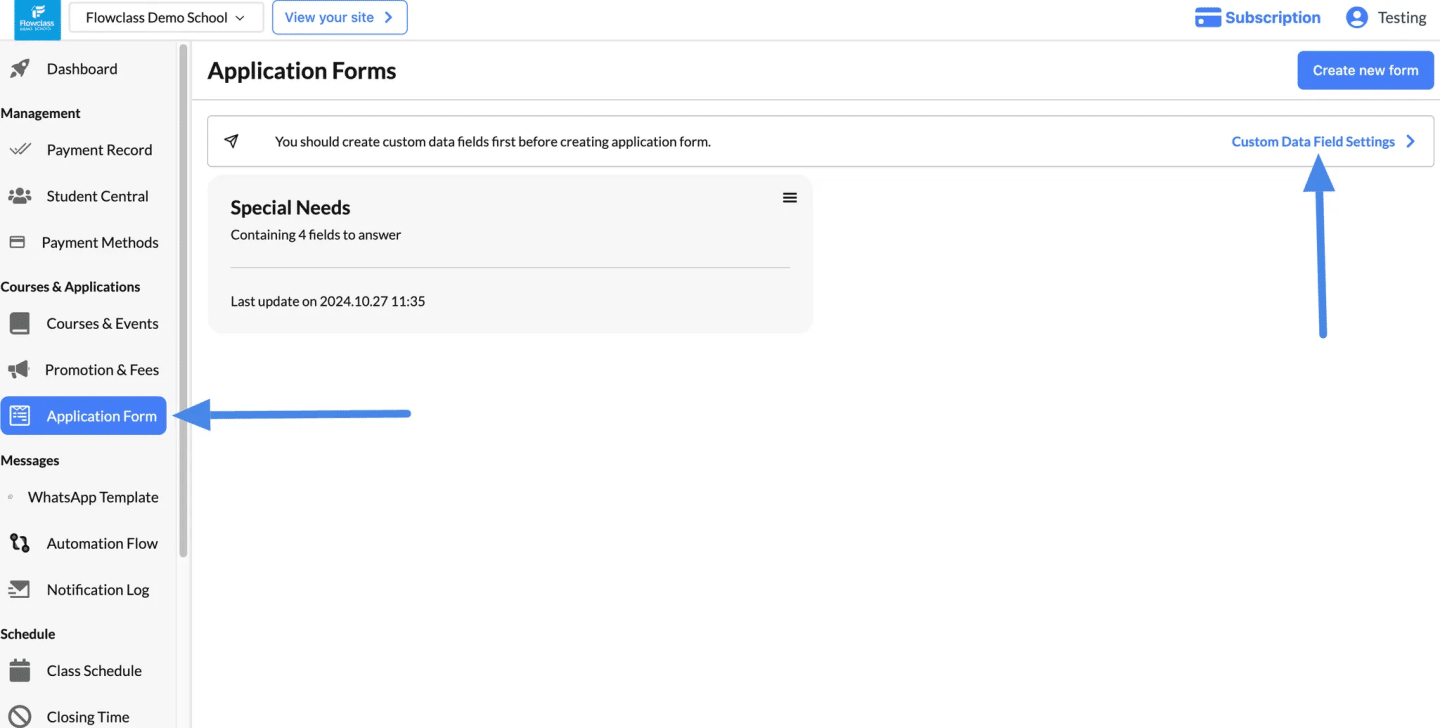
- Navigate to the Application Form section in the sidebar.
- Click on Custom Data Field Settings to manage or create new fields.
2. Reordering Custom Fields #
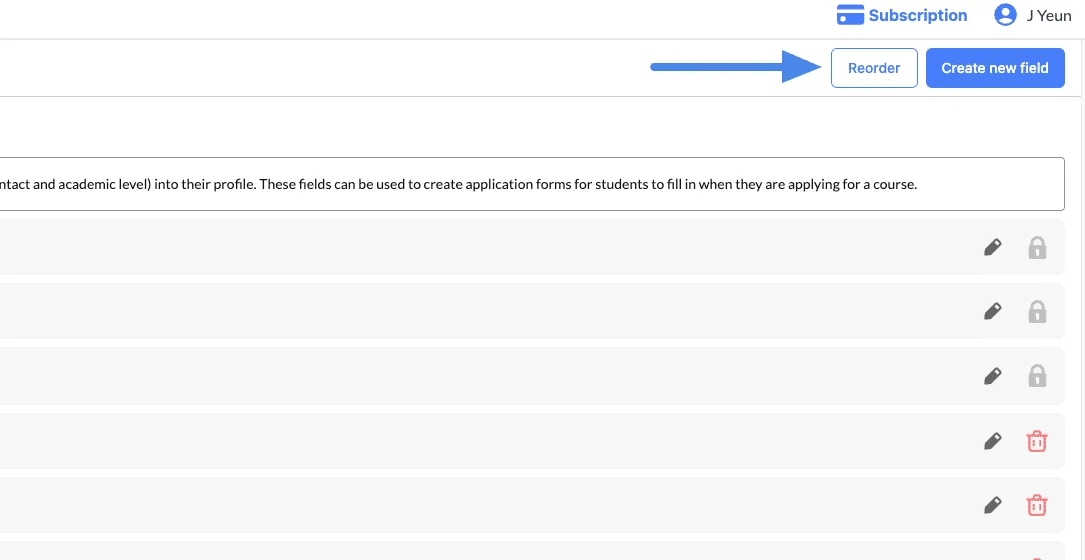
- Click the Reorder button at the top of the Custom Data Fields page.
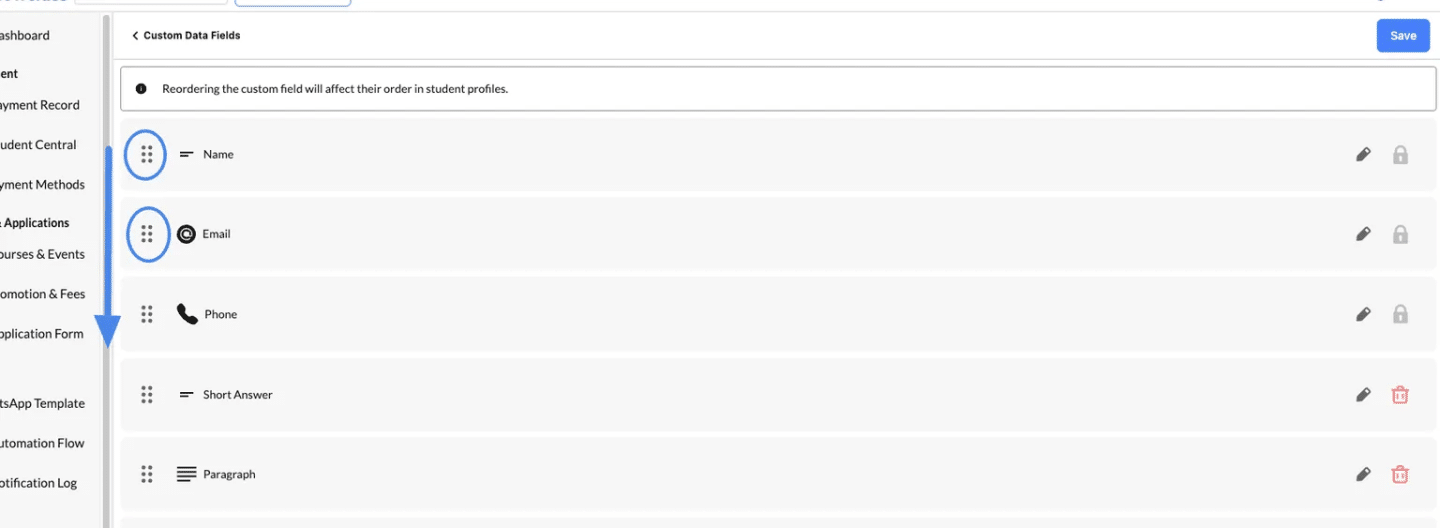
- Use the drag-and-drop feature (indicated by the dotted icons) to adjust the order of fields.
- The order of fields here will determine their placement in the student profiles and application forms.
After rearranging, click Save to confirm your changes.
Advantage of Reordering Custom Fields #
The reordering feature for custom data fields in Flowclass is a powerful tool that ensures consistency and usability across all application forms. By default, all application forms created will follow the defined order of fields in the Custom Data Field Settings.
- Default Field Order:
- Once fields are reordered in the settings, the new order is automatically applied to all application forms.
- This eliminates the need to manually rearrange fields for each form, saving time and ensuring a consistent structure.
- Professional Appearance:
- A standardized field order ensures that applicants encounter a predictable and professional layout, improving their experience.
Editing Custom Data Fields #
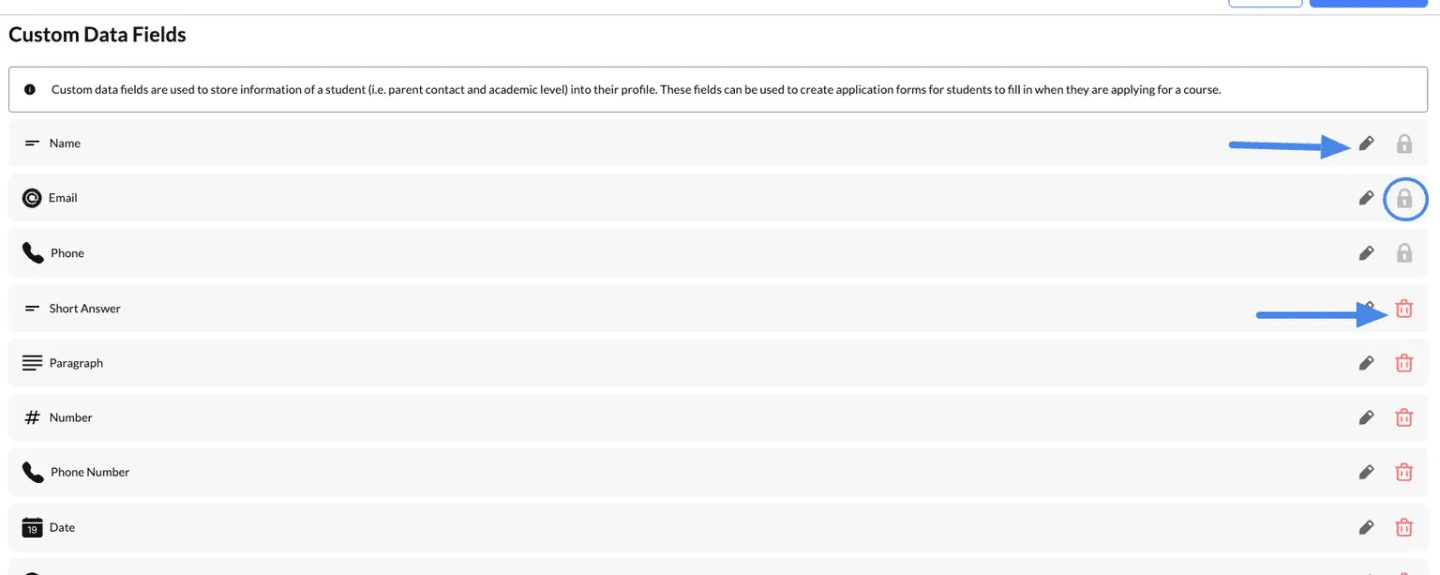
1. Default Fields Cannot Be Changed #
Certain fields, such as Name, Email, and Phone, are default fields provided by Flowclass. These fields are essential for identifying applicants and cannot be:
- Edited (indicated by the locked icon).
- Deleted (no trash icon is available).
Why Default Fields Are Locked
- Consistency: These fields ensure that all forms collect the most critical information needed for student profiles.
- System Dependency: The platform relies on these fields for managing applications, sorting data, and preventing duplicates.
2. Custom Fields Are Fully Editable #
For additional information beyond the default fields, you can create custom fields that are fully customizable:
- Edit: Use the pencil icon to modify the field’s label, type, or settings.
- Delete: Use the trash icon to remove unnecessary custom fields.
Impact on Previous Records
- Deleting a custom field will not retroactively remove the data from previous submissions.
- Any changes made to a field (e.g., renaming or reconfiguring) will not affect past records — the historical data will remain as originally entered.
3. Flexibility with Custom Fields #
Field Types
Custom fields can be created with various input types, such as:
- Short Answer: For brief text responses.
- Paragraph: For detailed answers.
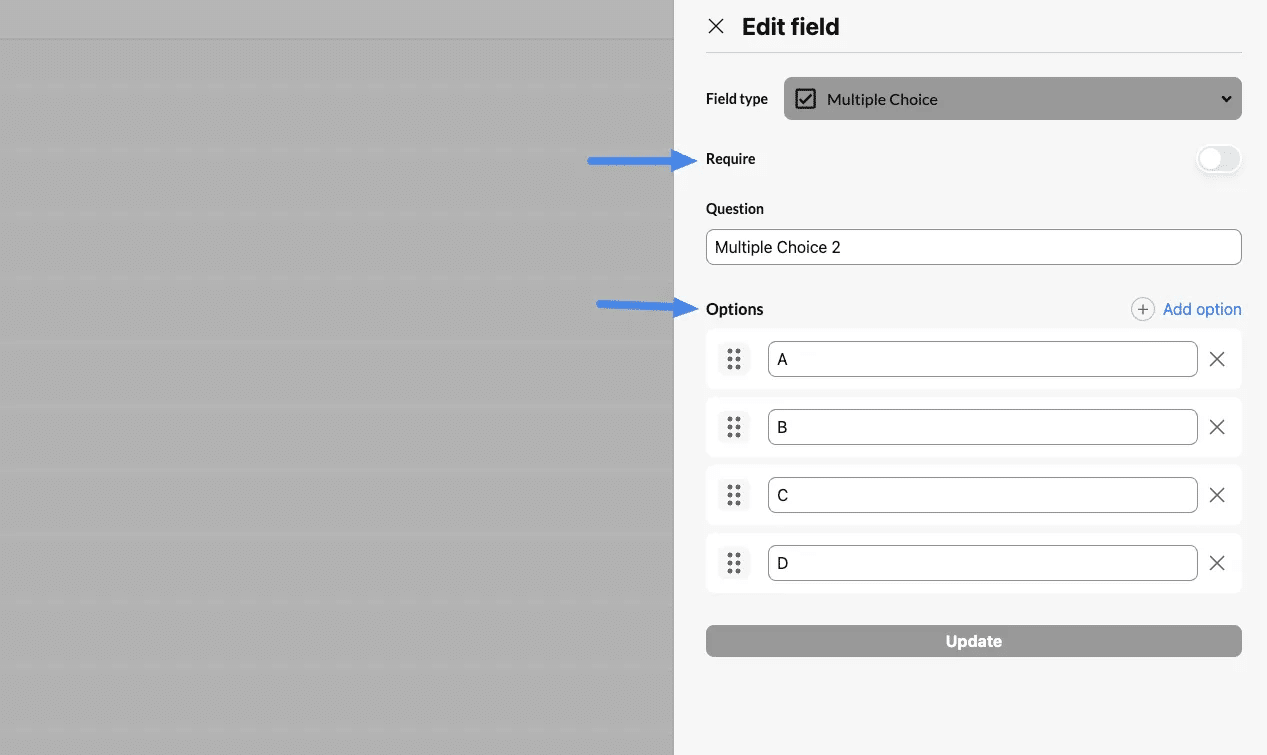
- Multiple Choice: With configurable options (as shown in the second screenshot).
- Number: For numerical inputs like age or ID.
- Date: For date-specific information.
Required Fields
You can toggle whether a custom field is mandatory by enabling the “Require” option. This ensures applicants cannot submit the form without providing the required information.