Keep track of every communication sent from your system with the Notification Log. This tool provides an organized view of all messages sent via Email and WhatsApp, ensuring transparency and easy tracking.
Step 1: Access the Notification Log #
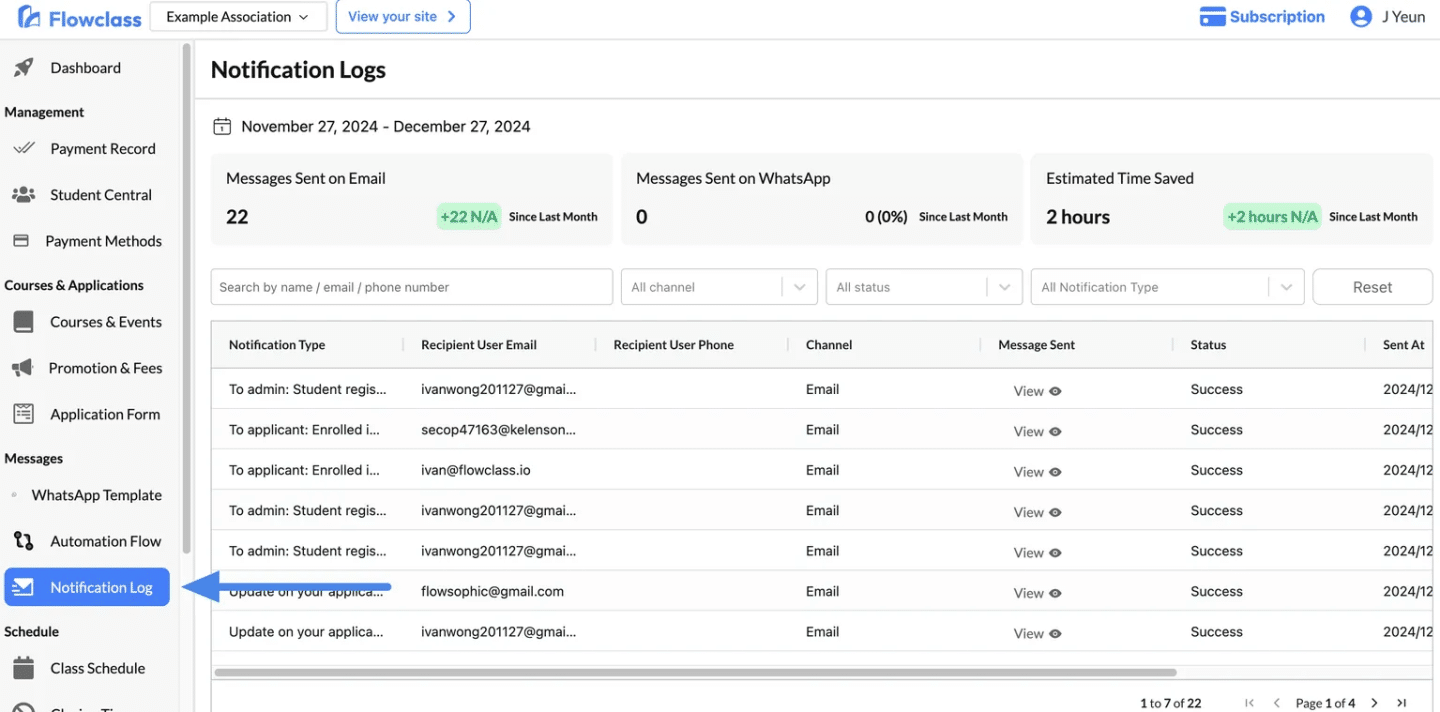
- Log in to your Flowclass account.
- On the left-hand navigation menu, locate the Messages section.
- Click on Notification Log to open the log dashboard.
Step 2: Understand the Dashboard Overview #
At the top of the Notification Log dashboard, you’ll find a summary of key metrics:
- Messages Sent on Email: Displays the total number of emails sent within the selected date range.
- Messages Sent on WhatsApp: Shows the total number of WhatsApp messages sent.
- Estimated Time Saved: Calculates the time saved by automating message delivery.
Tip: These insights help you monitor communication performance and efficiency.
Step 3: Use Filters to Narrow Down Your Search #
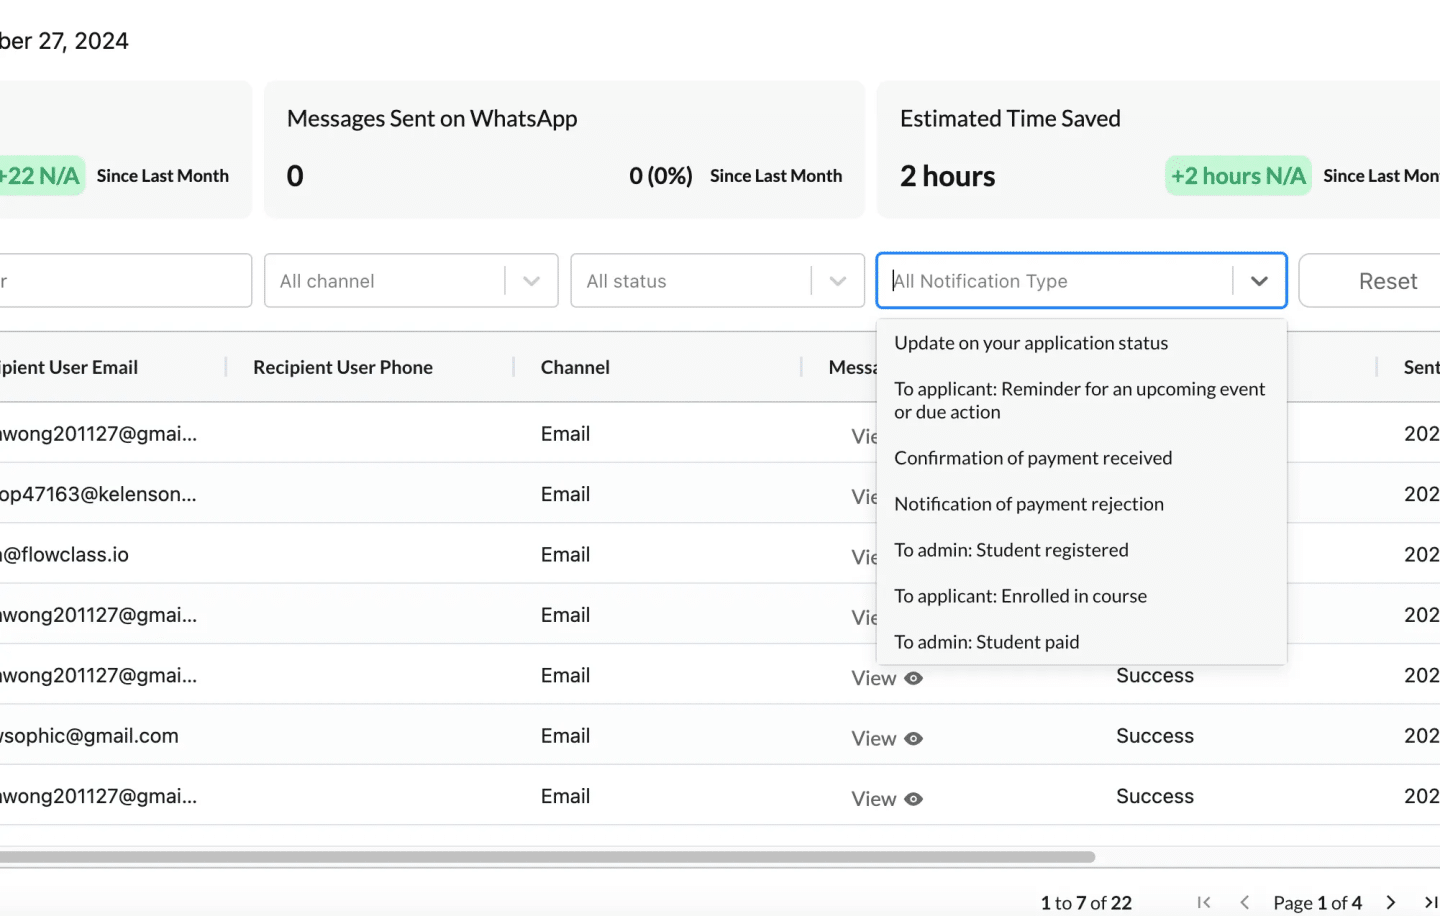
To quickly find specific messages, use the filter options located above the message list:
- Search Bar: Enter the recipient’s name, email, or phone number.
- Channel Filter: Select “Email” or “WhatsApp” to view messages sent through a specific channel.
- Status Filter: Filter messages based on their delivery status (e.g., Success, Pending, Failed).
- Notification Type Filter: Choose the type of notification (e.g., Enrollment Updates, Application Confirmations).
Once you’ve applied the filters, the table will display only the relevant messages.
Step 4: Review Individual Message Details #
The Notification Log displays a table of all sent messages, with the following key details:
- Notification Type: Describes the purpose of the message (e.g., “To admin: Student registration,” “To applicant: Enrollment confirmation”).
- Recipient User Email/Phone: Displays the recipient’s contact information.
- Channel: Indicates whether the message was sent via Email or WhatsApp.
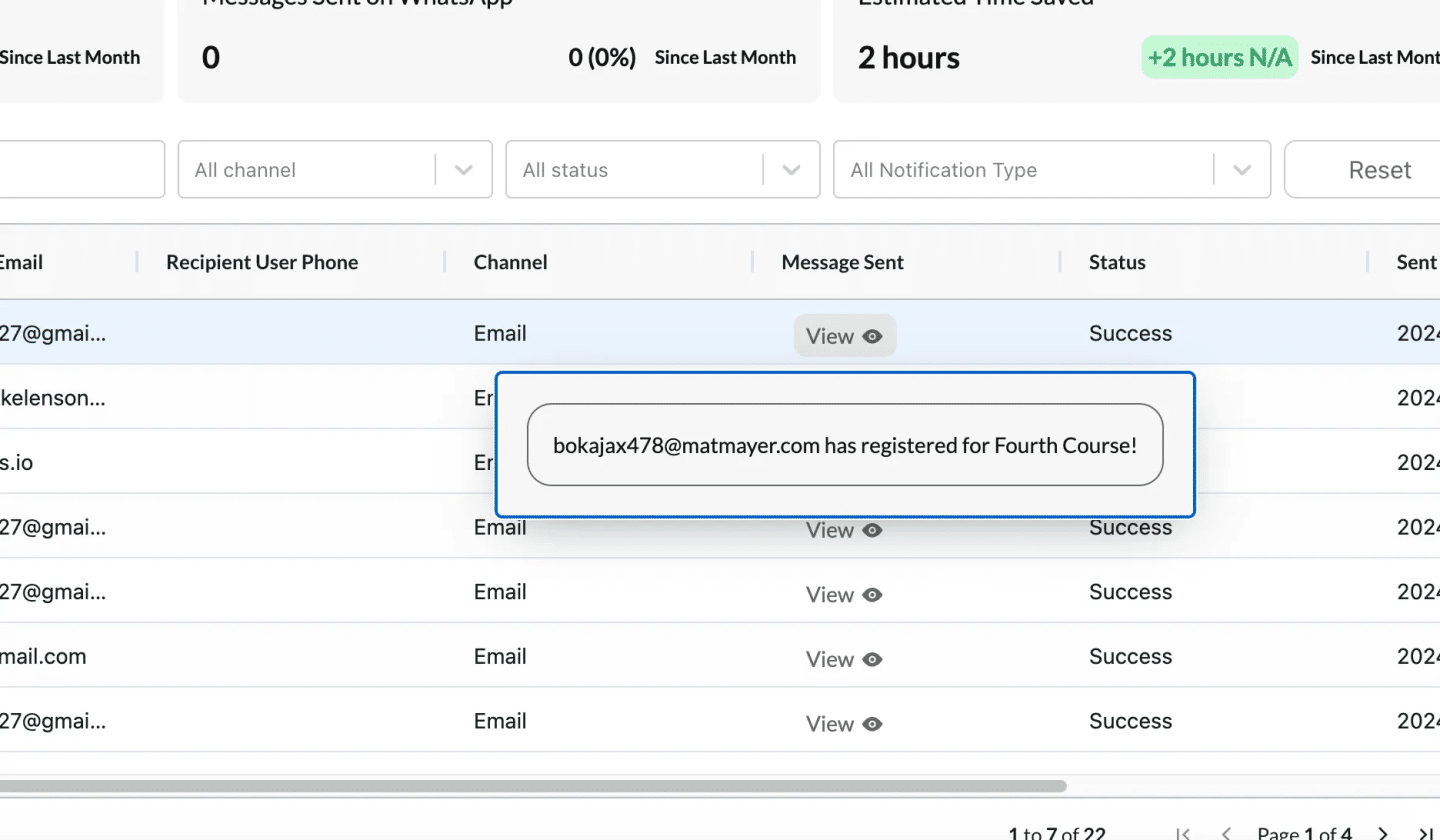
- Message Sent: Includes a View button to preview the full content of the sent message.
- Status: Shows whether the message was successfully delivered, is pending, or failed.
- Sent At: Lists the exact date and time the message was sent.
Tip: To preview a specific message, click the View button in the “Message Sent” column.
Step 5: Analyze and Take Action #
- Identify Delivery Issues: If a message shows as “Failed,” click on it for more details and troubleshoot accordingly.
- Verify Communication Logs: Ensure that important notifications, such as enrollment confirmations or updates, were successfully delivered.
- Maintain Records: Use the Notification Log as a record-keeping tool to track all sent communications for compliance or future reference.
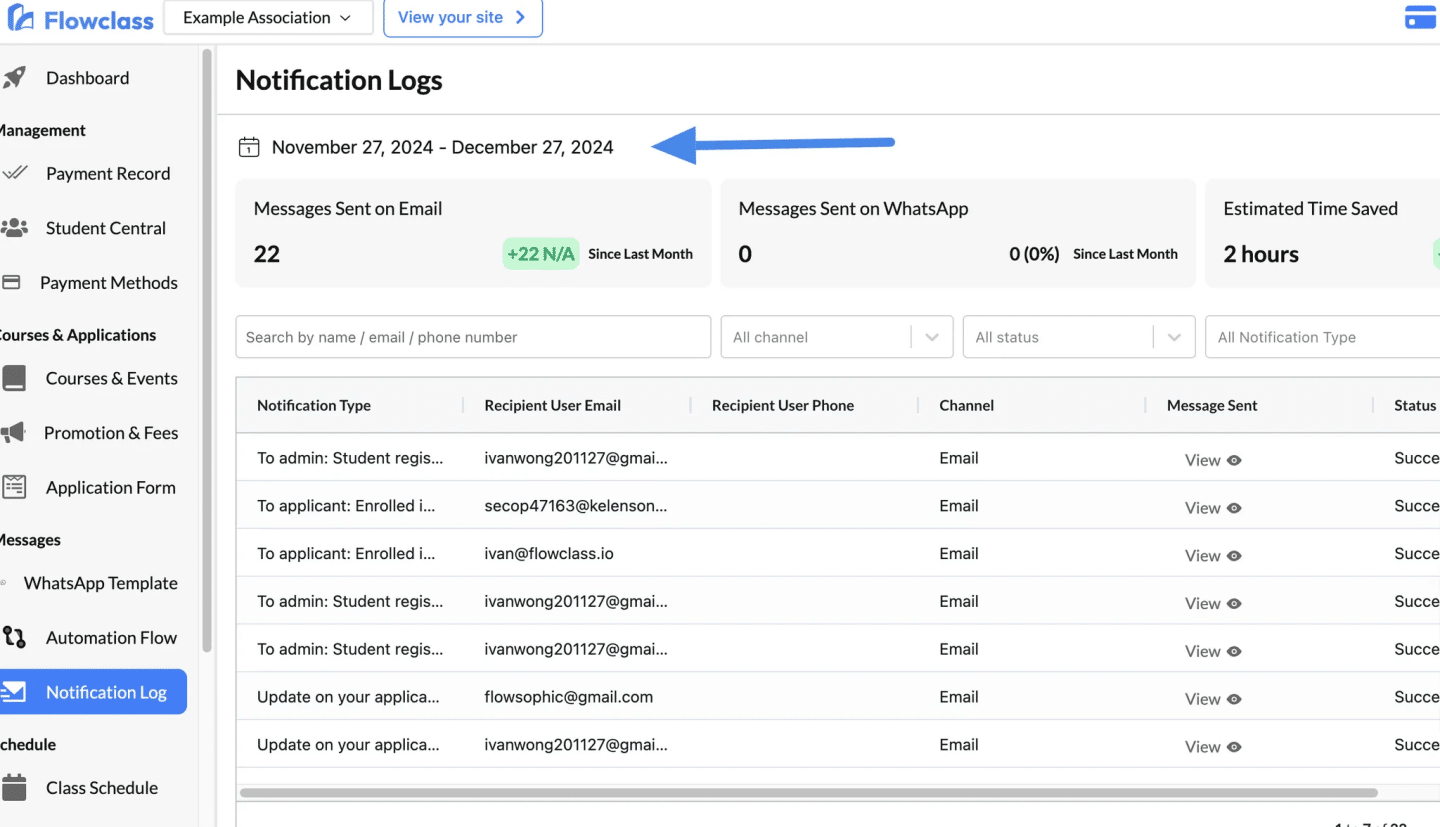
Step 6: Adjust the Date Range #
- At the top of the page, you’ll see a date range selector.
- Adjust the date range to view messages sent during a specific time period.
Example: To check all messages from last month, select the appropriate date range and click Apply.