Skip to main content Skip to footer
  • Showcases
  • Pricing
  • Solutions
    • For Teaching Business
    • For Service-Based Business
    • For NGOs
  • Resources
    • Our Partners
    • Blog
    • Help Center
    • English
    • 繁體中文
LoginGet Started NowStart Automating
    • English
    • 繁體中文
  • Showcases
  • Pricing
  • Solutions
    • For Teaching Business
    • For Service-Based Business
    • For NGOs
  • Resources
    • Our Partners
    • Blog
    • Help Center
LoginStart Automating

Promotions

4
  • Assign coupon to the student
  • Create Coupons
  • Create Free Coupons
  • Add registration fee

Certificates

1
  • Creating a Certificate Template in Flowclass

Course Calendar

4
  • Course Calendar
  • Change & Delay Class
  • Mark Attendance
  • View & Change Student’s Lesson

Initial Set Up

6
  • Set Up Branding & Region
  • Set Up Home Page
  • Set Up Gallery
  • Set Up Contact Information
  • Set Up Social Media
  • Set Up Custom Domain

FAQ

2
  • FAQ – About Flowclass
  • What’s Flowclass?

Web Portal

2
  • Student’s Guide to Joining a Course
  • Completing Payments

Credit System

1
  • Add credit for a parent

Course Settings

4
  • Set Up Course Page & SEO
  • Set Up Sort & Filter for Courses
  • After-Application QR Code & Message
  • Set Up Terms & Conditions

Staff Management

2
  • How to delete account?
  • Hourly Rate Assignment

Class Types & Settings

6
  • Regular Class v2: Set Up Once, Repeat Forever
  • Choose the Right Type of Classes
  • Set Up Events (Paid & Free)
  • Set Up Regular Class
  • Set Up Recurring Class
  • How to update Class Quota in Flowclass?

Invoice Management

2
  • Assign Students’ Course by Create and Send Invoice
  • Invoice Reviewing

Custom Forms

6
  • Create Custom Data Fields
  • How to Create Custom Data Fields in Flowclass
  • Modify & Reorder Custom Data Fields
  • Create Application Form
  • Create Multi-Step Forms
  • Create a Membership Application Form

Payment Methods

2
  • Creating Payment Methods
  • Connect Stripe Online Payments

Application Records

3
  • Process Application Records
  • Filter Application Statuses
  • Export Data & View Analytics

WhatsApp & Email

5
  • Set Up WhatsApp Templates
  • Editing WhatsApp Templates
  • Use Your Logo in Emails
  • Re-Send Payment Notifications
  • Notifications Sent After Application

Automation

3
  • Customize Automation Flows
  • Adjust Student Notification Preferences
  • Notification Log

Integration

3
  • Embed Into Websites
  • Label Printing with Flowclass
  • Label Printing with Software

Subscription Plans

1
  • Check Subscription Payment Records

Student Management

4
  • The Student Central
  • Import & Add Student
  • Update Student Records
  • Changing the password for student accounts

Schedule Mangement

5
  • Closing Time
  • Assign Course to Student
  • Change Student’s Class
  • Assign Lesson To Student
  • Change Lesson Time & Status

Updates

1
  • Flowclass v2.1.0 Update
View Categories
  • Home
  • Flowclass Documentation
  • WhatsApp & Email
  • Re-Send Payment Notifications

Re-Send Payment Notifications

2 min read

Re-sending notification emails is a critical feature to ensure recipients stay informed and complete pending tasks. Follow these step-by-step instructions to re-send notification emails using the interface shown in the screenshot.

Re-Send Email Notifications #


Step 1: Access the Payment Record Page #

  1. From the left-hand navigation menu, click on Payment Record under the Management section.
  2. Confirm you are on the correct page by reviewing the summary data (e.g., “Amount Received” and “Payments Received”).

Step 2: Filter or Select Specific Records #

  1. Use the filter options above the records table to narrow down the list if necessary:
    • Search by name, email, or phone.
    • Use dropdowns to filter by status (e.g., “Unpaid”) or payment method.
  2. Manually select the records for which you want to re-send notifications by checking the boxes in the first column of the table.
    • In the screenshot, three records are selected (Peter Chan, Ivan Wong, and Wong Man Yeung).

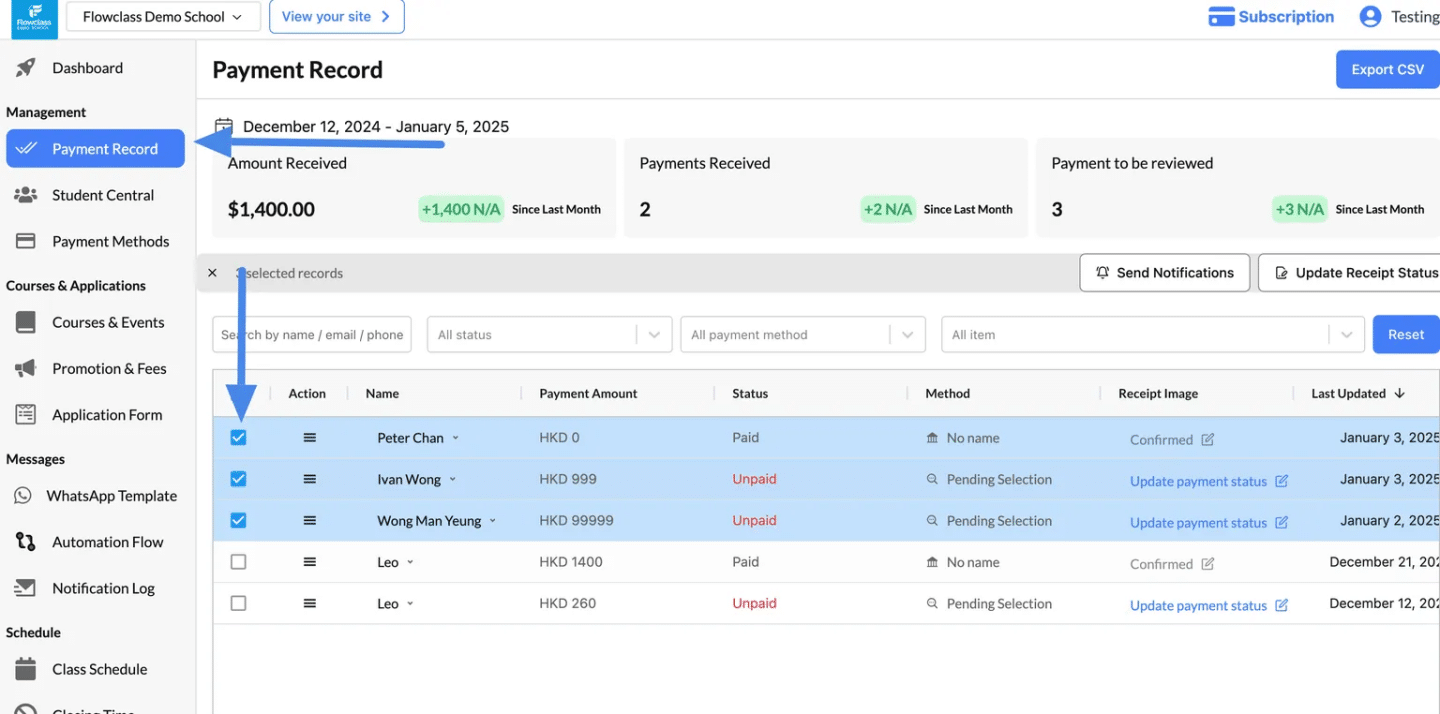
Step 3: Click “Send Notifications” #

  1. Once the records are selected, click the Send Notifications button located above the records table.
  2. A confirmation prompt may appear to ensure you want to re-send notifications to the selected recipients.

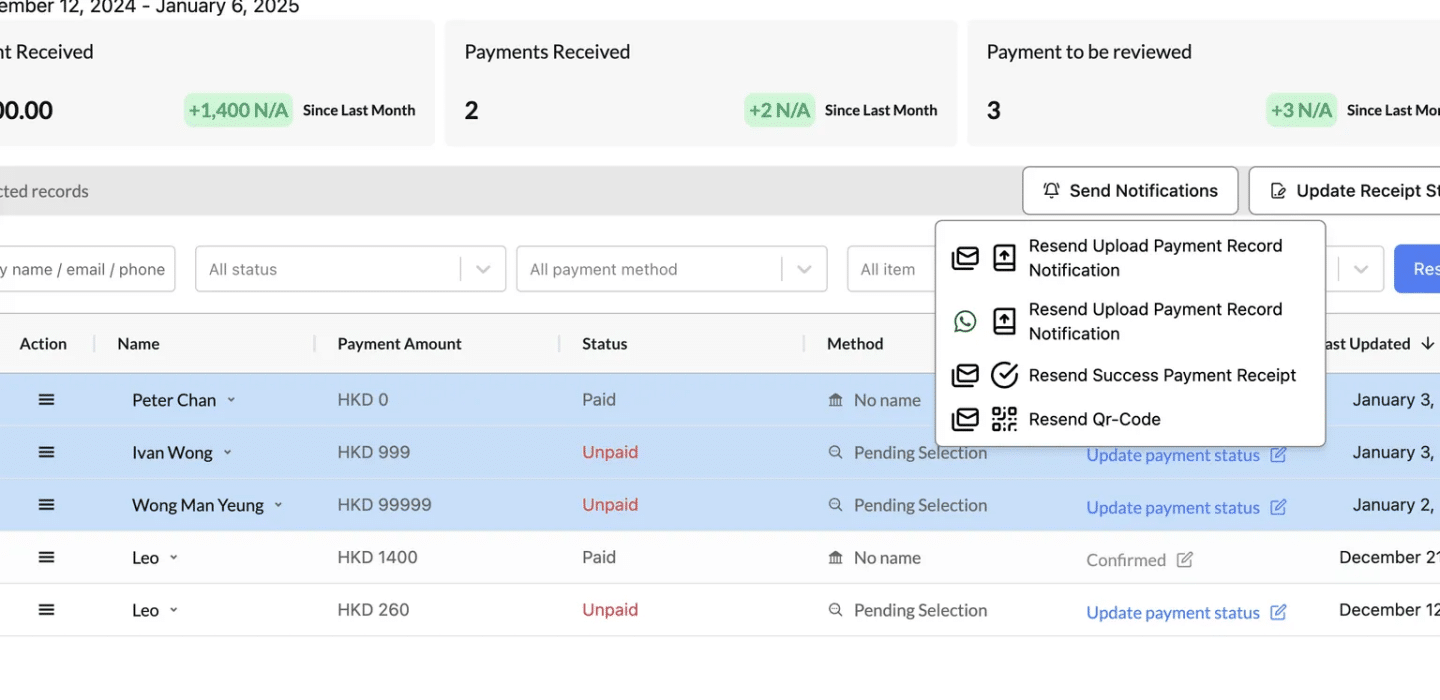
You can check the following document for more information about the notifications

Notifications Sent After Application

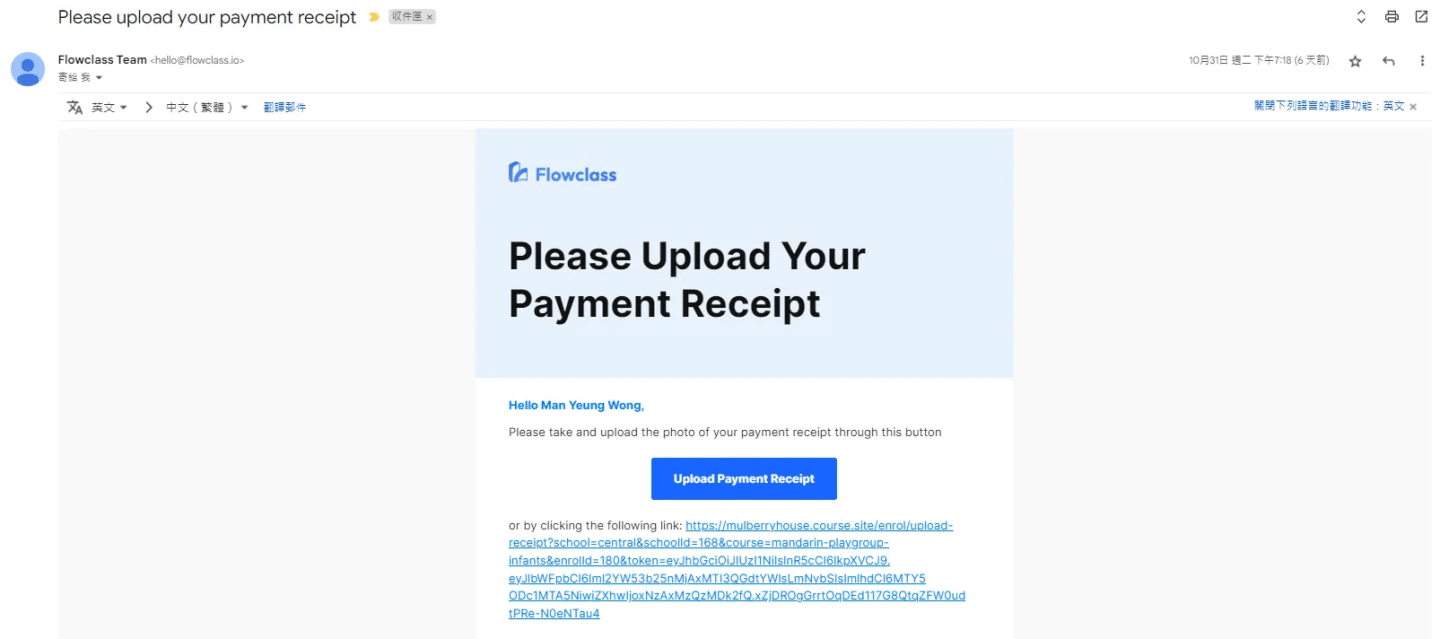
1. Resend Upload Payment Record Notification

  • Purpose: Sends a reminder to recipients to upload their payment record for verification.
  • Use Case:
    • When the payment status is “Unpaid” or “Pending Selection.”
    • Use this for recipients who forgot to upload proof of payment or need to update their submission.

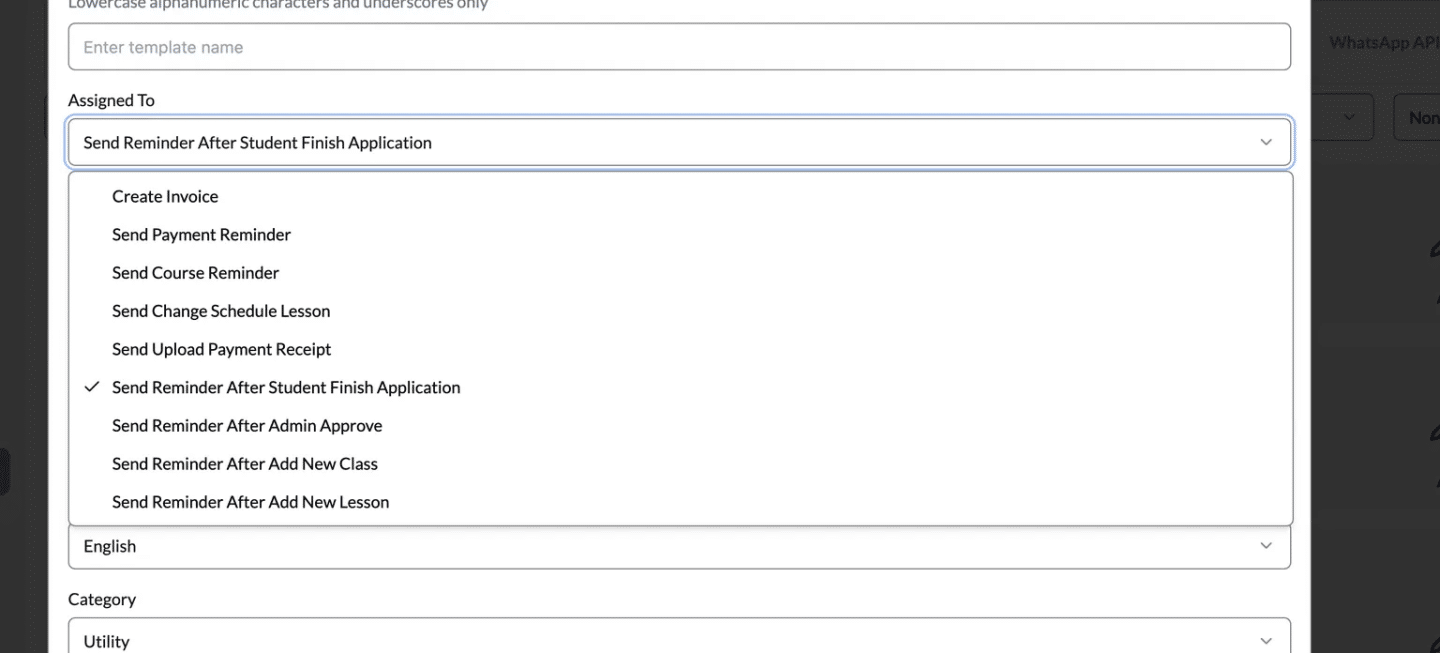
2. Resend Upload Payment Record Notification (Through WhatsApp)

  • Purpose: The second option in the “Send Notifications” dropdown sends the notification via WhatsApp, using the message template assigned to a specific type of action.
  • Use Case:
    • The screenshot provided shows that the message template can be customized and assigned to different actions, ensuring the correct communication is sent via WhatsApp.

3. Resend Success Payment Receipt

  • Purpose: Sends a confirmation email with a receipt for successful payments.
  • Use Case:
    • For recipients whose payment status is “Paid.”
    • Ensures they have a record of the transaction for their records.
    • Useful for resolving disputes or providing proof of payment.

4. Resend QR Code

  • Purpose: Sends a QR code to the recipient, typically for event access, registration, or verification purposes.
  • Use Case:
    • For recipients who need a QR code for an upcoming event or service.
    • Ideal for registrations, ticketing, or other QR-based entry systems.
Updated on August 13, 2025

What are your Feelings

  • Happy
  • Normal
  • Sad

Share This Article :

  • Facebook
  • X
  • LinkedIn
  • Pinterest
Use Your Logo in EmailsNotifications Sent After Application
Table of Contents
  • Re-Send Email Notifications
    • Step 1: Access the Payment Record Page
    • Step 2: Filter or Select Specific Records
    • Step 3: Click "Send Notifications"
Ready to jump in?

Flowclass helps automate tedious tasks so educators can focus on what matters most – Teaching.

Get Started

Start streamlining student bookings and automating payment processes today with Flowclass!

感謝您的訂閱!

我們會送上最有效的學習情報🥰

Flowclass
  • Follow us on Facebook
  • Follow us on Instagram
  • Follow us on X
info@flowclass.io
+852 5722 5763
Flat 151 & 152, 15/F, Weswick Commercial Building, 147-149 Queen’s Road East, Wan Chai, Hong Kong

Solutions

  • Solutions
    • For Teaching Business
    • For Service-Based Business
    • For NGOs
  • Showcases

Resource

  • Flowclass Blogs
  • Help Centre
  • Recent Updates
Solutions
  • Solutions
    • For Teaching Business
    • For Service-Based Business
    • For NGOs
  • Showcases
Resource
  • Flowclass Blogs
  • Help Centre
  • Recent Updates

2025 © All rights reserved by Flowsophic Limited (Doing Business As Flowclass)