Creating an event class can help you effectively manage and organize courses, events, or workshops. Follow this simple step-by-step guide to set up your event class seamlessly.
Create an Event Class #
Step 1: Navigate to “Courses & Events” #
- Log in to your dashboard: Begin by logging into your platform’s admin panel.
- Locate the “Courses & Events” Section:
- On the left-hand navigation menu, find and click on “Courses & Events”.
- This will take you to the page where all existing courses and events are listed.
Step 2: Click on “Create Course” #
- On the top-right corner of the “Courses & Events” page, click the blue “Create Course” button.
- This button will start the process of creating your event class.
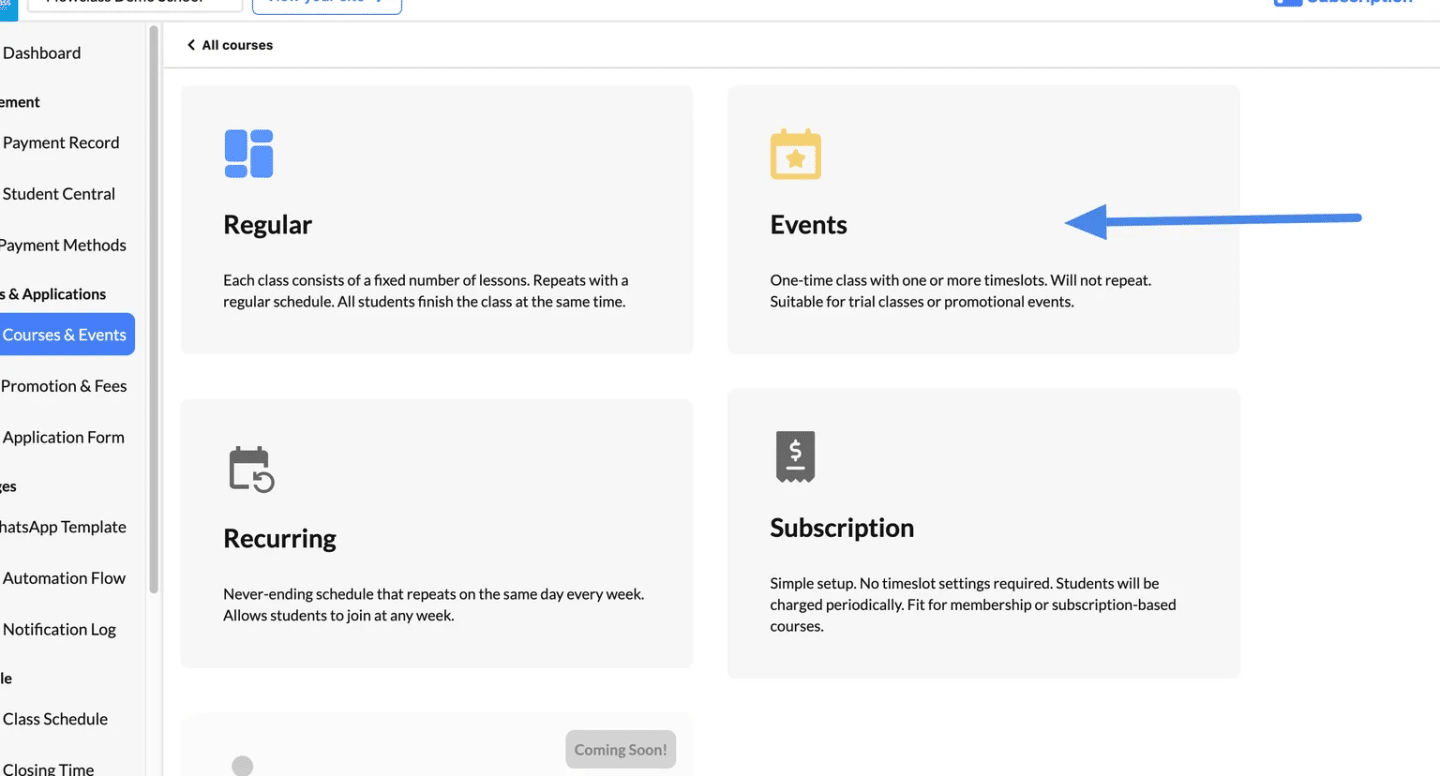
Step 3: Select the Class Type #
- Choose the Class Type:
- On the class selection page, you’ll see several options:
- Regular: Fixed schedules with a set number of lessons.
- Events: One-time sessions or promotional events.
- Recurring: Endless schedules that repeat on the same day every week.
- Subscription: Simple setup for recurring membership-based classes.
- Click “Events” for one-time or promotional sessions.
- On the class selection page, you’ll see several options:
- Click the Plus Icon (+) to create a new event class.
Create Free Event #
Free events are useful if you want to attract new students through trial lessons or competitions. Flowclass provides a convenient tool for you to launch events that skip the entire payment process.
Step 1: Enter the Class Name #
- In the “Class name” field, type a clear and descriptive name for your event. Example: “Free Trial Session” or “Open House Workshop.”
Step 2: Toggle “Free of Charge” #
- Switch the “Free of charge” toggle to the ON position.
- This ensures participants can join without any payment.
Step 3: Skip the Pricing Field #
- Once you’ve set the event as free, the “Price per lesson $” field becomes irrelevant. You can leave it blank.
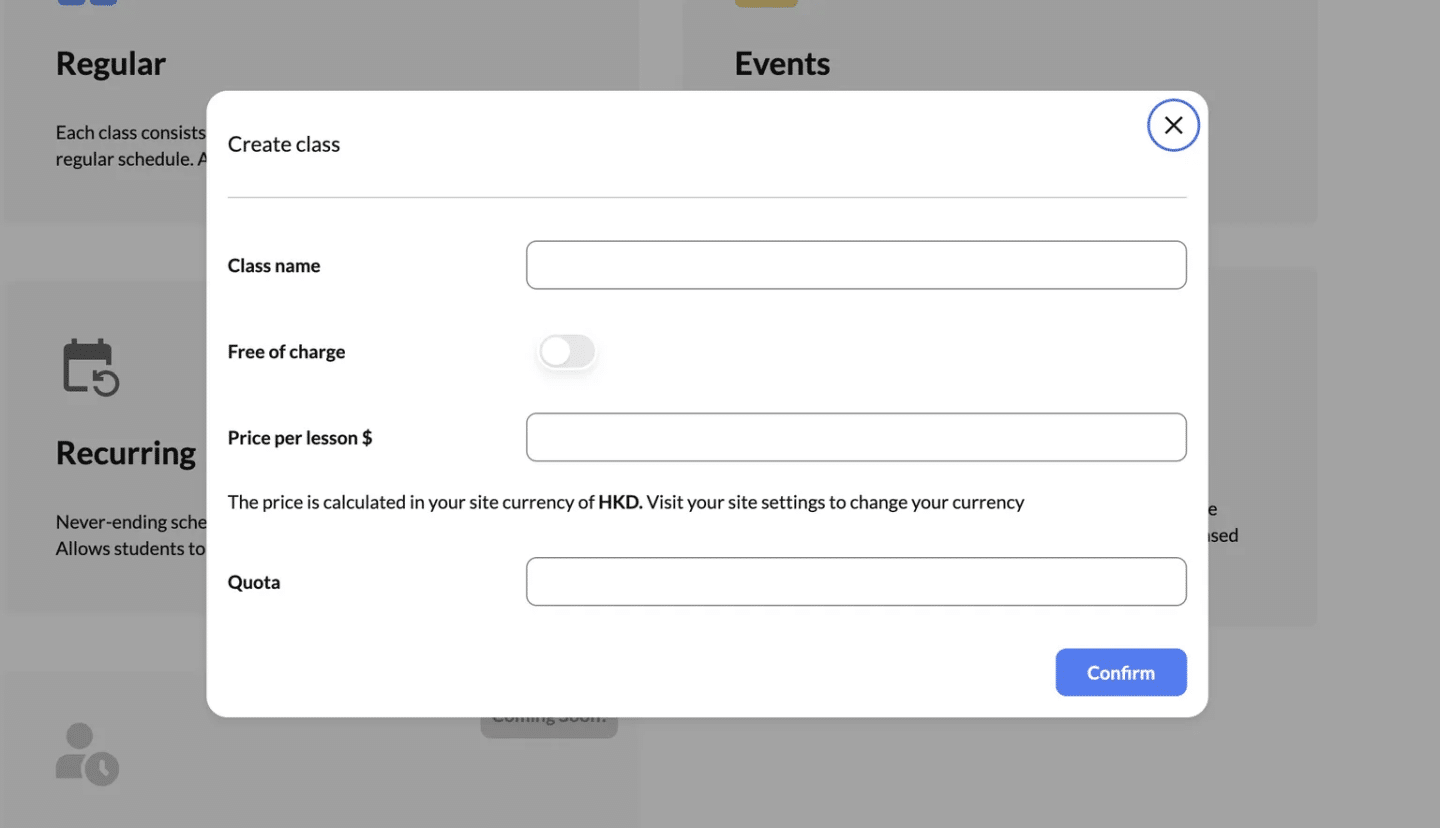
Step 4: Set the Quota #
- In the Quota field, enter the maximum number of participants allowed for the event. Example: If you want to limit attendance to 50 people, set the quota to 50.
Step 5: Confirm the Details #
- Review the details you’ve entered, ensuring all information is correct.
- Click the “Confirm” button to save and move on to the next step in the class creation process.

Here is a demo video:
Alternate way to create free event #
Step 1: Navigate to the “Courses & Events” Section #
- Log in to your admin dashboard.
- Select “Courses & Events” from the left-hand menu.
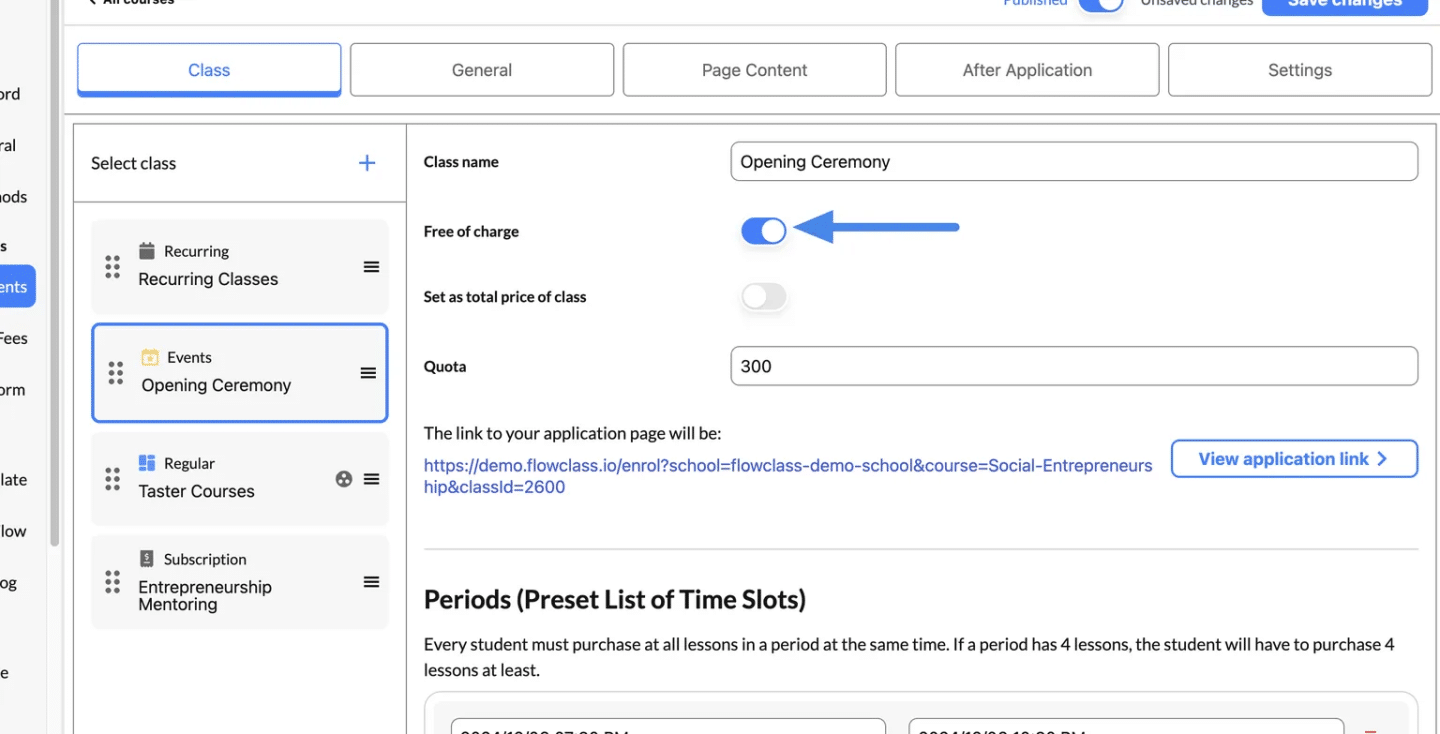
Step 2: Select the Event to Edit #
- Locate the event you want to modify in the list of classes under the “Events” section.
- Click on the event (e.g., “Opening Ceremony”) to open its settings.
Step 3: Toggle “Free of Charge” #
- On the Class tab, locate the “Free of charge” option.
- Toggle the switch to the ON position to make the event free.
- This will automatically disable the price field and allow participants to register without payment.
Step 4: Save Changes #
- After enabling the “Free of charge” option, review the details to ensure everything is accurate (e.g., class name, quota, time slots).
- Click the “Save changes” button in the top-right corner to apply the updates.
Step 5: Share the Updated Application Link #
- Find the application link for the event on the same page.
- Share the link with your audience to promote the free event.
Create Paid Event #
Configure Class Details #
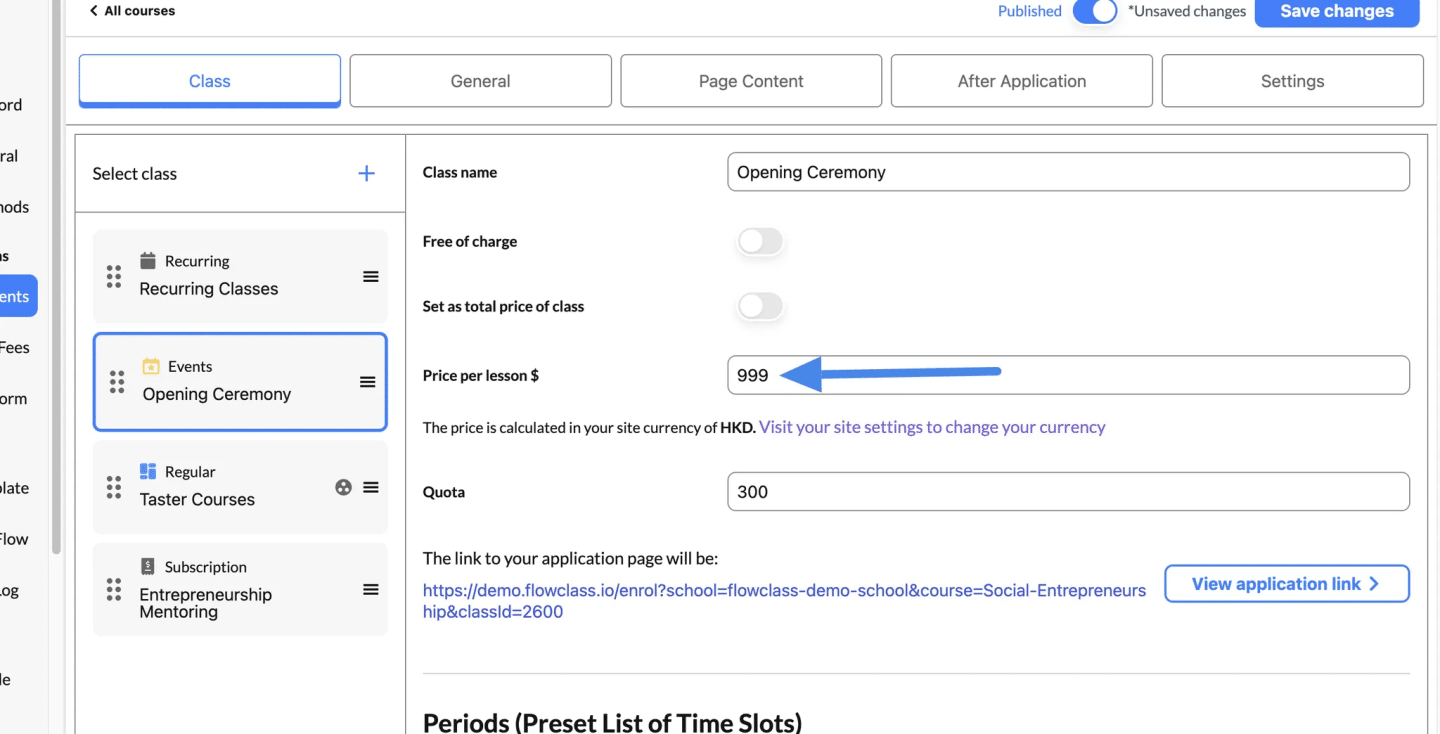
- Class Name:
- Enter a name that reflects the purpose of your event (e.g., “Opening Ceremony”).
- Free of Charge:
- Toggle the switch to make the event free, if applicable. If not, leave it off.
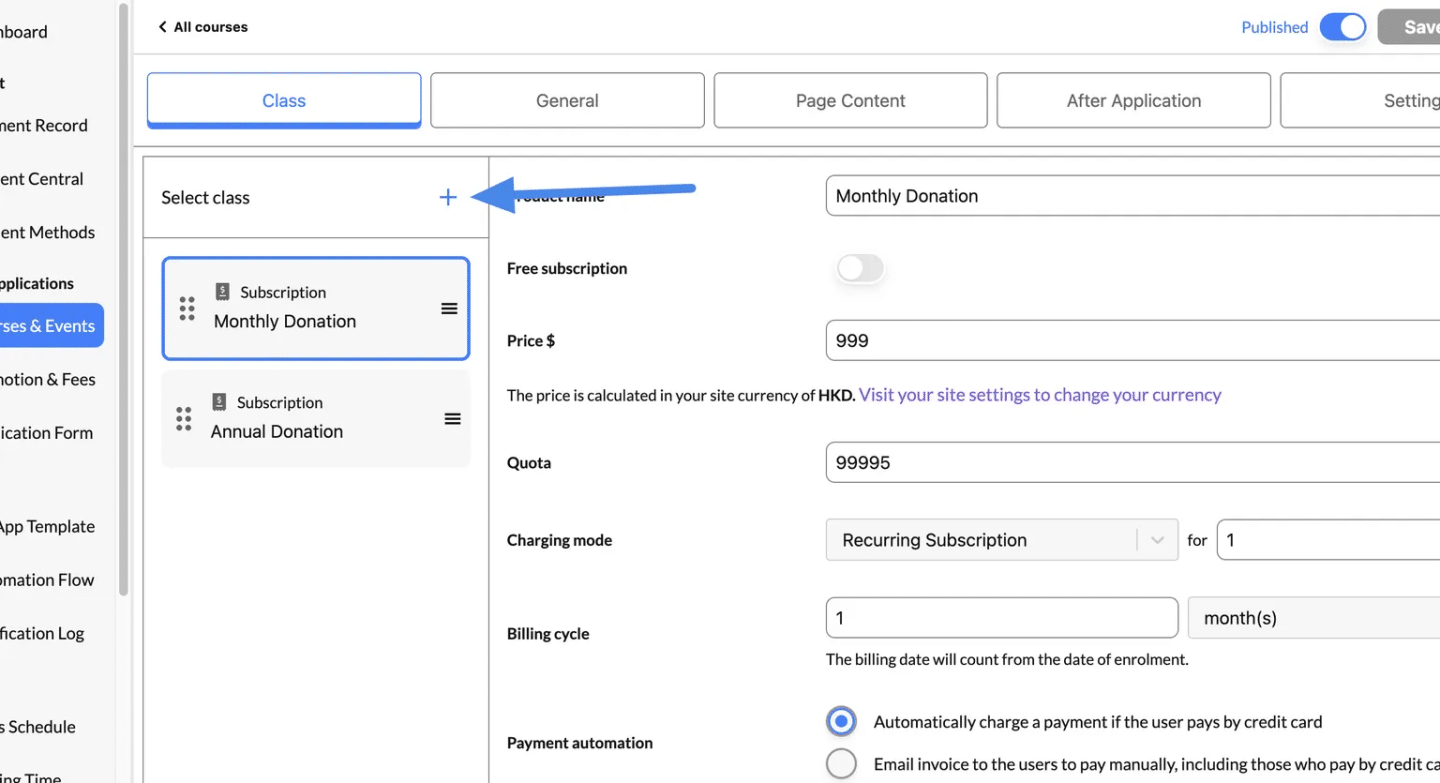
- Set Pricing:
- If it’s a paid event, ensure the price is entered correctly. For example, specify $999 or another amount.
- Quota:
- Enter the maximum number of participants allowed (e.g., 300). This controls how many people can register.
- Application Link:
- The system will generate an application link automatically. Copy this link to share with attendees.
Once the event is created, you can further refine its settings using the options available on the class page. Here’s an overview of the features you can configure:
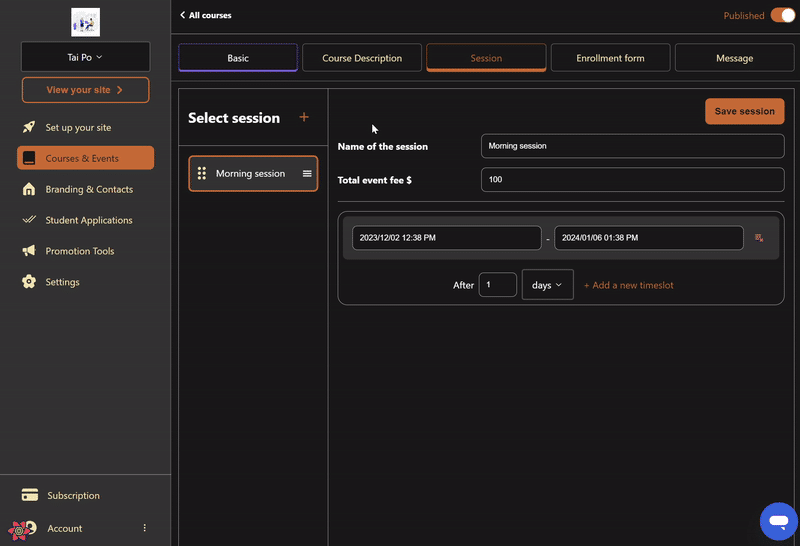
1. Periods (Preset List of Time Slots) #
- Add Time Slots:
- If your event requires additional sessions, click “+ Add a new timeslot” to include more dates and times.
- Example: Add another time slot for attendees who may prefer a different time.
- Edit Existing Time Slots:
- You can adjust the start and end times for existing slots by clicking the respective fields.
2. Allow Joining in the Middle of a Class (Drop-In) #
- Enable Drop-In:
- Toggle this option ON if you want participants to join after the class has started.
- The system will automatically calculate fees (if applicable) based on the remaining lessons.
- This is particularly useful for ongoing or flexible sessions.
3. Multiple Classes #
- Enable Multi-Class Enrollment:
- Toggle this option ON to allow users to register for multiple classes simultaneously.
- Ideal for participants interested in signing up for multiple events or courses.
4. One Application for Multiple People #
- Enable Group Applications:
- Toggle this option ON to allow one person to register multiple attendees in a single application.
- The system will calculate fees accordingly (if the event is not free).
- Great for group events, family registrations, or team sign-ups.
The Enrollment Flow #
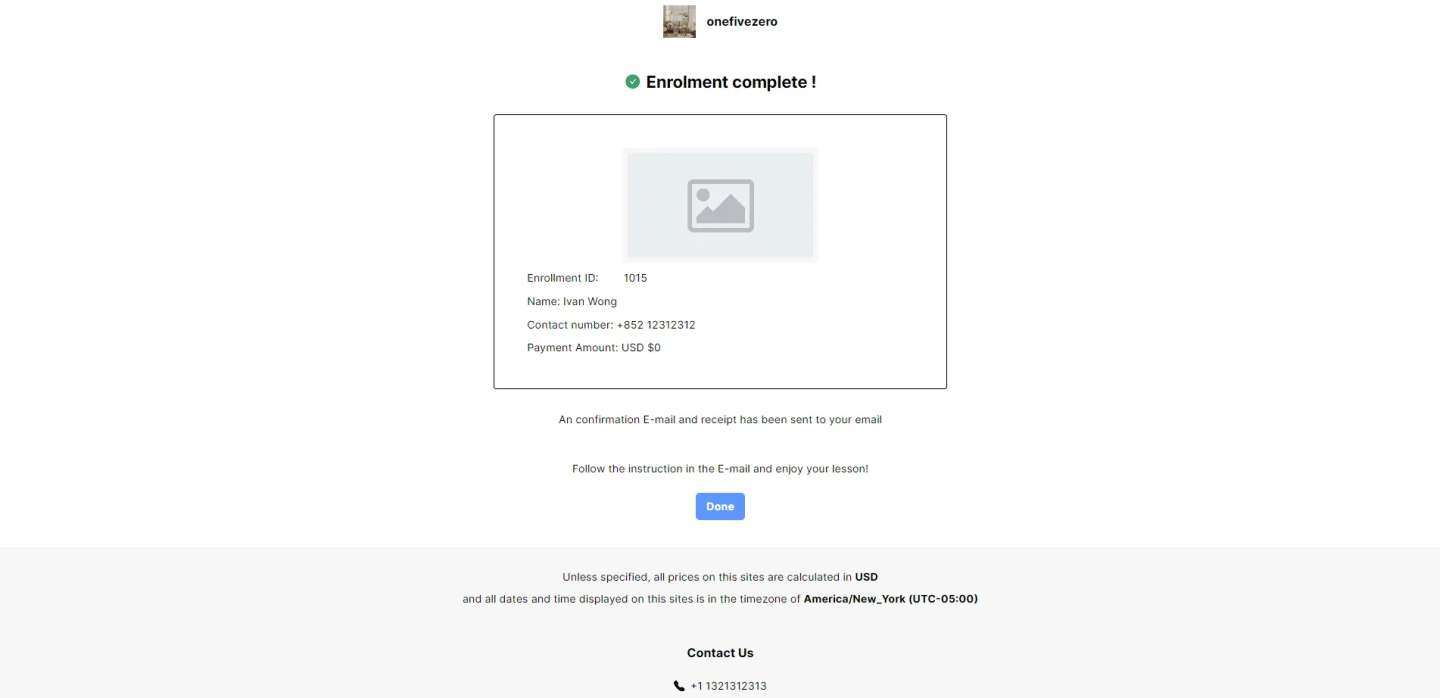
The student will enrol as usual. When they reach the payment page, it will be clear that the student will not need to do any payment.
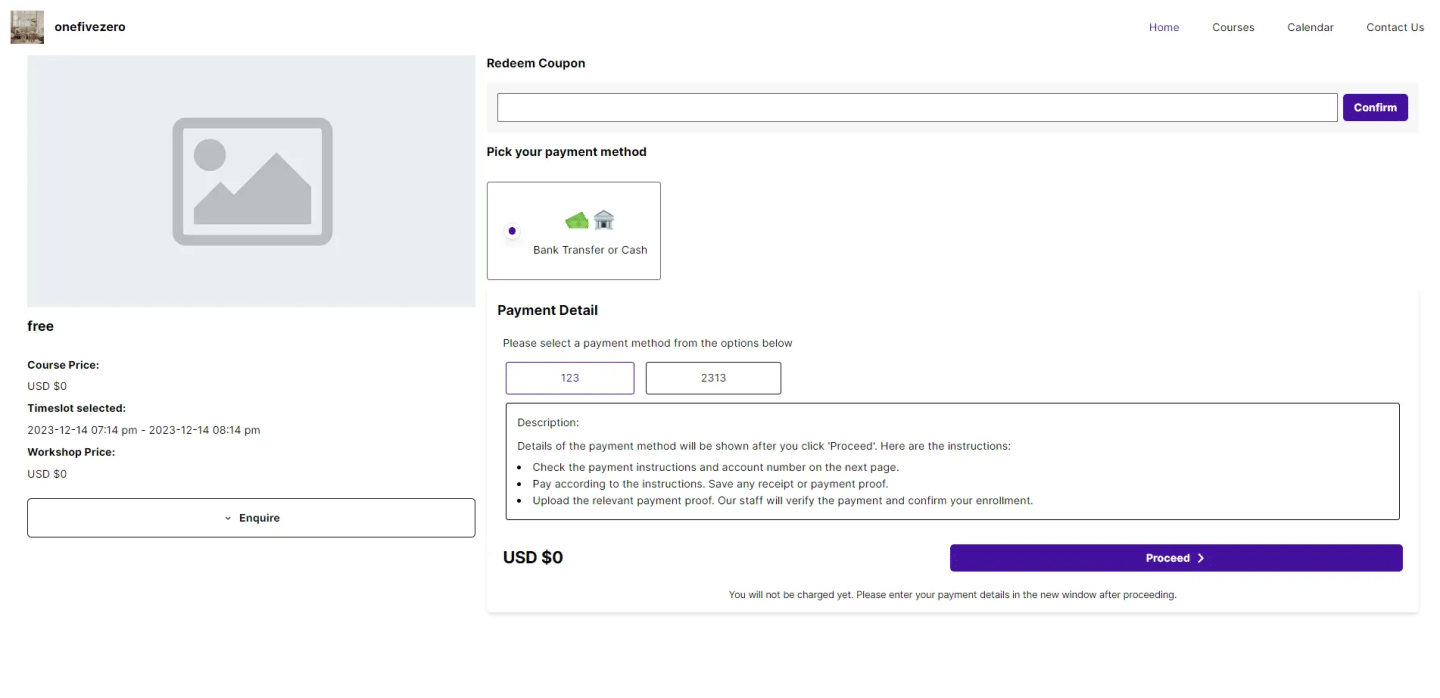
After clicking “Proceed”, the student will not need to upload a receipt, but instead goes to the “Enrollment Complete” screen directly.