The Terms & Conditions function allows you to define the policies and guidelines that users must agree to when using your services. This section ensures legal clarity and helps set expectations for your students or clients. Here’s how to use this function:
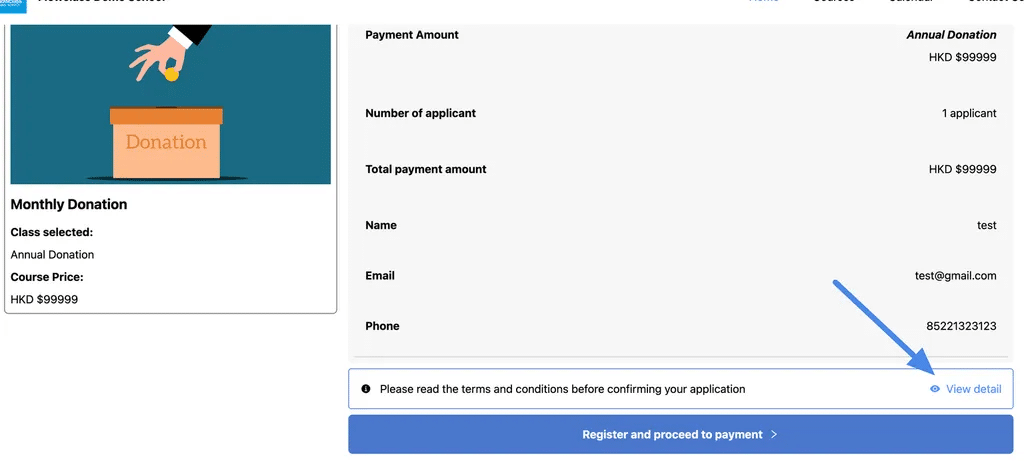
How it looks on the website #
Step 1: Review Order Details #
- Users review the summary of their selected class, payment amount, and personal details to confirm accuracy.
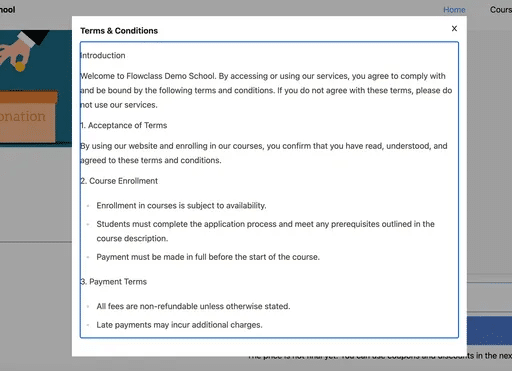
Step 2: Access Terms & Conditions #
- Click the “View Detail” button to open and read the full Terms & Conditions.
- Ensure clarity on policies, payment terms, and other conditions.
Step 3: Confirm and Proceed #
- After reviewing the terms, users click “Register and proceed to payment” to finalize their application or donation.
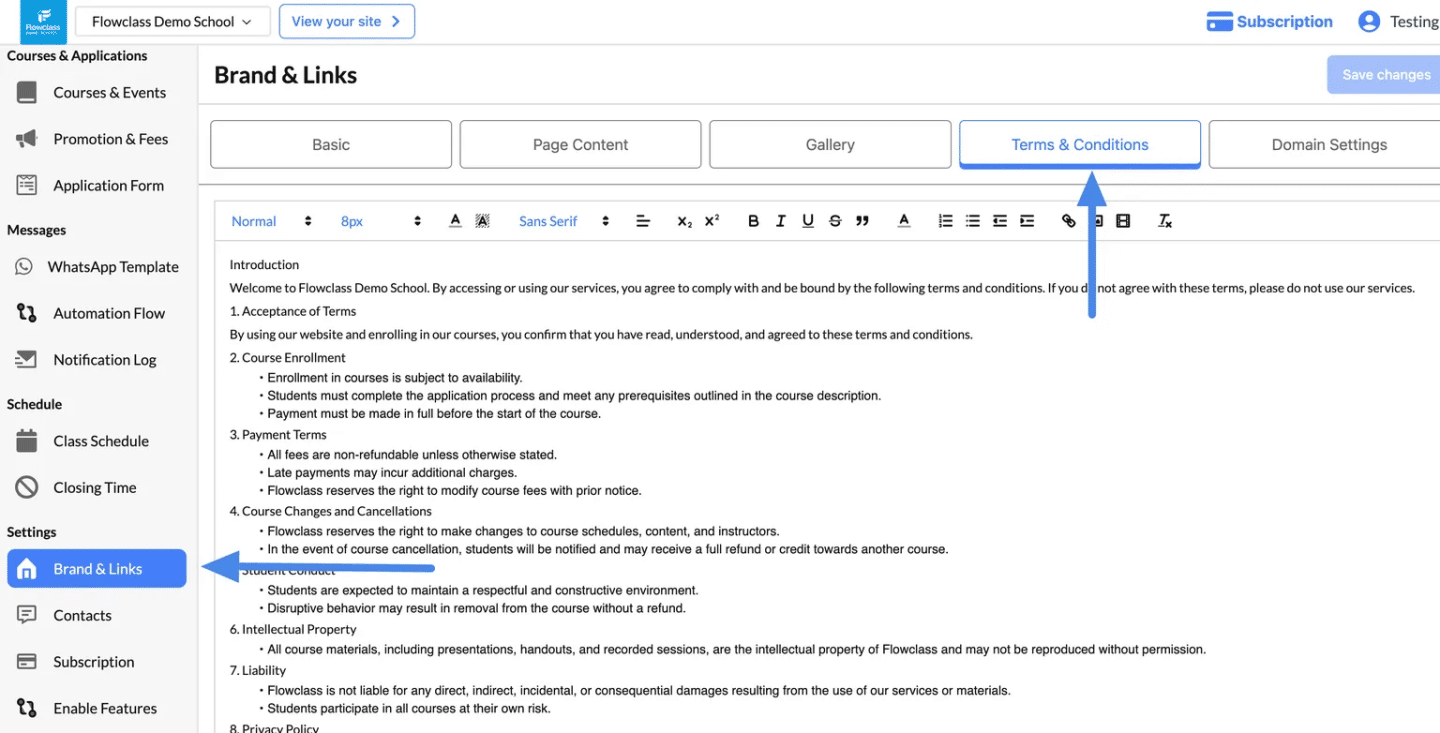
Set Up Terms & Conditions #
Step 1: Navigate to the “Terms & Conditions” Tab #
- Go to the Brand & Links page from the left-hand menu under Settings.
- Click on the “Terms & Conditions” tab at the top of the page (highlighted in the image with an arrow).
Step 2: Edit the Terms & Conditions #
- The text editor allows you to write or update your Terms & Conditions.
- You can use the formatting toolbar to:
- Bold or italicize text.
- Create numbered or bulleted lists.
- Add hyperlinks, tables, or special formatting.
- Example Sections to Include:
- Introduction: Welcome message and purpose of the agreement.
- Acceptance of Terms: Define the agreement users enter into by accessing your services.
- Payment Terms: Outline refund policies, late fees, and payment conditions.
- Course Enrollment: Specify enrollment prerequisites and processes.
- Student Conduct: Define expectations for behavior and consequences for misconduct.
- Liability: Limit your liability for damages or misuse of materials.
- Privacy Policy: Reference how user data is collected and used.
- You can use the formatting toolbar to:
Step 3: Save Changes #
- Once you’ve made all updates, click the “Save Changes” button in the top-right corner of the page.
- Your updated Terms & Conditions will be displayed to users when they interact with your services (e.g., during enrollment or account creation).