Access the Student Central Module #
1. Access the Student Central Module #
- Create Student: Add individual student records manually.
- Log in to your Admin Dashboard.
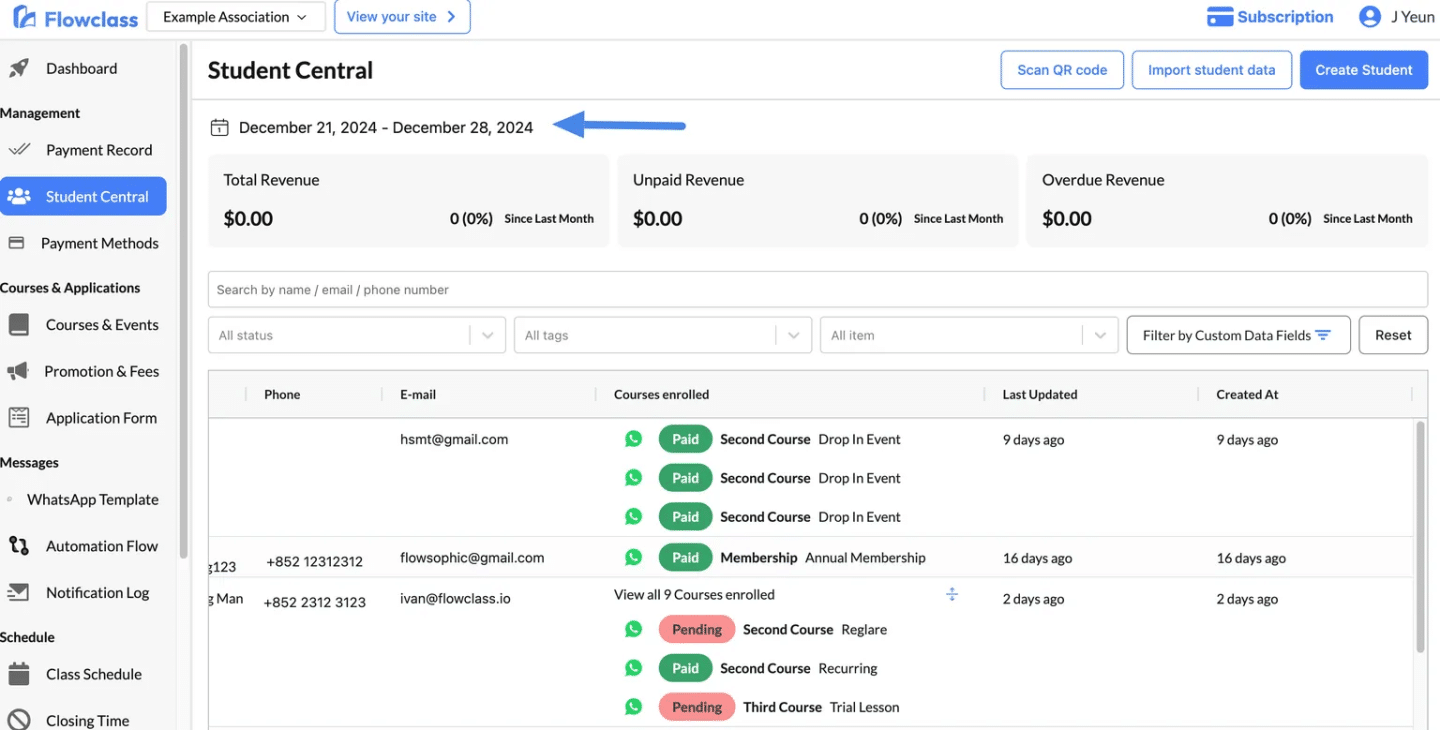
- Click Student Central in the left-hand menu under the “Management” section.
- This opens a summary page with student data, payment statuses, and revenue insights.
- Use the top navigation buttons for specific actions:
- Scan QR Code: Add students via QR codes.
- Import Student Data: Mass upload student details using a CSV file.

2. Track Revenue and Payment Status #
- View financial insights at the top of the page:
- Total Revenue: Payments received from all students.
- Unpaid Revenue: Outstanding payments.
- Overdue Revenue: Payments past their due date.
- Check the Courses Enrolled column for payment statuses:
- Green: Paid.
- Red: Pending or overdue.
Adjusting the Date Range
The date range selector at the top of the Student Central module allows you to customize the time frame for revenue calculations. However, adjusting the date will not affect the list of students displayed—it only updates the revenue figures shown in the dashboard.
- Revenue Figures Update:
- Total Revenue, Unpaid Revenue, and Overdue Revenue figures are recalculated based on the selected date range.
- This helps you analyze income trends and outstanding payments within a specific period.
- Student List Remains Unchanged:
- The student records displayed are unaffected by the date range.
- All enrolled students, regardless of the selected date range, will continue to appear in the table.
Search and Filter Student Records #
Search and Filter Student Records #
Efficiently locate and organize student records in Student Central using the powerful filtering tools.
Search Bar
- Purpose: Quickly locate individual students by entering their Name, Email, or Phone Number.
- How to Use:
- Type the desired keyword into the search bar at the top of the page.
- Results will update in real-time to display only matching records.
Filter by Status
- Purpose: Organize students based on their enrollment or payment status.
- Available Options:
- Paid: Students who have completed their payments for courses or memberships.
- Pending: Students with payments that are yet to be completed or confirmed.
- Overdue: Students with payments that have passed the due date.
- How to Use:
- Click the Status Filter dropdown.
- Select one or multiple statuses (e.g., Paid, Pending).
- The table will display only the records matching the selected statuses.
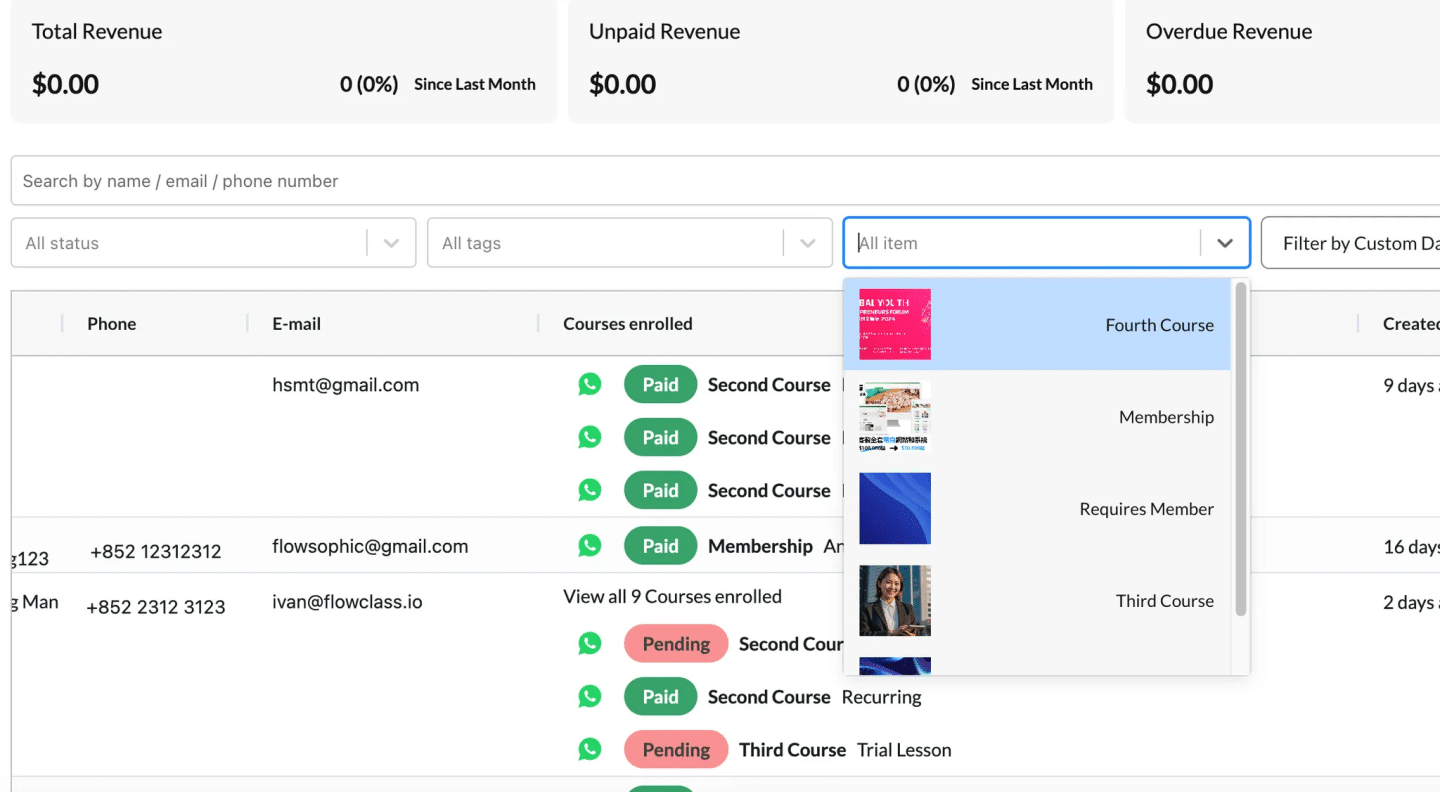
Filter by Items (Courses or Memberships)
The Item Filter allows you to narrow down student records based on their enrolled courses, memberships, or other offerings. This feature is particularly useful for tracking students associated with specific programs or services.
Filter by Custom Data Fields #
- Purpose: Advanced filtering based on unique attributes or data fields created by your organization. Custom data fields allow you to filter for information not covered in default fields, such as “Membership Type” or “Student ID.”
To create more custom data fields, please view Create Custom Data Fields
- How to Use:
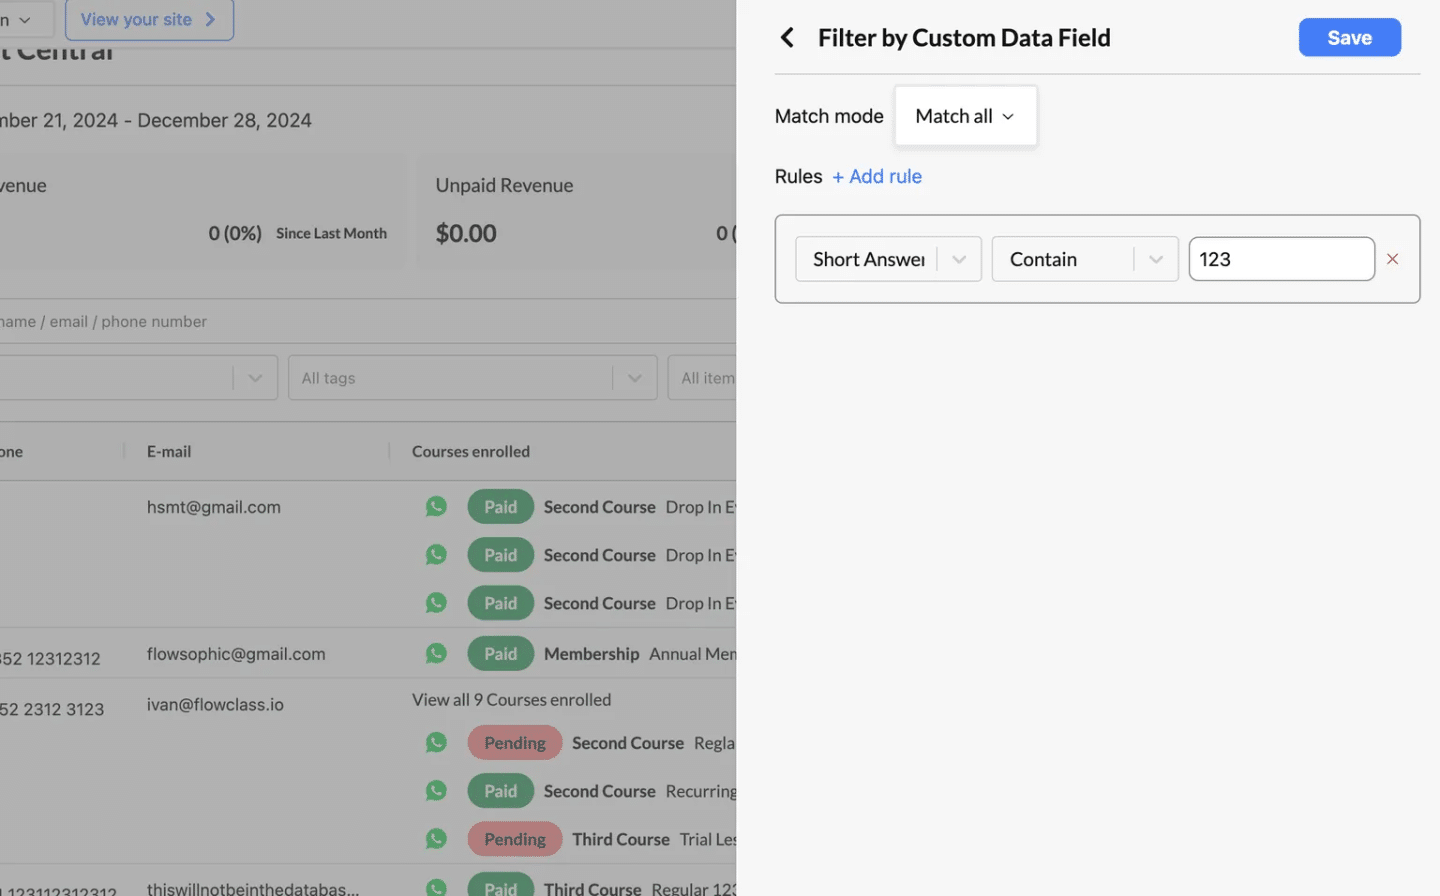
- Click Filter by Custom Data Fields in the toolbar.
- In the pop-up window:
- Choose a Match Mode:
- Match All: Records must satisfy all filter rules.
- Match Any: Records can satisfy any one of the filter rules.
- Add filter rules by selecting from the dropdowns:
- Field Type: Choose the custom field (e.g., “Short Answer,” “Single Choice”).
- Condition: Specify the matching condition (e.g., “Contains,” “Equals”).
- Value: Enter the value to match (e.g., “Gold Membership”).
- Choose a Match Mode:
- Click Save to apply the filter.
Sorting Student Records by Column Headers #
In Student Central, you can easily organize and analyze student data by sorting the table using the column headers. This feature allows you to quickly find specific information or structure the data in a way that suits your needs.
- Locate the Column Header:
- At the top of the student table, you’ll see headers like Name, Phone, Email, Courses Enrolled, Last Updated, and Created At.
- Click the Header:
- Click on any column header to sort the data in ascending order (e.g., A–Z or oldest to newest).
- Click the header again to sort in descending order (e.g., Z–A or newest to oldest).
- Visual Indicator:
- A small arrow icon will appear next to the header to show the active sorting order (upward for ascending, downward for descending).

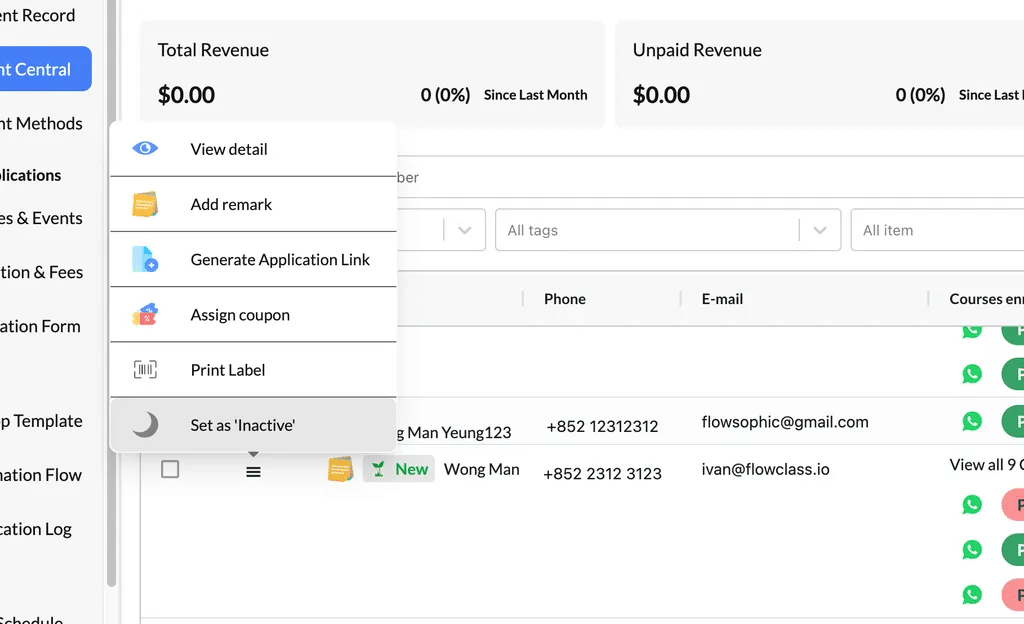
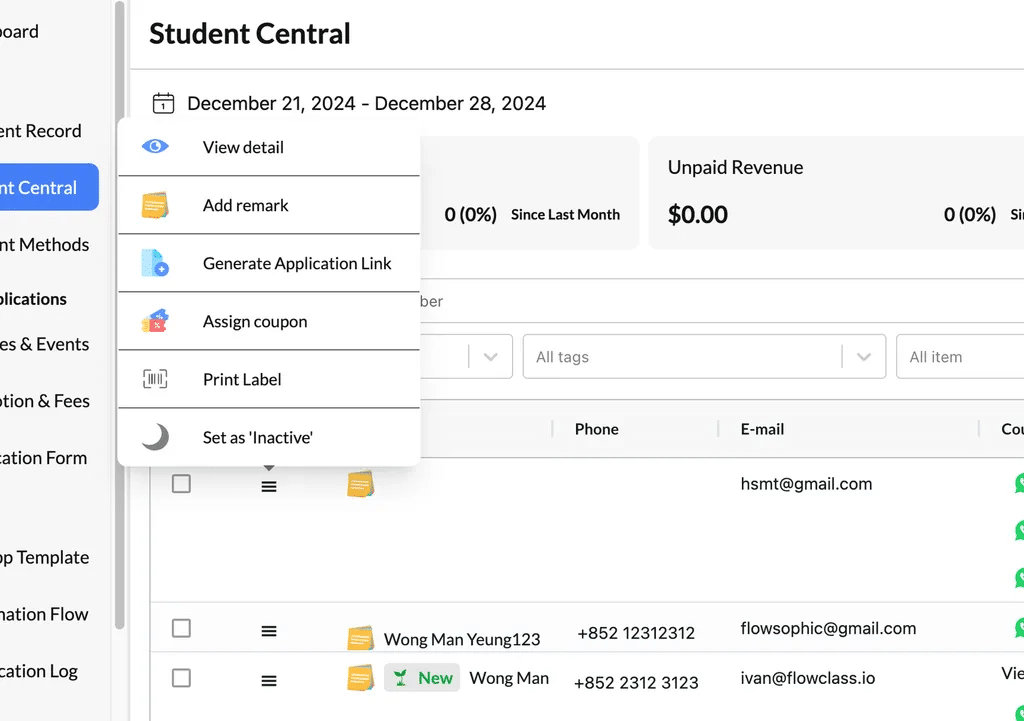
Action Items #
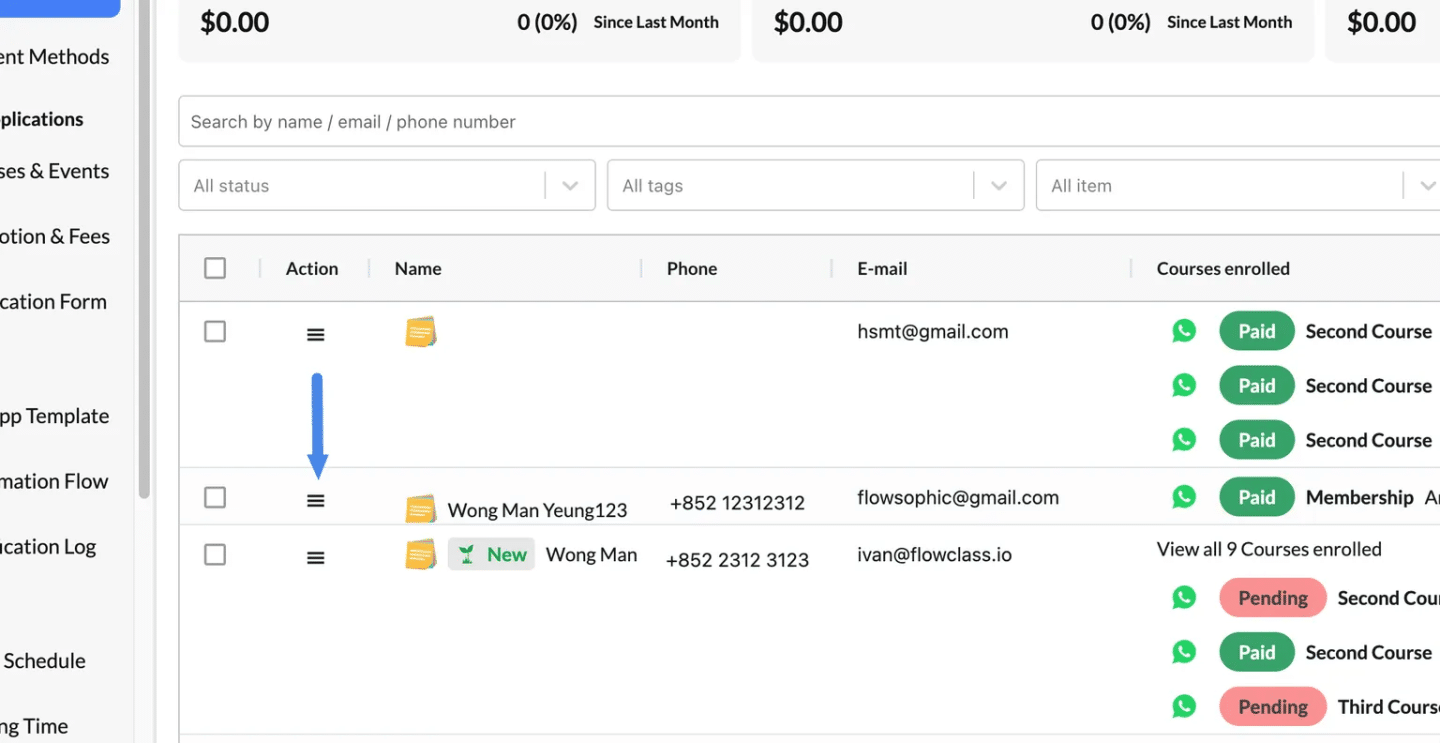
The Action Menu is represented by the three horizontal lines (☰) in the “Action” column of each student row. Clicking this menu reveals a list of options you can perform on that specific student’s profile.
View Detail #
- Opens the full profile of the selected student.
- View or edit their information, including personal details, courses enrolled, and payment history.
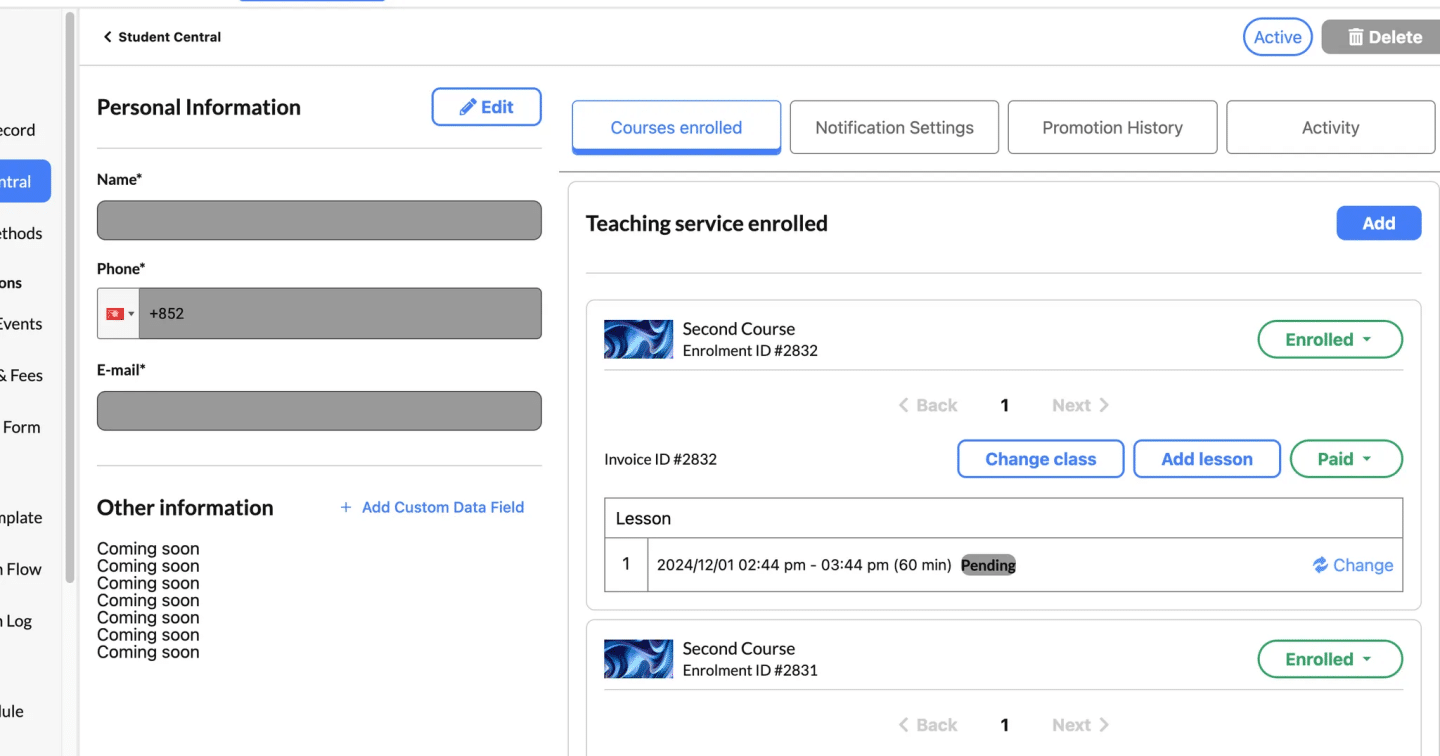
More on this function can be found on Update Student Records
Generate Application Link #
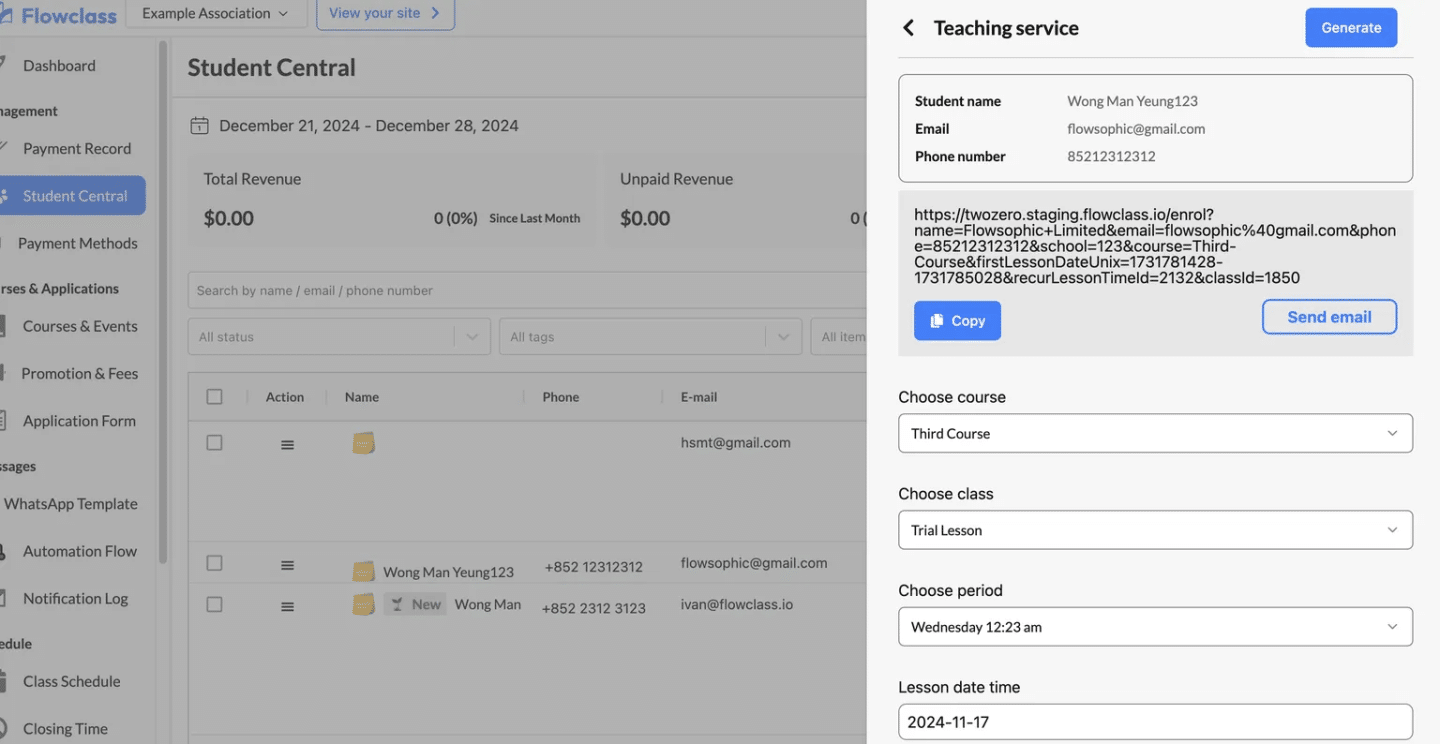
Creates a unique application link for the student, which can be shared for course registration or membership updates.
- Customize the Application Link:
- A side panel will open, displaying the student’s information (name, email, and phone number).
- Customize the following details to tailor the application link for the student:
- Choose Course: Select the course the student is applying for from the dropdown menu.
- Choose Class: If applicable, specify a class tied to the course.
- Choose Period: Select the time slot or period associated with the class.
- Lesson Date Time: Set the start date and time for the lesson or program.
- Generate the Link:
- Once all fields are selected, click the Generate button.
- A unique application link will appear in the box below.
- Share the Link:
- Copy: Use the Copy button to copy the link to your clipboard for sharing via WhatsApp, SMS, or other platforms.
- Send Email: Click Send Email to directly email the application link to the student using the email address associated with their profile.
3. Assign Coupon #
- Purpose: Offer discounts or promotional rewards to a student.
- How It Works:
- Choose from pre-configured coupons in the system.
- Assign the selected coupon directly to the student, applying the discount to their applicable courses or memberships.
More about this feature can be found on Assign coupon to the student
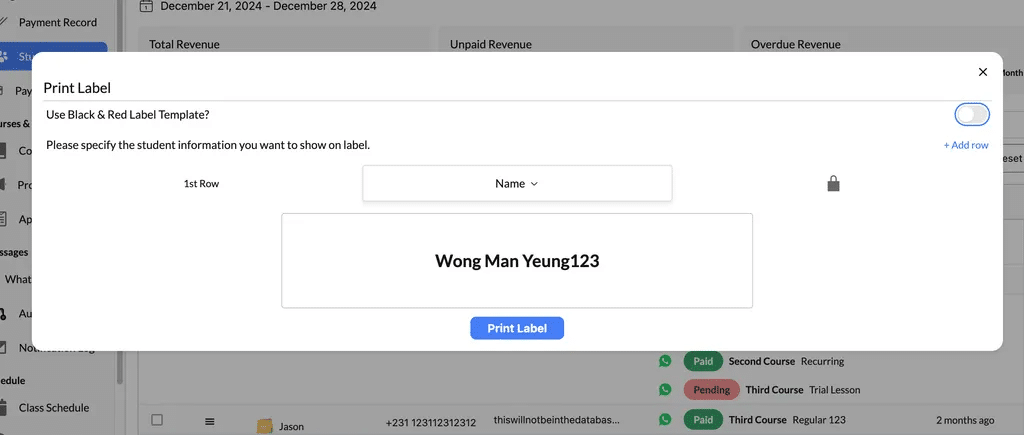
4. Print Label #
- Purpose: Create a printable label for the student’s identification or records.
- What It Includes:
- The label may feature the student’s name, course details, or other relevant data.
- Use Cases:
- Event Management: Use labels for organizing check-ins or attendance at events, workshops, or classes.
- File Organization: Print labels to attach to physical student records for better organization.
- Classroom Use: Generate name labels for seating arrangements or identification during in-person sessions.
More about this function can be found on Label Printing with Flowclass
5. Set as ‘Inactive’ #
- Remove from Active Lists:
- When a student is set as inactive, they will no longer appear in active lists or filters, helping to declutter your Student Central dashboard.
- No Notifications:
- Inactive students will not receive any system-generated notifications, such as reminders, updates, or promotional messages.
- Reversible Action:
- You can reactivate the student at any time by selecting Set as ‘Active’ from the same action menu.
- Delete Option:
- Once a student is marked as inactive, you can choose to permanently delete their record if it is no longer needed.
- This ensures full control over your student database, allowing you to remove outdated records while avoiding accidental deletion of active students.
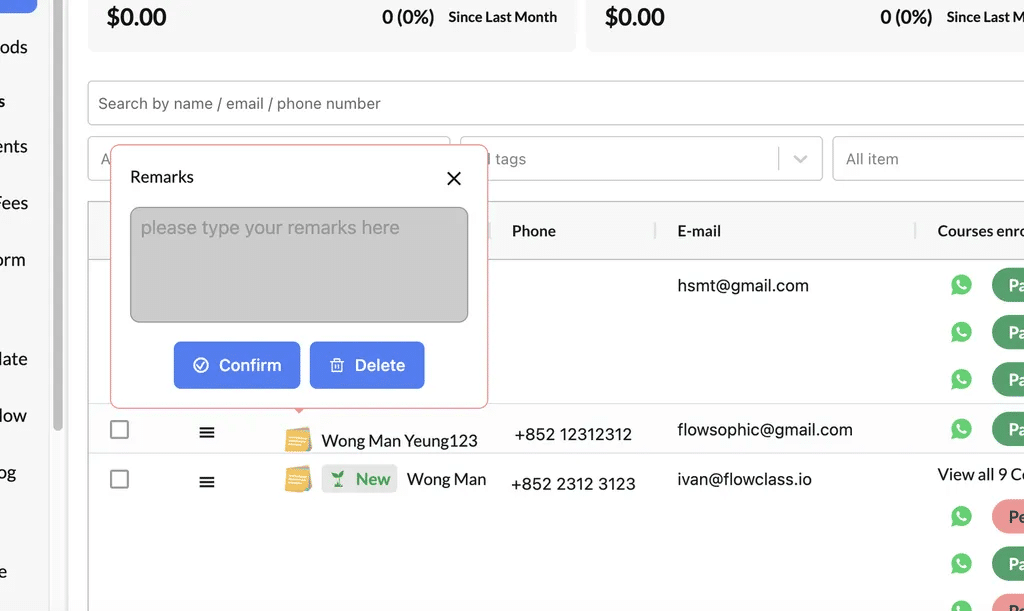
Remarks Function #
The Remarks Function is a powerful tool for adding internal notes to a student’s profile. Remarks are visible only to administrators, ensuring private and secure communication within the management team.
How to Add a Remark
- Click the Action Menu (☰) for the student.
- Select Add Remark.
- A pop-up window will appear where you can type your note.
- Example: “Student requested a schedule change for next week.”
- Click Confirm to save the remark.
Managing Remarks
- Edit or Delete Remarks:
- Return to the Add Remark option in the Action Menu to modify or remove an existing remark.
- View Remarks:
- Remarks are displayed as an icon (yellow sticky note) next to the student’s name. Hover over the icon to preview the note.


