How to Use the Course Calendar #
The Course Calendar feature not only allows you to view scheduled classes but also provides detailed insights into individual lessons. With just a few clicks, you can access essential class details, manage student lists, and ensure smooth operations. Let’s walk through the process step-by-step.
Step 1: Access the Class Schedule #
- Log in to Your Dashboard: Navigate to the “Class Schedule” option under the Schedule section in the sidebar.
- Filter for Specific Classes (Optional):
- Use the Select Course or Select Class dropdown to narrow the schedule view.
- This helps you quickly locate the class you’re interested in.
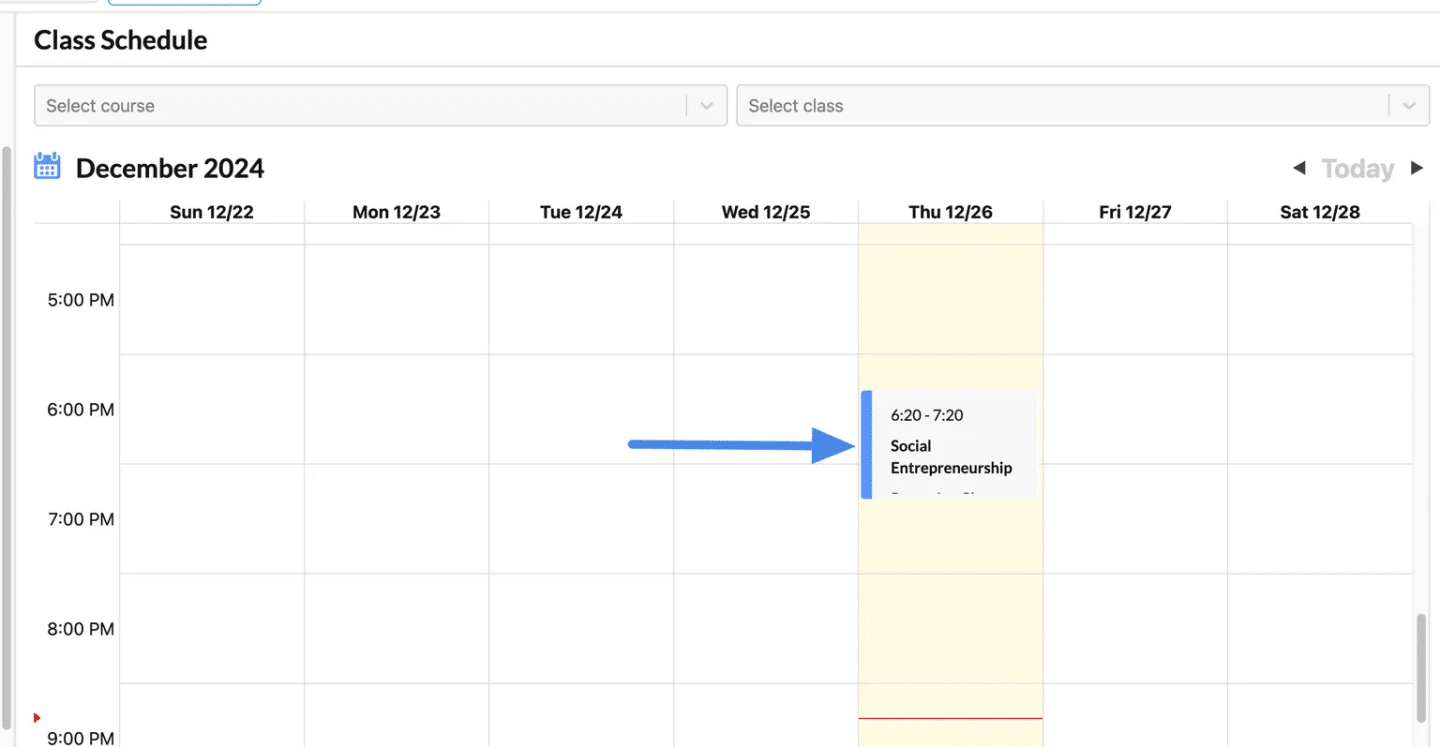
Step 2: View Your Class #
- Locate the Class:
- On the calendar, find the class you want to manage.
- Example: “Social Entrepreneurship” on Thursday, December 26, 2024, from 6:20 PM to 7:20 PM.
- Click on the Class Block:
- Clicking the class will open a Lesson Details window on the right-hand side.
Open the Student Management Panel #
- Scroll to the Student List Section:
- In the Lesson Details panel, locate the Student List section.
- This section shows the student quota (e.g., 2/45) and lists all enrolled students.
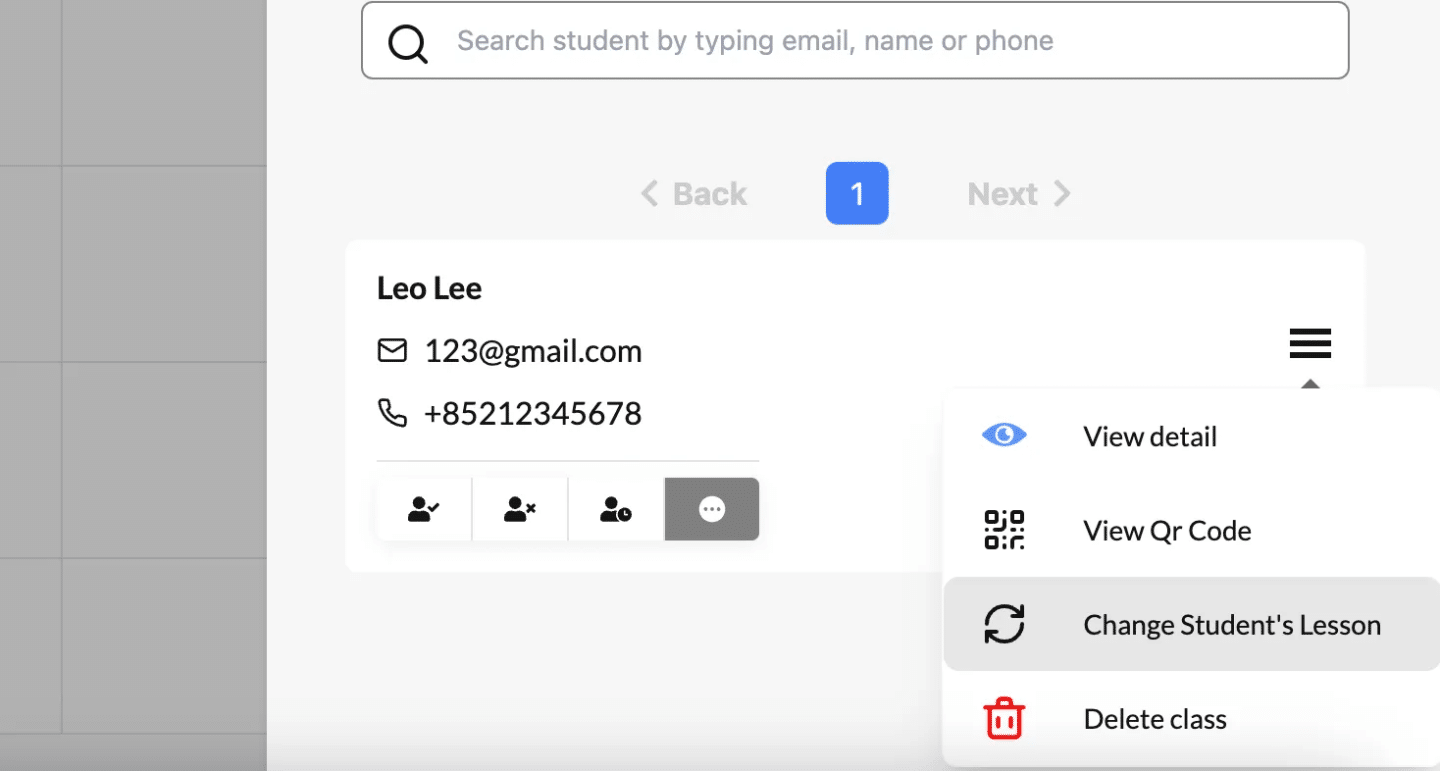
- Locate the Hamburger Menu for a Student:
- Beside each student’s name, you’ll see a hamburger menu (three horizontal lines).
- Click this icon to reveal student-specific management options.
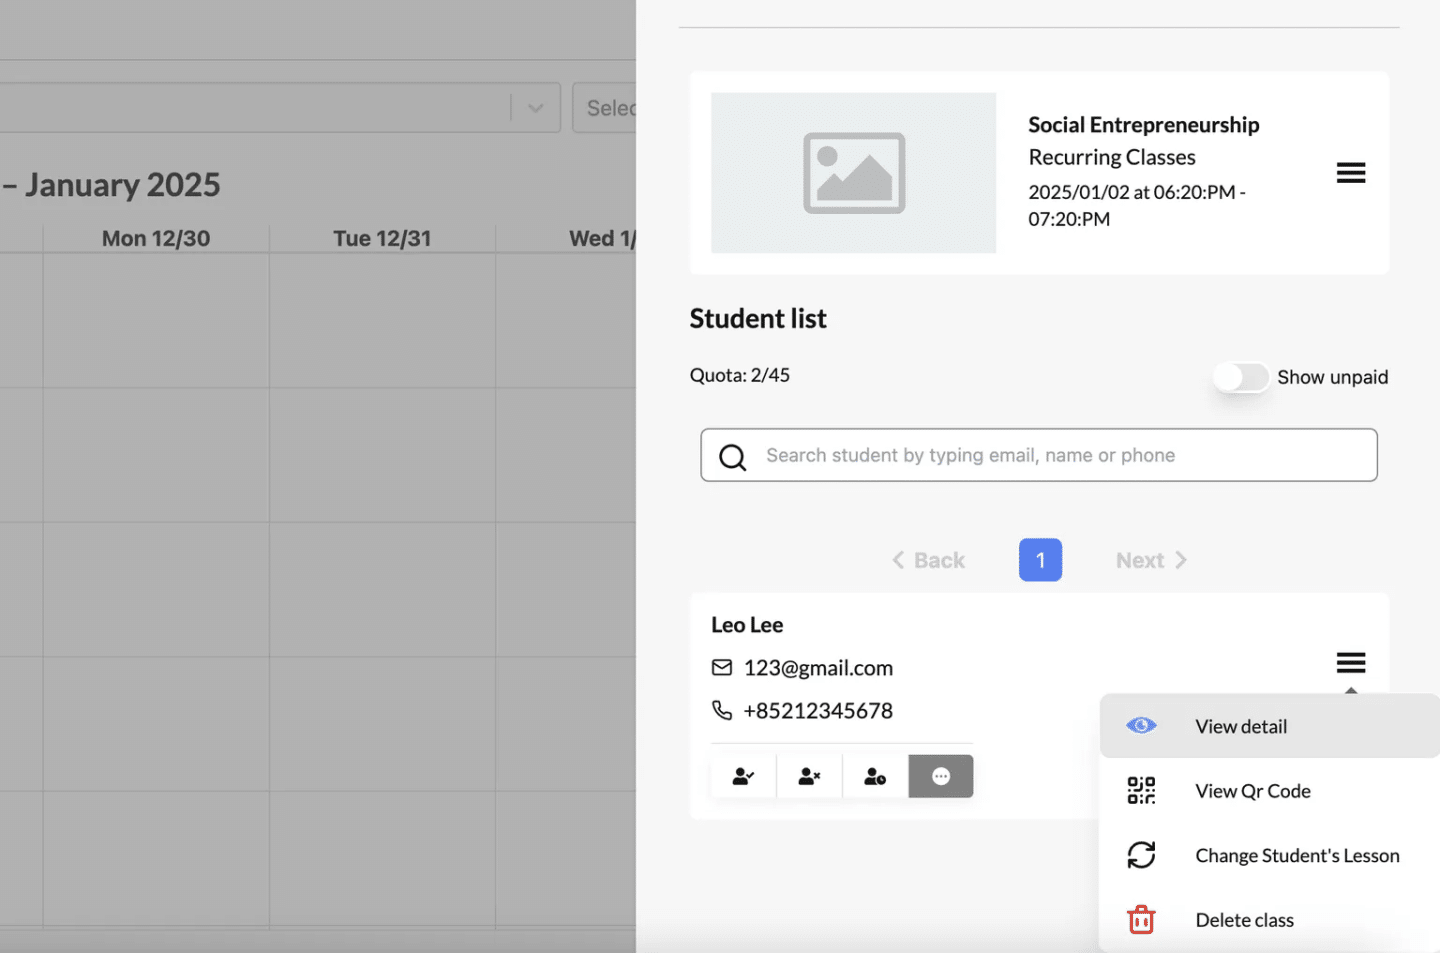
View Student’s Lesson Details #
View Detail (Eye Icon) #
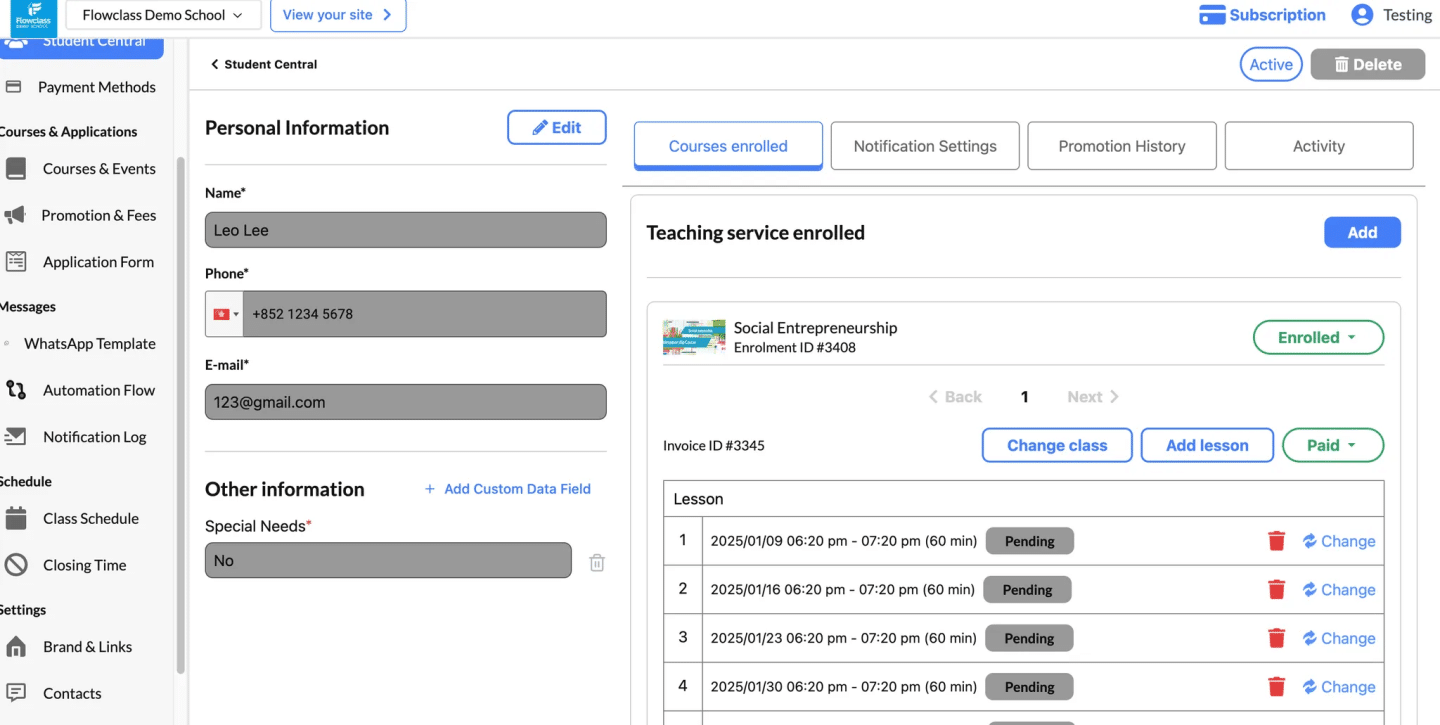
- Access detailed information about the student and their class history. You will be redirected to the record in Student Record
- What You Can See:
- Attendance records.
- Payment status.
- Contact details (email, phone number).
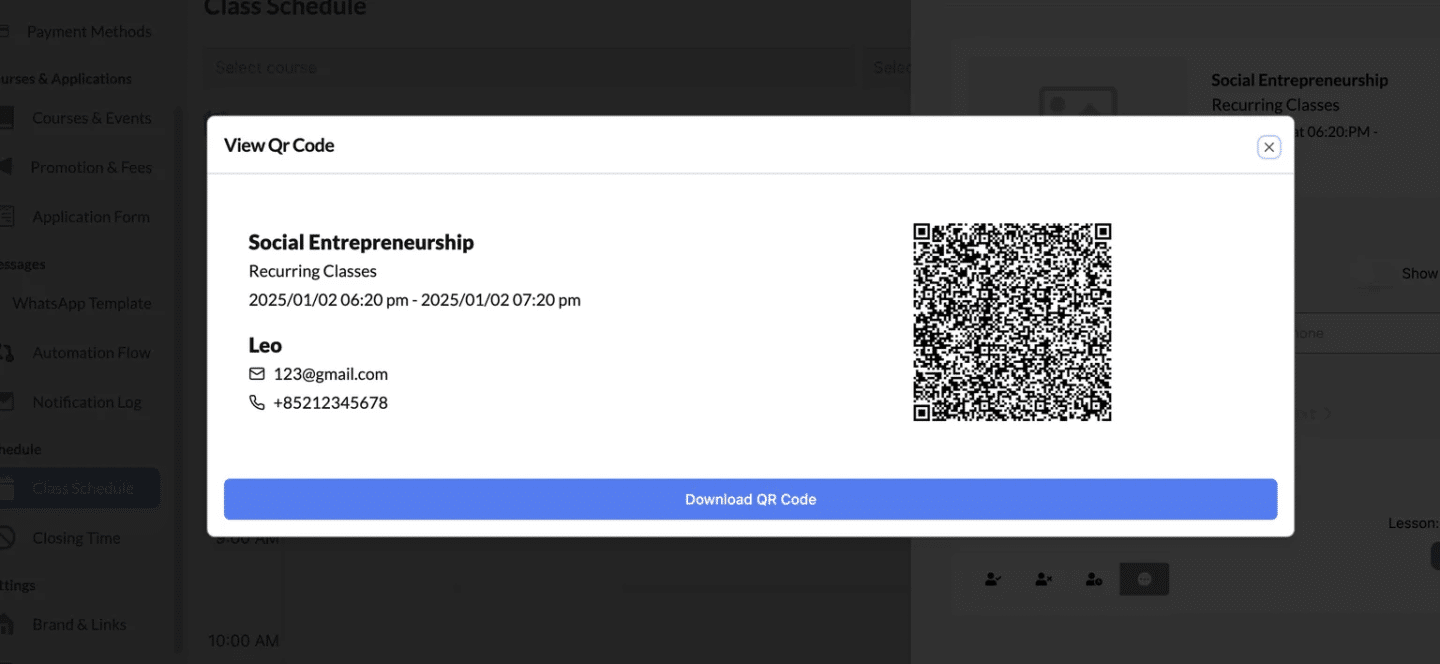
View the QR Code #
After clicking “View QR Code”, a pop-up will appear containing the following details:
- Class Information:
- Lesson name (e.g., Social Entrepreneurship).
- Lesson type (e.g., Recurring Classes).
- Date and time of the class.
- Student Information:
- The student’s name, email, and phone number.
- Unique QR Code:
- A QR code specific to the student for the selected class.
You will be able to scan the QR code to mark attendance. This can be accomplished in the Student Record feature.
More about the scanning QR code feature will be written in another article.
Where the QR code can be used? #
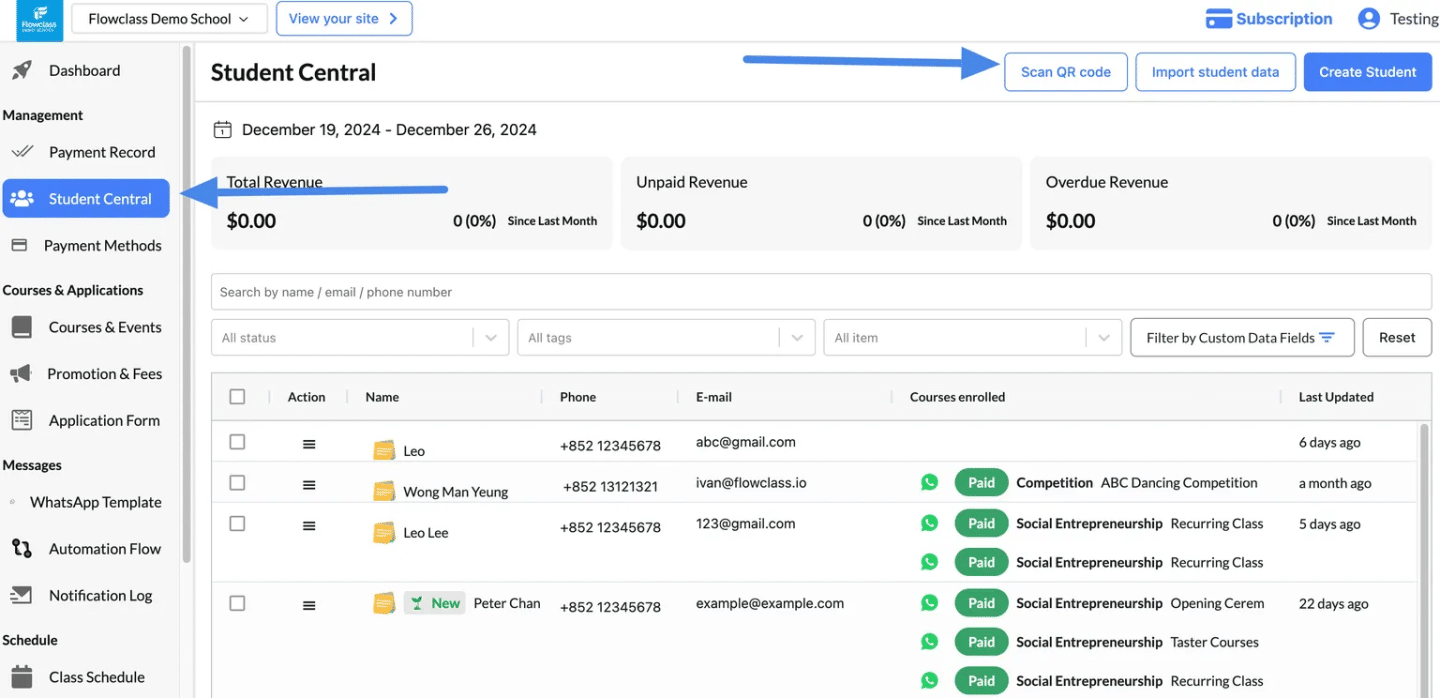
- Navigate to “Student Central”:
- From the dashboard, click on the “Student Central” option in the navigation menu.
- Locate the “Scan QR Code” Button:
- In the top-right corner of the Student Central page, find and click the “Scan QR Code” button.
Change Individual Student’s Lesson #
The “Change Student’s Lesson” feature is used when a student needs to be reassigned to a different class or schedule within the same course due to conflicts or special requests.
- From the dropdown, choose the “Change Student’s Lesson” option.
- This will open the Add Lesson panel.
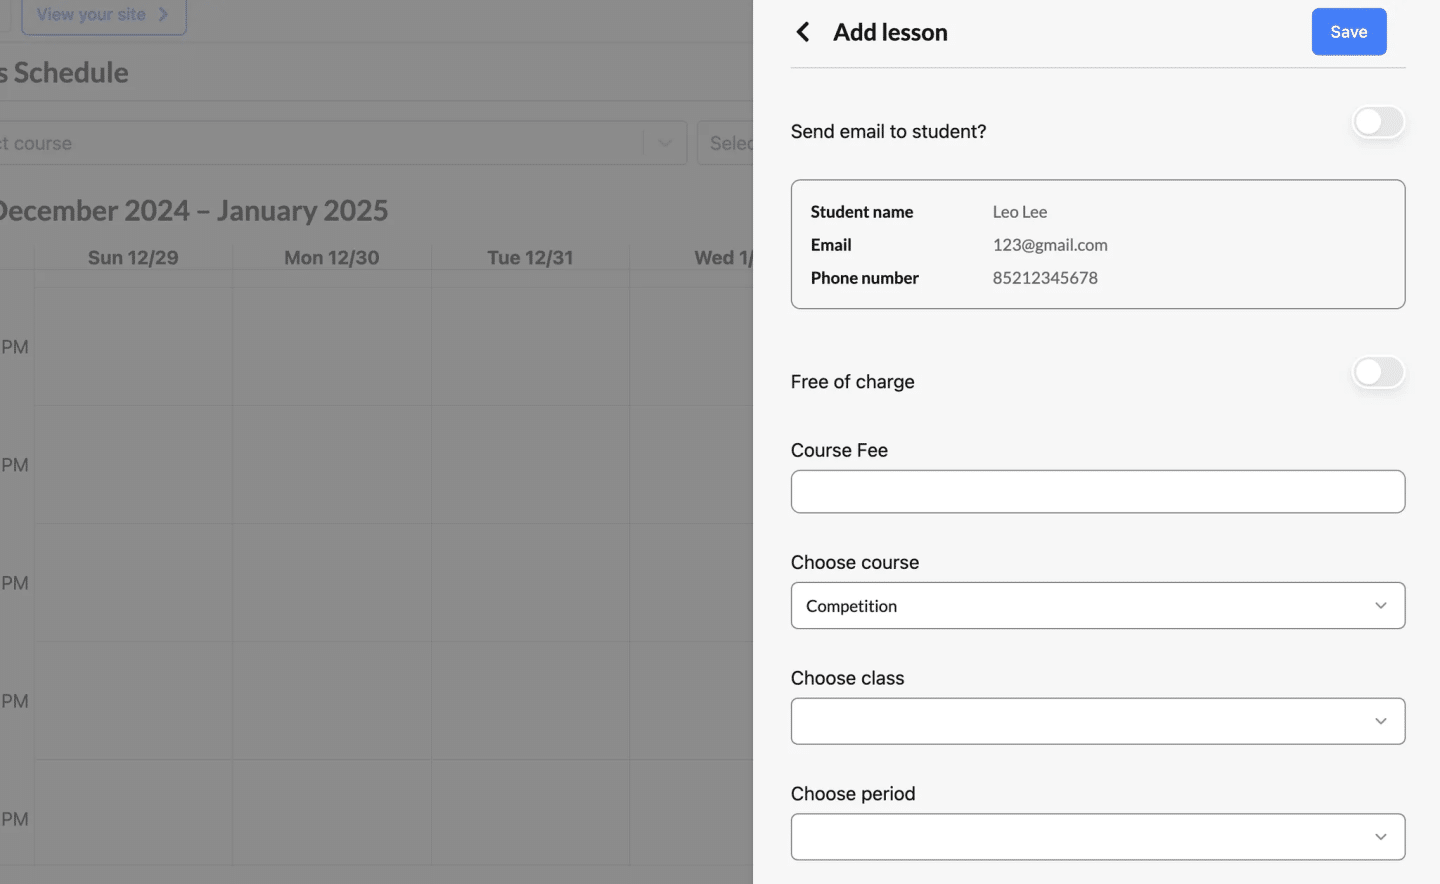
Update the Student’s Lesson #
In the Add Lesson panel, you’ll see several fields to customize the new lesson assignment:
- Send Email to Student (Optional):
- Toggle the button to on if you want to notify the student via email about the change.
- Student Information:
- Review the student’s name, email, and phone number to ensure accuracy.
- Free of Charge (Optional):
- Toggle the button to on if the new lesson will be free of charge.
- If not, enter the Course Fee in the provided field.
- Choose Course:
- Select the course to which the student will be reassigned.
- Example: Competition.
- Choose Class:
- Pick the specific class within the course.
- Example: January 5, 2025, 4:00 PM – 5:00 PM.
- Choose Period:
- Specify the period or time slot for the lesson.
Save the Changes #
- Review the Details:
- Double-check all the information, including the course, class, and period.
- Click “Save”:
- Finalize the reassignment by clicking the Save button.
- Confirm Email Notification (If Enabled):
- If email notifications were enabled, the student will receive an email about the updated lesson details.


